Friday, December 2, 2011

Now there are four

I am Anti-Leftovers.

Husband loves them. Loves them so much that he affectionately calls them "lefties." While he will happily eat week-old chana masala for breakfast, the leftover has to be something special indeed for me to dig into it. Even one of my favorite foods in the world -- Mom's stuffing -- is languishing in its leftover form. I can't even think of a single thing that I truly enjoy the second time around. Oh. Turkey tacos. But that's it. I think maybe it's a mental problem.

Who wants this? I don't.

My vigorous Anti-Leftover stance reaches epic proportions around Thanksgiving time, when one is not only flooded with the leftovers themselves, but with 8,342,361 recipes for how to use them. Food magazines, food TV, food Internets, food iPad apps, all falling over themselves to inspire you to make a stuffing frittata or a turkey chili named after Guy Fieri's son. In my mind, there are exactly three things to do with Thanksgiving leftovers: (1) reheat and enjoy them as they are, if you must; (2) make a turkey sandwich; and (3) make turkey stock. (Actually, the stock is required. But that is another post.)

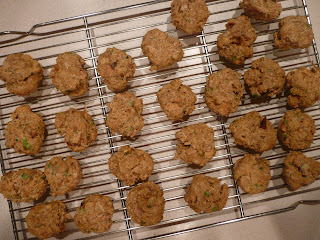
But now there are four. Welcome to the only recipe that utilizes Thanksgiving leftovers that I shall countenance: TURKEY COOKIES. FOR THE DOG.


This recipe is just perfect: making it ensures that no turkey will be wasted, as you can wait until the Pro-Leftovers people in your house have their fill, then use the remaining scraps for these "cookies." (I can't bear to waste meat -- an animal gave its life for what's on that plate, it's not right to throw any of it away.) Even if it's a day or so past its prime, I assure you, your pup won't care. As long as your best friend isn't on a restricted diet that would prohibit any of the component ingredients, this is a healthy doggie treat, made with love, that will make your companion love you even more than she already does.


And it will make me love you, because you are being rational about Thanksgiving leftovers. And I know how you crave my approval.


P.S. I am not alone in my T-giving leftover disdain: my rigid worldview was bolstered this year by a writer for Slate.com, Jill Pellettieri, who makes a persuasive and dare I say definitive case against Thanksgiving leftovers in a piece titled, "Let Leftovers Be Leftovers." Jill reasons: you wouldn't make a turkey quesadilla suiza any other day of the year, so why must you on the last Friday of November? Additionally, and most compelling, she advocates eschewing leftovers because one should keep the special and ceremonial Thanksgiving meal just that -- special. If you are going to spend most of November preparing for a single meal, why would you not enjoy what's left of that meal as it is? Why cobble it into something else, be it a pot pie or a hash or a soup? If you love Thanksgiving food so much as to spend the better part of a month making it, why discard it so callously after just one plateful?
"We spend weeks planning for Thanksgiving dinner. We travel great distances to enjoy it with loved ones. We postpone diets to gorge ourselves. We may even fast all day to make room for one more slice of pumpkin pie. Why not enjoy the leftovers for what they are, a delicious continuation of that feast? Why replace these rituals with recipes that are not only ridiculous, but create more work? Let Thanksgiving live out its natural life—you'll know when it's time to move on." 
It's a good argument, I tell you, and Jill, I want you to be my new bestie.


++++++

TURKEY COOKIES
Adapted from a recipe that appeared in my local vet's newsletter


2 c. cooked turkey, cut into a small dice
3 T. grated cheese (my pup Jet likes sharp cheddar)
1 T. fresh parsley, chopped
4 eggs
2 c. whole wheat flour
2 T. nutritional yeast (or brewer's yeast)
2 T. vegetable oil


Preheat the oven to 350 degrees Fahrenheit. Line a baking sheet with parchment paper. In a medium bowl, combine the turkey, cheese and parsley. Mix well. In a separate bowl, beat the eggs and pour over the turkey mixture.

"I hear these can also be served to cats. But I don't know nothin' 'bout no cats."

Add the flour, nutritional yeast and oil. Using your hands, mix until the ingredients are thoroughly combined and the mixture resembles a dough ball.

Using a spring-loaded scoop (or two spoons), portion the cookies, rolling each into a ball. Place on the prepared baking sheet. Using the bottom of a small juice glass, gently press each ball into a flat round about 1 inch thick.


Bake for 18-20 minutes, until the cookies are brown and firm. Remove to a wire rack to cool completely; feed to best friend.


Turkey cookies must be stored in the refrigerator.

Makes about 2 1/2 dozen.


++++++

Previously, on A Stove With A House Around It:

Two years ago: kaiser rolls
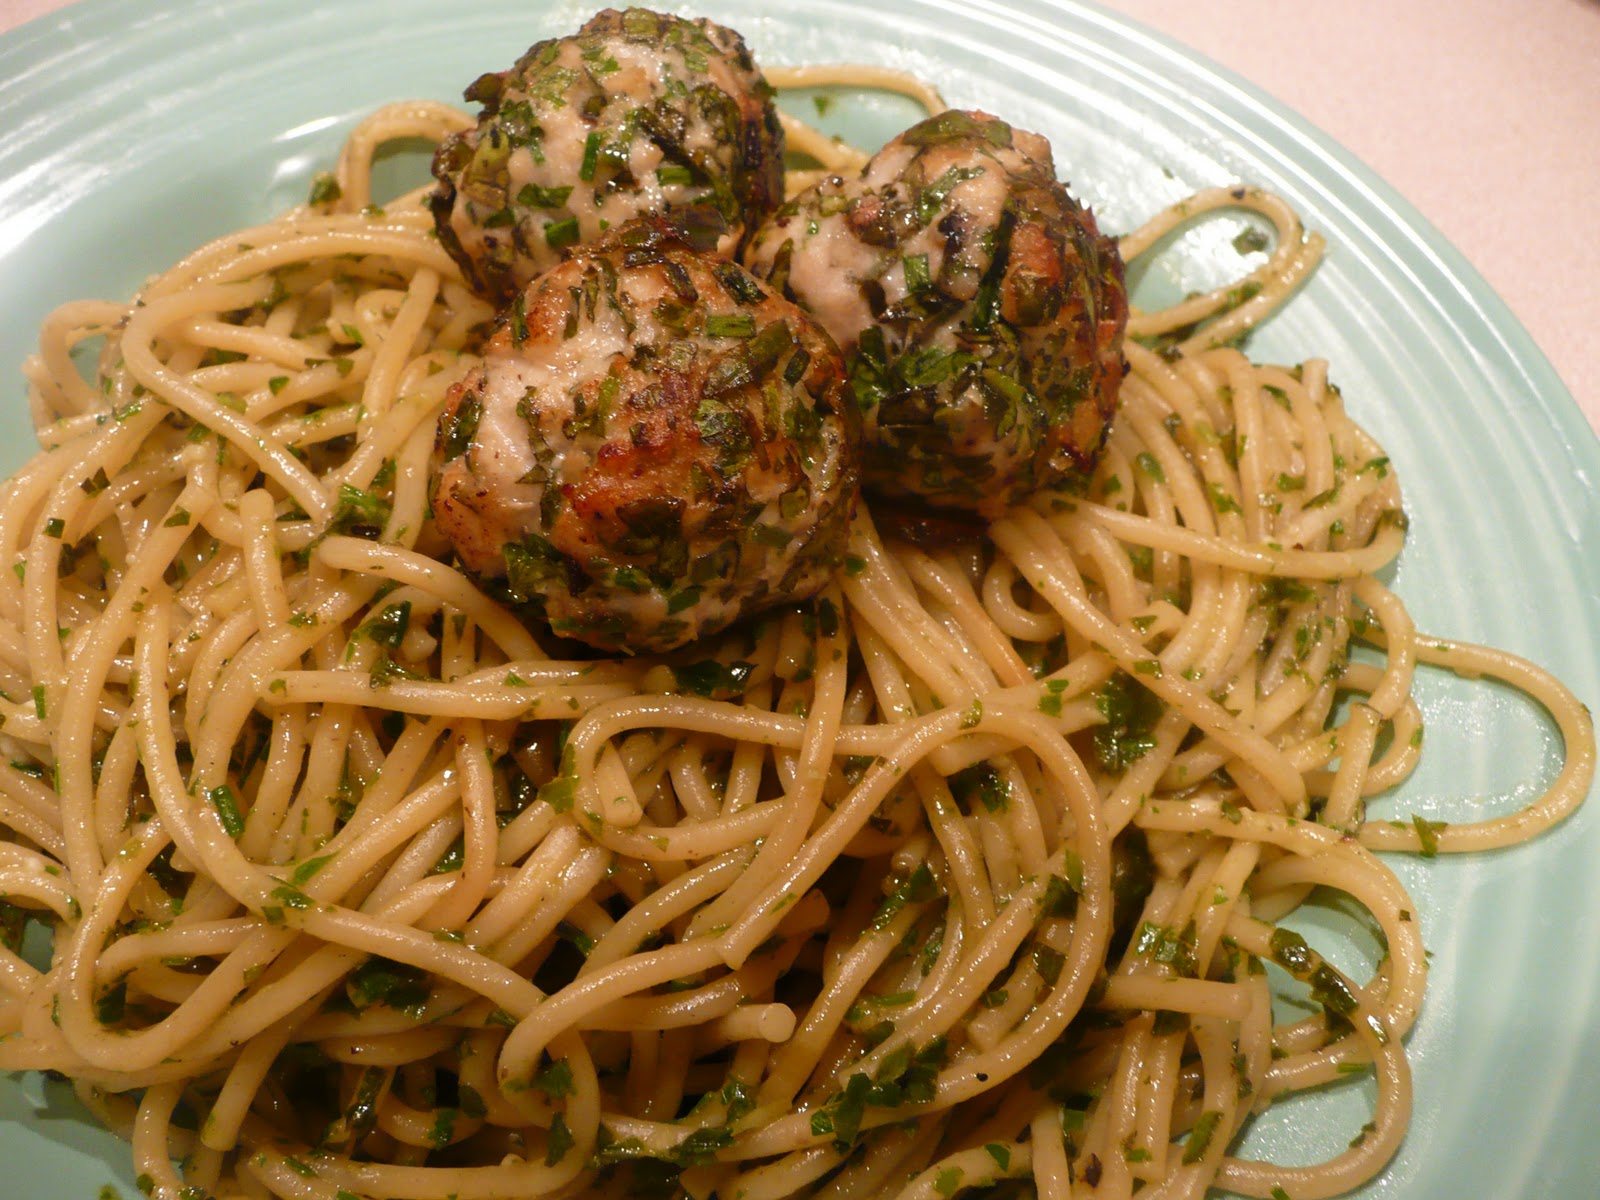
Three years ago: turkey meatballs

Saturday, November 12, 2011

Dear fig-walnut pie of '10

This is a pie that I made a year ago.


I was all gung-ho about this pie, creating the recipe and baking it the night before Thanksgiving and then nibbling on it contentedly the next day. I had every intention of sharing it with you last year, but then I was all, "Thanksgiving's over now, does anyone really want to know about a fig-walnut pie? Surely they've moved on to gingerbread and thoughts of reindeer hooves on the roof."

Thus, the recipe and these photos have languished, imprisoned in the tiny jail cell that is an 8-GB SD card. I'd look at them every so often. Hm, I could write about this pie. But it's May! Nobody bakes pies in the spring. And then, Here's this pie again. But it's August! It's a million degrees! Plus, Thanksgiving will be here in no time.

As it is, time flies. And here we are: less than two weeks from Thanksgiving. Time to talk about the pie! Huzzah!


This whole thing came about last year when I was sitting around thinking about how people love pecan pies (myself included), but I never hear anyone talk about a walnut pie. Why not? I demanded an answer. A preliminary Google search told me that walnut pies do indeed exist. There are plenty of recipes out there. But they don't seem to enjoy the same headline-grabbing pie-ttention that their pecan cousins command. I was going to change that, if only for myself and whoever else managed to get a fork in the pie before I devoured it, all un-ladylike.

I threw figs into the mix because I determined that an all-walnut pie might be too overpowering with slightly bitter walnut aftertaste -- which I normally love when I'm snacking on walnuts but that might become too much within the context of a walnut-only pie. I started thinking about where I find walnuts, culinarily. On cheese trays. Next to the yummy veined cheeses. Alongside a fig or two, cut in half to show off their rustic, seeded centers. I almost went down the path of making a savory tart, with the blue cheese incorporated -- maybe I'll do that this year! -- but in the end, baked up a rich, and sweet beauty chock full of walnuts and chewy flecks of dried fig.

And with that, dear fig-walnut pie of '10, I release you from the SD card.

(In context, second from right)


+++++++

FIG-WALNUT PIE


I used America's Test Kitchen's vodka pie crust recipe for this pie, and let me tell you: like everything else America's Test Kitchen does, it was perfect. Easy to work with, flaky, tasty, fantastic. But of course, you may use any pie crust that you love with all your heart.

Please note: if you do go with the vodka pie dough, the recipe makes enough for a double-crust pie, which this isn't. So go ahead and wrap the second disk in several layers of plastic wrap and freeze; it freezes quite well and then you'll be ready for impromptu pie-making. 'Cause that always happens.

For the crust:
 
2 1/2 c. all-purpose flour, divided
1 t. kosher salt
2 T. sugar
12 T. cold unsalted butter, cut into 1/4-inch pieces
1/2 c. cold vegetable shortening, cut into 4 pieces
1/4 c. vodka, cold
1/4 c. cold water

For the pie:

1/4 c. dried figs
2 T. dark rum 
1/4 c. unsalted butter
1/2 c. light brown sugar
1/2 c. light corn syrup
Pinch kosher salt
2 large eggs
12 oz. raw unsalted walnuts, roughly chopped


First, make the crust. Place 1 1/2 c. of the flour, salt and sugar in a food processor and pulse until combined. Add the butter and the shortening and process until a homogeneous dough begins to collect in uneven clumps, about 15 seconds (the dough will resemble cottage cheese curds). With a rubber spatula, scrape the bowl to redistribute the dough around the blade. Add the remaining cup of flour and pulse until the mixture is evenly distributed around the bowl, 4 to 6 quick pulses. Empty the mixture into a medium bowl.

Sprinkle vodka and water over the mixture. With a rubber spatula and using a folding motion, mix the dough, pressing down on it until it is slightly tacky and sticks together. Divide the dough into 2 even balls and flatten each into a 4-inch disk. Wrap each in plastic wrap and refrigerate at least 45 minutes, or up to 2 days.


Remove the pie dough from the refrigerator about 15 minutes before you wish to work with it. At this time, preheat the oven to 350 degrees Fahrenheit. On a floured work surface, roll out the dough into a 10-inch round (you might need a little more flour than usual if you're using the vodka dough, as it's a bit stickier). Place the dough in a pie plate, trim and flute the edges and return to the refrigerator to chill while you assemble the filling.


In a small bowl, soak the figs in the rum. Let the figs sit while you assemble the rest of the filling.


Melt the butter in a medium saucepan over low heat. When the butter is melted, remove from the heat and add brown sugar, corn syrup, salt and eggs. Whisk the mixture until well-combined.


Remove the pie shell from the refrigerator and fill about 3/4 full with walnuts. Add the rum-soaked figs -- and any remaining rum in the bowl -- to the filling; stir to combine. Pour the filling over the walnuts and bake for 30-35 minutes. Cool on a wire rack for about 15 minutes before cutting and serving.

Makes one pie.
++++++

Previously, on A Stove With A House Around It:

Two years ago: twice-baked cauliflower
Three years ago: dark gingerbread pear cake

Sunday, October 30, 2011

Thought wistfully of laminated dough

Gather 'round, kids. I would like to tell you a story.

It's the late '90s. Let's say 1998. I live in Chicago, a stone's throw from Wrigley Field, a cosmopolitan's sip from the heart of Boystown (otherwise known as Sidetrack). My third-floor apartment, though a one-bedroom, is so small that the kitchen doesn't have a single drawer. I'm still in the futon stage. The living room wall is festooned with a ceremonial street sign from when they christened my street, Cornelia Ave., "The Jon Simmons Parade." (This sign was much funnier and much more festive before I learned that Jon Simmons was a slain gay activist.) (I loved that sign, though, and still have it.) (No, I didn't steal it. It was $5 at a thrift shop on Halsted and Addison.) Even though my apartment is tiny, I have a wine rack with a built-in bar, copper bowls for mixing egg whites to stiff peaks, and enough room, somehow, to braid a tsoureki.


When I'm not at work on W. Wacker overlooking the Chicago River, or watching "Mr. Show with Bob and David" with Sort-Of Boyfriend (who would become Husband seven years later), or belting out showtunes at the aforementioned Sidetrack, I am sitting in that teeny apartment, on the futon, watching the fledgling Food Network, specifically "Taste." "Taste" is the brainchild of the inimitable David Rosengarten, who, it would turn out, was rather imitable in that Alton Brown came along to do the same show, to great effect, with "Good Eats." I digress. The "Taste" episode I'm watching is devoted to croissants, and it is particularly compelling: croissant dough is a laminated dough! Laminating dough is a lengthy process that involves constructing many alternating sheets of dough and butter, which puff during baking to create the flaky layers associated with a good croissant. Who on earth has the time and patience to make such a thing?!?? I wonder. It should be said that I also wonder how it will ever be possible that it will be the year 2000 and I will be twenty-six. I watch the rest of the episode, turn off the TV and head out for the evening, probably with a bottle of sparkling wine or vodka in hand.

Wasn't that a great story?

I've often thought wistfully of laminated dough since that day. Could I do it? Would it work? Am I crazy? Then, one bright day in 2011 -- bolstered by the intervening decade-plus of cooking and the experience of writing this blog for several years -- I see a croissant recipe in my Baking Illustrated cookbook and realize that laminating dough is actually very simple.

I made croissants. They were so easy. They were so amazing.


Then I found a recipe for deep-dish pizza with a cornmeal-flecked laminated crust. I made that, too. It was so easy. It was so amazing.

Now all I want to do is laminate dough. I suggest you do the same.


++++++


CROISSANTS
Adapted from Baking Illustrated

A note: this recipe allows you do to something called "FORMING THE BUTTER SQUARE." It is fun, and intense.

Another, more practical note: this dough needs to be cold when you work with it. Make sure it's thoroughly chilled before you begin rolling it out. If it gets warm or sticky, wrap it in plastic wrap and chill again. Your vigilance will be rewarded.

One last note: it helps to have a ruler for this recipe. Embrace your inner massive geek and buy a nice metal one and dedicate it to kitchen use.

And finally: this recipe includes the phrase "isosceles triangle." Do not be intimidated.


For the dough:
3 c. (15 oz.) all-purpose flour, plus extra for rolling
1 T. instant yeast
1/4 c. (1 3/4 oz.) sugar
1 1/4 t. kosher salt
1 1/4 c. whole milk, cold
2 T. unsalted butter

For the BUTTER SQUARE:
24 T. (3 sticks) unsalted butter, cut into 1-T pieces and kept cold
2 T. all-purpose flour

For the egg wash:
1 large egg, beaten


First, make the dough. In a medium bowl, whisk 2 3/4 c. of the flour with the yeast, sugar and salt. Place the milk in the bowl of an electric mixer fitted with the dough hook. Add the flour mixture to the milk and mix at low speed until a ball of dough forms, about 5 minutes. 

Cut the 2 T. of butter into small pieces and add them to the dough. Continue to knead until the butter is fully incorporated and the dough becomes smooth and clears the sides of the bowl, about 5-6 minutes more. The dough should be sticky, but if more dough is sticking to the sides of the bowl than to itself, add the remaining 1/4 c. flour, 1 T. at a time. Wrap the dough in plastic wrap and refrigerate for 1 hour.

While the dough is chilling, have the time of your life while making the BUTTER SQUARE. Using a bench scraper, toss the butter pieces and flour together on a clean work surface. Smear the butter back and forth against the work surface until they combine into a smooth, homogeneous mixture. Wrap the butter mixture in plastic wrap and use the edges of the plastic to form it into an even 7-inch square. Refrigerate the butter square until ready to use, at least 30 minutes.

When everything is thoroughly chilled, it's time to make the turns. Lightly dust a work surface with flour. Roll the dough into an 11-inch square. Place the BUTTER SQUARE diagonally on top of the dough.


Fold the corners of the dough over the butter so they meet in the middle of the BUTTER SQUARE. Pinch the ends of the dough together to seal.


Using a rolling pin, tap the dough from the center outward until the butter begins to soften and become malleable. Gently roll the dough into a 14-inch square, dusting the work surface with flour as necessary to prevent sticking.


Fold one outside edge of the dough in toward the center and bring the opposite outside edge in over the top, as if folding a business letter.


Repeat the process, but folding over each end to make a square.


Congratulations! You have made 2 turns. Wrap the dough in plastic wrap and refrigerate for 2 hours.

After 2 hours, make 2 more turns. Remove the dough and place again on a work surface lightly dusted with flour. As before, roll the dough into a 14-inch square. Fold as before: first like a business letter, then folding over each end to make a square. Chill again for at least 2 hours.

Now it's time to shape the croissants. Line 2 baking sheets with parchment paper. Place the chilled dough onto a floured surface and gently roll it into a 20-inch square. Using a pizza cutter and your handy ruler, cut the dough into two equal rectangles. Cut each rectangle into thirds width-wise and then into triangles, for a total of 12 triangles.

Working one at a time, lift each triangle off the work surface, holding the base in one hand and the tip in the other. Gently stretch it into an isosceles triangle with two sides equal in length.

Place the triangle back on the work surface. With the base closest to you, cut a 1-inch slit into the center of the base of the triangle. Fold the two sides of the slit outward.

With both hands, roll the triangle from the base, gently stretching the dough as you roll and leaving the last 1/4-inch of the tip unrolled.


Transfer the croissant to the prepared baking sheet. Bring the ends of the croissant toward each other to form a crescent shape. Repeat with the remaining triangles.

Cover the croissants loosely with plastic wrap and let them rise at room temperature until puffy, 45-60 minutes. They will not double in size.

Finally, brush with egg wash and bake. Heat the oven to 400 degrees Fahrenheit. Brush the croissants with the beaten egg. Bake until the croissants are golden brown, about 18 minutes, rotating the baking sheet halfway through the baking time.

Cool on a wire rack for about 15 minutes before devouring them all in an embarrassing fashion.


Makes 12 croissants, best served fresh out the kitchen. However, they can be kept at room temperature for 2 days. You can also wrap them well in plastic and keep them in the freezer for up to 2 weeks, reheating them from frozen in a 300-degree oven for 5-10 minutes, but I wouldn't know anything about that because I consume all croissants without delay.


++++++

Previously, on A Stove With A House Around It:

One year ago: walnut shortbread
Two years ago: macaron fail (boy, isn't that fun to re-live)
Three years ago: pizza Margherita and pizza with sage-walnut pesto and gorgonzola

Tuesday, October 25, 2011

Squarely in order

The first thing my son learned how to do -- the first thing that wasn't instinctive, like eating or crying or turning over -- was feed the dog a treat. Honestly. His first party trick was not to play peekaboo or patty cake or shake a rattle. It was to take the Barkwheat handed to him, hold it out patiently and wait for the large Chesapeake Bay Retriever to extract it, gingerly, from his tiny human-paw. I could not be more proud of him, as it is clear that even as a wee tot, he has his priorities squarely in order.


So when he began to grow very weary of smoothly-pureed baby food, whether store-bought or prepared at home by me, I felt the least I could do to reward his dog-loving instincts was give him some good quality adult food (or "human food," as Husband calls it, as if babies are somehow not human, which they kind of aren't, but anyway). Somewhere around his first birthday he had started taking a keen interest in our food, reaching plaintively and somewhat pathetically for our plates, whimpering shyly as if quietly pleading, "What is that and why am I not having any and I am so tired of these carrots but I can't talk so please please try to figure it out you losers."

Soon his subtle non-verbal requests became outright mutiny, and I realized that if the lad was to eat well, he was going to have to start eating our food. So I wandered out onto the back porch, where a variety of stubborn herbs still thrive, defying this summer's wet and generally crappy garden-growing weather, and cut a massive bouquet of basil, parsley and chives. I mixed together some turkey meatballs, using scads of the finely-chopped fresh herbs as the meatballs' primary flavor. I took more of the herbs and whirred together a pesto, earthy and salty and bright. I cooked some spaghetti. And as I served a bowl of herby spaghetti with herby meatballs to Husband, I took a serving for a spin in the food processor for the baby.


I fed him a spoonful; he responded, "Mmmmmmmm" then waved his hands frantically while giggling and smiling.

He then gave the dog a meatball.


++++++

SPAGHETTI WITH HERBED TURKEY MEATBALLS AND PESTO
Adapted loosely from Serious Eats


2 c. fresh basil, finely chopped (about 2 large bunches)
1/2 c. fresh parsley, finely chopped
1/2 c. chives, finely chopped
1 slice ciabatta or other crusty white bread
1/4 c. whole milk
1/2 lb. ground turkey
Kosher salt and freshly-cracked black pepper
1 lb. spaghetti
6 T. olive oil
2 garlic cloves
Freshly-grated Pecorino, to garnish


Combine the herbs into a bowl and mix well. Soak the bread in the milk for about 5 minutes, then remove it and lightly squeeze out the milk.


Place the bread in a medium bowl, and add the ground turkey, 1 c. of the herb mix and a pinch of salt and pepper. Using your hands, work the mixture until well-combined, adding the remaining milk, if necessary, to form a slightly sticky mixture. Shape into 1-inch meatballs.


Heat 2 T. of the olive oil in a large skillet over medium heat until shimmering. Add the meatballs (in batches if necessary) and cook until brown on all sides, about 5-10 minutes. Remove the meatballs to a baking sheet (keep warm in an oven heated to 250 degrees Fahrenheit). Reserve the pan drippings in the skillet.


In the meantime, bring a large pot of salted water to a boil and cook the spaghetti according to the package directions until it's al dente. Drain, reserving 1 c. of the pasta cooking water.


In a food processor, combine the remaining herbs, 4 T. of the olive oil, garlic, a pinch of salt and pepper and 1/4 c. of the reserved pasta water. Process until pureed, seasoning to taste if necessary.  


Place the drained pasta into the skillet that you used to cook the meatballs, along with a splash of the reserved pasta cooking water. Add the herb sauce and toss over low heat, adding more pasta water if necessary to make a smooth sauce. Top with meatballs and serve with a generous dusting of Pecorino.


Makes 4 servings, but really more like 2 servings. To put it another way, it's enough for two hungry adults, a tot and a Jet.


++++++


Previously, on A Stove With A House Around It:


One year ago: walnut shortbread
Two years ago: Bread Baker's Apprentice French bread
Three years ago: sibling rivalry chicken noodle soup

Sunday, August 28, 2011

You are wrong

I am going to imagine for a moment that you, gentle reader, are not so busy with earthquakes, hurricanes, craft beer, pennant races, gas prices, waning summer days, jobs, lives and Jim Thome's return to the Indians that you haven't been wondering, "Why is Dianne not blogging very much these days?"

You are undoubtedly thinking, "It's because she has a baby, right? Who I guess is now technically a toddler, because he turned one last week." ("Technically A Toddler" is the name of my new band, by the way.)

You are wrong, however.


I haven't been blogging of late because I am trying to read all seven Harry Potter books and watch all eight movies in a row, in one gigantic pop culture chunk. I missed the boat completely over the past decade of Pottermania, and it is just with the release of the final movie that I decided I needed to consume the entire epic saga at once. I've been working on it since the second week of July, and am currently on page 528 of Harry Potter and the Order of the Phoenix. Harry is learning Occlumency from Snape and fawning over Cho. Last night I had a dream that I was being harassed by a mob of evil blond Slytherins. And people say your priorities change when you have kids. Ha! Your priorities change when you read Potter.


Even though I'm spending a lot of my time developing a crush on Ron Weasley, that doesn't mean that I've stopped cooking. For example: I recently made this delicious cinnamon-scented fried chicken. It was flavorful, and juicy, and crunchy, and golden-reddish-brown and cooked in a cast-iron skillet (my favorite cooking vessel apart from my Potions cauldron). It was quick, coming together in no time. It satisfied me and Husband, giving him the energy to take care of the entire household while I retreated to the leather recliner, wondering why the imposter Moody didn't just make Harry's quill into a Portkey, thereby avoiding the whole Triwizard Tournament shenanigan and perhaps sparing the life of strapping young Cedric.


But then there would have been no point to the approximately 5,326 pages of ...The Goblet of Fire, and I'd be forced to resume normal adult responsibilities. Who needs that when you can have a good book and a good piece of chicken?

Next up: dragon steaks. Not just Hagrid's ice packs anymore!


++++++

CINNAMON-SCENTED FRIED CHICKEN


2 c. water
2 T. kosher salt, divided
2 T. Worcestershire sauce
4 boneless, skinless chicken breasts (or, alternatively, 1 good whole chicken, cut into pieces)
2 c. all-purpose flour
2 T. ground cinnamon
1 t. freshly-ground black pepper
Vegetable oil


Place water, 1 T. salt and Worcestershire sauce into a large bowl. Whisk to combine, dissolving the salt. Add the chicken breasts (or chicken pieces) to the bowl; refrigerate, covered, for 30 minutes.

Remove the chicken from the brine. Discard brine. Pat the chicken dry with paper towels.

Add enough vegetable oil to a large cast-iron skillet to come to a depth of about 1/2 inch. Turn heat to medium-high.


While the fat heats, combine the flour, remaining 1 T. of salt, cinnamon and black pepper in a plastic bag. Toss the chicken in the bag, 2-3 pieces at a a time, until well-coated. Place the pieces on a rack as you finish.

When the oil is hot (a pinch of flour will sizzle when sprinkled in), turn the heat to high and slowly add the chicken, a few pieces at a time. (If you add them all at once, the oil temperature will fall.) Cover the skillet with a mesh screen, reduce the heat to medium-high and cook for about 5 minutes.

Turn the chicken and continue to cook for approximately another 5 minutes. Then, turn the chicken as needed to make sure it's golden brown on both sides, cooking until a probe thermometer inserted into the white meat reads 161 degrees Fahrenheit. (If you're cooking dark meat pieces, you'll have to cook them a little longer, until they temp at 165 degrees.) Remove chicken from skillet and drain on paper towels.

Serve hot, warm or at room temperature (or even cold, if you're like Husband). I like mine with a hefty dollop of rich mashed potatoes.


Makes 4 servings.


++++++

Previously, on A Stove With A House Around It:

One year ago: blueberry-corn ice cream sundaes
Two years ago: Bread Baker's Apprentice English muffins
Three years ago: homegrown tomato salad with feta and cracked-black pepper

Friday, July 29, 2011

I need to reevaluate

First, a little bit of blogkeeping: Though I really really really wanted it to work out, my little experiment with Tumblr has ended. I loved everything about it except the inability of the non-Tumblr-affiliated reader to comment on the posts. Deal-breaker, I suppose. So I shall toil here in Blogger until which time I can get my act together and contemplate a complete blog overhaul. Which might not happen until 2028. Stay tuned.

And now to talk about pie!


I am somewhat of a pain in the ass. I know, shocking! When you have picked your jaw up off the floor, please hear me out: I have had it in my mind for a good three decades now that I don't like anything with a creamy consistency. Sour cream: yuck! Chocolate mousse: the horror! Jello: not without a shot of grain alcohol!


But a few months ago Mom brought me a crumpled page, evidently torn hastily from a magazine. She stuck it on my refrigerator with the "What happens in Amish country stays in Amish country" magnet and stated authoritatively, "Make this for me." I took a look over at the scrap of paper and glimpsed a recipe for coconut-key lime pie -- which is completely in Mom's wheelhouse because she loves coconut and key lime and any sort of pie involving a massive pile of whipped cream -- but not at all in mine because of the aforementioned perceived disgust with creamy consistencies. I decided to make it for her birthday; one is permitted to have whatever baked good one wants on one's birthday, regardless if one's offspring is a pain in the ass.


AND THE PIE WAS DELICIOUS. Who knew? WTF? Do I like creamy, custard-y pies after all? Are pigs flying? Did hell freeze over? Is Guy Fieri wearing his sunglasses over his eyes?

Even more intriguing: does this mean I've liked cream pies all along? Is that even possible? I need to reevaluate my entire worldview.

While I do that, you should make this pie.


P.S. I recently started liking sour cream, too.


++++++

COCONUT-KEY LIME PIE
Adapted from Everyday Food


A great tip from friend and key lime pie-lover Renee: When you find good key limes in the market, buy them, juice them and freeze the juice. (Freezing them in ice cube trays is particularly convenient.) You'll always have great key lime juice on hand to scratch that pie-making itch!

For the crust: 

6 oz. graham crackers (about 12 crackers)
3 T. sugar
1/4 t. kosher salt
5 T. unsalted better, melted

For the filling:
 
3 T. sweetened shredded coconut, toasted
1 can (14 oz.) sweetened condensed milk
1 can (13.5 oz.) unsweetened coconut milk
1/3 c. fresh (or bottled if you can't find fresh) key lime juice, from about 9 key limes
7 large egg yolks
2 c. cold heavy cream
2 T. powdered sugar


First, make the crust. Preheat the oven to 350 degrees Fahrenheit. In a food processor, pulse the graham crackers until finely ground. Add the sugar, salt and butter and pulse until combined. Firmly press the mixture into the bottom and up the sides of a 9-inch pie plate. Bake until the crust is dry and set, 10-12 minutes. Let the pie crust cool completely before filling.

Reduce the oven temperature to 325 degrees Fahrenheit. Spread the shredded coconut in a single layer on a baking sheet and bake, stirring often, until it's toasted and lightly browned, about 5-7 minutes. Keep an eye on it; you don't want it to be too brown.


Make the filling. In a medium bowl, whisk together the condensed milk, coconut milk, key lime juice and egg yolks until smooth. Pour into the prepared crust and bake until it's set but still slightly wobbly in the center, about 50 minutes. (Start checking the pie at 40 minutes, just to make sure you don't over bake it.)


Let the pie cool on a wire rack for 1 1/2 to 2 hours, then refrigerate for 3 hours (or up to 1 day).

When ready to serve, in the bowl of an electric mixer fitted with the whisk attachment, beat the cream and powdered sugar on high until stiff peaks form, about 3 minutes. Top the pie with whipped cream and sprinkle with the toasted coconut.


Serves 6 to 8 regular people; fewer if they're cream pie lovers. And, really, who isn't a cream pie lover?


++++++

Previously, on A Stove With A House Around It:

One year ago: a reminder of the American flag cake
Two years ago: mallows and Milan cookies
Three years ago: pesto

Thursday, June 23, 2011

Garlic scapes, elsewhere, plus an experiment

Hey guys.

Just for fun, just for a moment, I'm doing a little experimenting with Tumblr. Tonight I posted a little tome about pickled garlic scapes. Please head over there and take a look, especially if you have a trove of scapes littering your kitchen as a result of a few overzealous trips to a farmers' market.

We'll see how the Tumblr thing goes. I like the way it looks, and it's a heck of a lot easier to use than this here Blogger. But the ability for readers to leave comments is seriously curtailed, which could be a deal-breaker.

Anyway. This is all very fascinating. What I really want you to know is, there are dilly scapes over there, and changes might be afoot at the Circle K.

Stay tuned!

Saturday, May 14, 2011

Bread Baker's Apprentice: 20/43: multigrain bread extraordinaire

Multigrain bread extraordinaire!


Such a name deserves an exclamation point. I think all breads should have such names: casatiello magnifique! Kaiser rolls eleganza! English muffins especial! However, sadly, in his excellent The Bread Baker's Apprentice, bread enthusiast and expert baker Peter Reinhart opts for the more sensible, straightforward names: casatiello. Kaiser rolls. English muffins.

Until you get to page 187, where for some reason Reinhart was moved to title his multigrain loaf, "Multigrain bread extraordinaire." It seemed a little randomly enthusiastic, especially for a nutritious bread that might not otherwise inspire such joie de vivre. Speaking for myself, I tend to get a little more excited by, say, a brioche made with enough butter to fill the business end of a dump truck. Brioche extraordinaire! That, I could expect.


But then I made the dough for the extraordinary multigrain bread. And in its bountiful rustic healthful glory, it rose so high atop its pan as to make me blush a little.


I baked it, and witnessed its surprisingly soft crumb flake away from its delicate crisp crust. I then took Reinhart's advice: "This bread...makes the best toast in the world." I browned a few slices in the trusty toaster oven, anointed them with an "appropriate" amount of salted Irish butter, and promptly enjoyed the best toast in the world.


Extraordinaire!


++++++

The Bread Baker's Apprentice challenge asks that we do not share Peter Reinhart's recipes, no matter how extraordinary or pedestrian. But you have the book. So turn to page 187 already!


++++++

Previously, on A Stove With A House Around It:

One year ago: crispy chicken tacos
Two years ago: mustard chicken in phyllo
Three years ago: cream of mushroom soup

Tuesday, May 10, 2011

Turns out

So OK, I have these little rules. I don't have obsessive-compulsive disorder or anything, I just like certain things to be certain ways. Because these certain ways of mine make good sense. To me.

Like, if I'm going to sprinkle grated Pecorino as a garnish over a dish of baked pasta, I turn the pasta over with my fork first, moving the cheesy baked topping to the bottom of the dish. That way, you don't have a layer of cheese (grated Pecorino) over a layer of cheese (crusty mozzarella). The salty goodness of the cheeses are therefore evenly distributed throughout the dish, instead of piled atop one another where you might eat them in one bite and then be left with cheese-less pasta on the bottom of the dish (the horror).

Or, if I'm untacking a horse, I must put the bridle back in the tack room first, before removing the saddle. I can't let the bridle just hang there on the hook, reasonably, while I alleviate the unceasing pressure of the cinch from the horsie's belly. No, the poor horse must stand there, looking around, continuing to suck in and wonder if that cinch makes her look fat, while I deliberately return the bridle to its appointed hook. I do this because if I don't, I forget to put the bridle away because I get too involved with talking to the goats and dodging the errant barn cats.


And just as a for-instance, even though we have a dishwasher, I insist that certain dishes be hand-washed. I have decided that my sea foam Fiestaware, for example, cannot withstand the horrific rigors of the dishwasher. I think I decided this because one piece got discolored on the edge from leaning up against a cookie sheet while it dried, leaving a teeny rust stain. Why I blamed this on the dishwasher is anyone's guess, but so it is. They are my favorite dishes and they are treated specially as a result. The sunflower coffee cups that we bought in Ecuador must also be hand-washed, mostly because I don't want the fragile "CUENCA" mark on their bases to be scrubbed away. The pots have to be washed by hand, and not on the perfectly capable "pots and pans" cycle, because they are big and take up too much space in the dishwasher, leaving no room for anything else. (Appropriate question: "Anything else? It would seem that you don't allow any dishes in your dishwasher, Dianne.") And the knives! The knives must be washed immediately, dried and returned to the blocks. They are not permitted to sit in the sink awaiting cleaning. But that's just good safety sense.


So anyway, it turns out that I am a little OCD, apparently. Except for that knife-safety bit. A knife is in your hand, on your board, or in your block. Or at the local cookware shop, getting sharpened on the first Monday of the month.

And because I like things just so, I insist that this delicious dinner of delicate angel hair pasta mixed with a sharp melange of artichoke hearts and capers be topped with toasted panko instead of my usual favored grated Pecorino. There are enough salty elements to the dish to render it just perfect. Pecorino would gild the lily, and not in a good way. I have my reasons, and they are sound.


Unlike when I gently and rationally and repeatedly remind Husband why the dish towel should stay by the sink, and not all the way across the room by the basement door.*

*What use is it way over there? When my hands are wet, at the sink, the towel should be waiting.


++++++

CHICKEN WITH ARTICHOKES, ANGEL HAIR AND TOASTED PANKO


For the toasted panko:
3 T. olive oil
1/2 c. panko
1/4 c. fresh parsley, chopped
Sea salt and freshly-cracked black pepper, to taste

For the rest of the dish:
1/4 c. all-purpose flour
Pinch sea salt and freshly-cracked black pepper
4 boneless, skinless chicken breasts, pounded thin
3 T. olive oil
1 c. chicken stock
1 14-oz. can artichoke hearts packed in water, drained, rinsed and quartered
2 T. capers, drained and rinsed
3 T. unsalted butter
1 lb. angel hair pasta
1/2 c. fresh parsley leaves, chopped


First, make the toasted panko crumblies. Place the olive oil in a saucepan over medium heat. Add the panko, parsley, salt and pepper and toast, stirring occasionally, until the panko is toasty and browned. Set aside, off the heat.

Then, get to making the rest of the dish. Set a large pot of salted water to boil. In a shallow dish, combine the flour, salt and pepper. Dredge the chicken in the flour mixture, shaking off the excess. In a large skillet, heat the olive oil over medium-high heat. Cook the chicken in batches, adding a little more oil if the pan gets too dry, until the chicken is a pleasing light golden brown, about 3 minutes per side. Set aside.


Add the chicken stock to the empty skillet, scraping the skillet with a wooden spoon to loosen the crusty tasty bits. Bring the stock to a boil; cook until reduced by half. Add the artichokes, capers and chicken and juices to the pan. Gently swirl to combine, and bring just to the boil. Remove skillet from the heat and stir in butter; cover to keep warm.

Add the pasta to the boiling salted water and cook according to the package directions until al dente. Drain the pasta and add it to the skillet, mixing it with the chicken, artichokes and sauce. Top with parsley and serve sprinkled with the reserved toasted panko.


Serves 4.


++++++

Previously, on A Stove With A House Around It:

One year ago: guacamole
Two years ago: honey biscuits
Three years ago: chocolate crinkles

Monday, May 9, 2011

Men Who Cook!


Today I'm taking a teeny little step outside the realm of what I normally do around here, that is to say, cook things at home, in an amateur fashion, and then tell you about them.

Today I'll tell you about some other amateur cooks, all of them men, who are gathering this Friday to pit their best dishes against one another to benefit Akron's Summa Health System's Palliative Care and Hospice Services. Viva La Flavor, Summa's 11th Annual Men Who Cook event, will be held Friday, May 13, at the St. Joseph Family Center in Akron, from 5:00-9:00 p.m. This year's Las Vegas theme provides the setting for some of Akron's most talented amateur male chefs to work their culinary magic for the judges -- a panel of esteemed Akron women. (Summa's Web site has complete lists of the cooking men and judging women.)

In celebration of the home cook, Summa has graciously given me two tickets to this Friday's event to give away to a lucky reader. If you'd like to enter to win the tickets:

(1) Leave me a comment, below, and tell me about a man who cooks in your life.

(2) Follow me on Twitter and tweet me with the following message: I just entered to win tickets to @SummaHealth's Men Who Cook! http://bit.ly/lutNvm

One winner will be chosen at random at 6:00 p.m. on Wednesday, May 11. Tickets will be left at the event will call under the winner's name. And for more details on the event, be sure to follow Summa Health System on Twitter and Facebook!

Good luck to you, and to the cooking men on Friday night! May we all enjoy the food and raise lots of money for Summa's Palliative Care and Hospice Services.