Sunday, April 27, 2008

Weekends were made for cinnamon

Sunday morning. Well, really almost Sunday afternoon as I begin to write this. Regardless of the exact hour, it feels lazy. Which is exactly how I want my Sundays to feel. Even though the sun is shining and it is a perfect 60 degrees outside, and I have a large bag of potting soil and several envelopes of arugula and lettuce seeds just begging to be planted, I feel the urge to bake. And not only that: I feel the urge to bake something that will take hours to complete. Because it's Sunday. Sunday gives you the time to engage in such noble pursuits. Sunday bequeaths the hours necessary to make cinnamon rolls.


Weekends were made for cinnamon. Weekdays are to harried, too unpleasant for cinnamon. On those days, just getting out of the house in some semblance of order is a major win. One cannot linger over the intoxicating aroma of cinnamon when the trash needs to be taken to the curb and the dog needs to go out again and the travel mug must be filled with coffee to provide the caffeine fortification needed to face the office. I dream of a day when I can linger over cinnamon on a random Tuesday, which is to say I dream of a day when I can free myself from my day job, but until then it's a hard-boiled egg or cereal and soy milk at my desk. No wafting cinnamon; no yeasty, homemade buns.


Except on Sundays. (And, of course, the occasional Saturday. Except that Saturday always seems to be robbed of its cinnamon potential by the nagging need to go to the post office, pick up the dry cleaning, etc., etc.) Sundays just beg to have their multitude of care-free hours filled with rising bread. So it is that my weekend domestic self seeks this recipe: "Truck-stop cinnamon rolls," from Home Baking: The Artful Mix of Flour and Traditions from Around the World, by Jeffrey Alford and Naomi Duguid. (With such a glorious title, you know this book has to be good.)
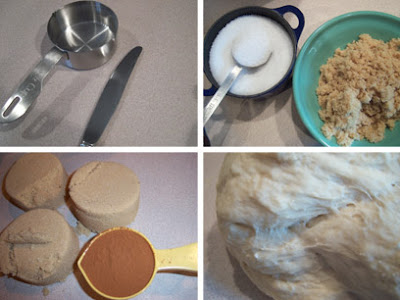

These are not your average cinnamon rolls. They are gigantic. I mean, massive. They are bready -- more so than the average sweet confection. The cinnamon really takes center stage in these beauties, as the rolls are not masked in a cloyingly sweet glaze or icing. (Not that there's anything wrong with cloyingly sweet glazes or icing; on the contrary, such toppings are magnificent on the right roll. However, this roll wishes to stand on its own cinnamon-y feet.) They really are more like small loaves of cinnamon bread than they are "rolls." But if you are accustomed to excess, as I am, their size and heft will thrill you.

If you want to eat these cinnamon rolls first thing in the morning, you will have to do a little work the night before, and then get up very early to prepare them for the second and third rises. Personally, I feel that working into the night and then denying myself the happy little sleep-in that Sunday allows negates the lazy, slow context that makes these cinnamon rolls taste so good. I start making them whenever I wish and if they're not ready until 4:00 in the afternoon, what does it matter? It's still Sunday. The homey, soul-pleasing scent of cinnamon is still washing over the kitchen, punctuated here and there by fragrant waves of yeast. The cinnamon rolls marry just as well to a tall glass of milk as they do to a steaming cup of coffee. If it gets late enough in the day, I'll just eat one while sitting on the front porch with a beer. I have no qualms. Cinnamon rolls are best enjoyed at any time, day or night.

When Jerry Seinfeld righteously advocated for the Lesser Babka, in truth he was defending the honor of all baked goods lucky enough to include cinnamon: "I beg your pardon? Cinnamon takes a back seat to no babka. People love cinnamon. It should be on tables at restaurants along with salt and pepper. Anytime anyone says, 'Oh, this is so good. What's in it?' The answer invariably comes back, 'Cinnamon.' 'Cinnamon.' Again and again. Lesser babka? I think not."


++++++

TRUCK-STOP CINNAMON ROLLS
Adapted from Home Baking, by Jeffrey Alford and Naomi Duguid


I love this recipe for many reasons, one of which is the fact that an electric mixer is not needed. All this recipe calls for is a big bowl or two, a good old-fashioned wooden spoon and the best kitchen tools around: the baker's hands.

For the dough:

1 T. dried yeast

5 c. warm water

1/2 c. light or dark brown sugar

2 T. kosher salt

6 c. all-purpose flour, preferably unbleached

About 7 c. bread flour, preferably unbleached

For the filling:

1/4 c. vegetable oil

1 3/4 c. light brown sugar

1/4 c. ground cinnamon

Using a whisk, dissolve the yeast in the water in a large bowl. Stir in 6 c. all-purpose flour with a wooden spoon, incorporating the mixture until it's relatively smooth (there will be some lumps). Let the sponge rest for 2 hours, covered with plastic wrap and then draped with a kitchen towel.

After 2 hours, the sponge will be lively and will have grown. It actually bubbles right before your very eyes, which gives the clear indication that the yeast is alive.


Gently stir the sponge, then sprinkle on the brown sugar and kosher salt and stir in. Add about 6 c. bread flour, one cup at a time, stirring and turning as a dough begins to form. When the dough becomes too difficult to turn with a spoon (usually after the first 5 cups of flour have been added), turn it out onto a well-floured work surface. Knead for 8-10 minutes, incorporating more bread flour as needed, until the dough is smooth and elastic.


(When you first turn the flour out of the bowl onto the work surface, you might curse to yourself at what a mess you've made. You will wonder if the dough will ever come together, if you will ever be able to reclaim your hands from the dough-covered clubs that they've become. Be patient. The dough will come together, like magic. [It helps to have a second set of hands close by, to add more flour as you knead.])


Place the dough in a large lightly-oiled bowl. Cover the bowl with plastic wrap and let the dough rise until doubled in volume, 1 1/2 to 2 hours.


Pull the dough away from the sides of the bowl and transfer to the work surface. Flatten it into a square approximately 24 inches across. Pour on the oil and rub it around to completely cover the surface of the dough. Sprinkle on the brown sugar and then the cinnamon.


Roll up the dough into a jelly-roll shape, then cut into 12 rounds. (If you want the finished rolls to be smaller, cut the dough into 18 rounds.) I find a bench scraper works well to aid in the rolling process; use it to release the dough from the work surface as you roll. A serrated knife is the best tool for the cutting -- cut gently but firmly and the dough should give fairly easily.


Lightly grease a large baking sheet, or line a sheet with a Silpat. Lay the cinnamon rolls on the baking sheet. If you lost any filling in the cutting process, be sure to sprinkle it back over the rolls on the baking sheet. You never want to leave any sugar or cinnamon behind! Cover with plastic wrap and let rise for 30 minutes.


Meanwhile, place a rack in the middle of the oven and preheat the oven to 400 degrees Fahrenheit. Bake the rolls for 30 minutes, until they are a beautiful brown color. Do keep an eye on them throughout the baking; if they start to get too brown, cover with aluminum foil to prevent burning and over-baking. This is crucial: not only will the sugar on an over-baked cinnamon roll turn into an unpleasant, bitter crust, the bread itself will be tough. I usually cover the rolls after the first 15-20 minutes of baking.

Using a spatula to "cut" between and separate the rolls, lift them off the sheet and transfer to a rack to cool. To soften the crusty tops, cover loosely with a cotton cloth after 10 minutes.

Makes 12 or 18 rolls, depending on the size you desire. Note that these cinnamon rolls are delicious the next day, too. Just give them a quick spin in the microwave for 30 seconds and they will be soft and warm and sugarlicious.

Friday, April 25, 2008

A divinely chewy, butter-rich flavor that lingers long after the last legal two-up game is over

One of my favorite things to do is celebrate Australian national holidays. I find it gives my fellow Americans pause, as friends and coworkers wonder why I am wearing the green and gold. It also presents the opportunity to educate anyone who will listen about Australia's history. (This makes me very popular at parties.) Most important, it is a fantastic excuse to consume Australian snacks; what higher honor can there be than to bake and eat delicious treats in commemoration of an antipodean paradise's statehood and distinct national identity? I mean, really.

(For example, here I am last year, wearing my Australia jumper, embarrassingly chewing a homemade ANZAC biscuit.)

25 April is ANZAC Day. ANZAC Day commemorates the first major military action fought by Australian and New Zealand forces during World War I: the Gallipoli campaign. Allow me to quote the Australian War Memorial Web site, for it describes Gallipoli more eloquently than I most likely could:

When war broke out in 1914 Australia had been a federal commonwealth for only 14 years. The new national government was eager to establish its reputation among the nations of the world. In 1915 Australian and New Zealand soldiers formed part of the allied expedition that set out to capture the Gallipoli peninsula to open the way to the Black Sea for the allied navies. The plan was to capture Constantinople (now Istanbul), the capital of the Ottoman Empire and an ally of Germany. They landed at Gallipoli on 25 April, meeting fierce resistance from the Turkish defenders. What had been planned as a bold stroke to knock Turkey out of the war quickly became a stalemate, and the campaign dragged on for eight months. At the end of 1915 the allied forces were evacuated after both sides had suffered heavy casualties and endured great hardships. Over 8,000 Australian soldiers were killed. News of the landing at Gallipoli made a profound impact on Australians at home and 25 April quickly became the day on which Australians remembered the sacrifice of those who had died in war.

Although the Gallipoli campaign failed in its military objectives of capturing Constantinople and knocking Turkey out of the war, the Australian and New Zealand actions during the campaign bequeathed an intangible but powerful legacy. The creation of what became known as the "ANZAC legend" became an important part of the national identity of both nations. This shaped the ways they viewed both their past and future.


(The inspiring and artistically/architecturally fascinating ANZAC Memorial in Hyde Park, Sydney.)

(The sculpture inside the monument, titled "The Sacrifice," is arresting and immensely thought-provoking. The sculpture depicts "...the recumbent figure of a young warrior who has made the supreme sacrifice; his naked body lies upon a shield which is supported by three womenfolk -- his best loved Mother, Wife and Sister and in the arms of one is a child, the future generations for whom the sacrifice has been made." There was a sign asking visitors to refrain from taking photographs of the statue in order to respect its meaning. However, rule-breaker Husband was moved and intrigued by the work and felt the need to take this shot surreptitiously. A quick Flickr search proves that perhaps we need not have been so concerned.)

Now. With the history lesson complete, on with the baked goods! ANZAC biscuits are said to have been devised to travel well: according to many sources, they were an integral part of care packages sent to Australian and New Zealand Army Corps soldiers fighting abroad in World War I. Over the years the ANZAC biscuit has become a culturally, historically and culinarily important cookie. The oat-y, coconut-y, golden brown and delicious treats are synonymous with 25 April and consuming them is one sure-fire way to celebrate ANZAC Day. Indeed, they are often used as a fundraising tool for the RSL (Returned and Services League of Australia) veterans organizations. Like Girl Scout cookies, only way cooler and much more buttery.

(These are Greg's ANZAC biscuits, baked a few days ago. I include this photo both as acknowledgement of Greg's supreme baking skills and as an example of ANZAC biscuits baked by an actual Australian.)

Though this post is really about ANZAC biscuits, I would be remiss if I wrote a missive about ANZAC Day and did not mention two-up. Two-up is a phenomenally simple and awesome gambling game that was played by the convicts, then by men in Australia's goldfields, then by Australia's soldiers fighting in WWI and now by Australians on ANZAC Day. Two coins are placed, heads-up, on a paddle called a kip. The person throwing the coins in the air, called the spinner, bets, which is matched by someone in the crowd. The spinner throws the coins: if they're both heads, the spinner wins; both tails, he loses. If one is heads and one is tails, he throws again. Observers in the crowd can bet as well, with the tail-better holding the money until the result is decided. The game is illegal every day of the year except on ANZAC Day, when it is allowed in tribute to the soldiers who played two-up in the theatre of war. (Though I understand a version is legal in some Australian casinos.) Along with the parades and the laying of wreaths and the red poppies and the delightful biscuits, two-up is an important part of the commemoration of ANZAC Day.

When I visited Australia in 2004, I was lucky enough that my visit coincided with ANZAC Day -- so I got to experience the holiday up close. What follows is my journal entry from that day.

_______

Sunday, 25 April 2004

ANZAC Day. I have a little bit of a sleep in, and then a relaxing brekky of heavily-buttered toast in front of the TV, watching the ANZAC march. It is much like Memorial Day, but focused mostly on WWI. It commemorates Gallipoli, but it makes sense in my mind that it would be a day to honour veterans in general. But I can't really get anyone to confirm this to me. What I do get is, one should eat some ANZAC biscuits and play some two-up. Fine with me! I read some cooking magazines, catch up on some writing, etc. and mid-afternoon Greg and I head to the Penrith Whitewater Stadium and the Sydney International Regatta Centre -- both in Penrith, both Olympic venues.

The whitewater rafting place is totally man made, with turbines that create the chop. You can have a go at the rafting, should you desire, but Greg and I watch from the sidelines. People are capsizing and flopping about left and right, and it looks like loads of fun. A very short drive away is the Regatta Centre, which I remember from TV. The dais is still there that the medal winners used, so I stand on it like a jackass with my hand over my heart and lament that Greg has no sort of award to bestow. We get some good photos with the "Sydney 2000" logo in the foreground, although to me it looks like it says, "Sydney Zooo!"


We stop at a bar on the way home to witness some two-up, and I am dying to bet but do not, fearing my American accent may disqualify me from this special patriotic activity. Greg tells me this is a rough, industrial, blue-collar crowd, but they look meeker than your average New Castle resident to me. But what do I know? -- they are Australian, and therefore do have a sort of hand-me-a-Vegemite-sandwich toughness. So, none of my money changes hands, but I do leave feeling that much richer.

Back at home we get ready to host Lance, Lynn and Chantelle for drinks. Chantelle looks the exact same to me, very beautiful. True to form, the adults look great, again not aging. We spend several hours catching up -- Kerrie and Greg haven't seen them for awhile, either -- looking at photos and sharing stories. They are amazed that I send them a Christmas card each year. Again, people, shocked at simple written words. But it is very sweet. We watch the video of tonight's episode of "My Restaurant Rules" after they leave and, as I predicted, the underdog Perth restaurant survived, with Sydney getting the axe. Kerrie and Greg are surprised, but as a reality-show-viewing veteran, I have a few things to teach them.

*Forgot to mention, John Howard was all George W. Bush today, and made a surprise visit to Australian troops in Iraq to celebrate ANZAC Day with them.

_______

This Friday (or Thursday evening, if you want to be technical about it since Australia is currently 14 hours ahead of U.S. Eastern Standard Time), bake a batch of ANZAC biscuits. The biscuits are incredibly quick and easy to make and their somewhat rustic appearance belies a divinely chewy, butter-rich flavor that lingers long after the last legal two-up game is over. Though I might be tempted to augment my celebration with an a capella rendition of "Advance Australia Fair" -- or at least a couple spins of Diesel and Dust and Hi Fi Way -- just baking the ANZAC biscuits is a tasty way to pay proper respect to our friends in the Southern Hemisphere.


A happy ANZAC Day to all of you fine Australians!


++++++

ANZAC biscuits
Adapted from Bills Sydney Food, by Bill Granger


Bill says, "These hero-sustaining treats are said to have been devised for sending in care packages to Australia and New Zealand Army Corps soldiers serving in World War I. They must be chewy, so be careful not to overcook them."

1 c. all-purpose flour

1 c. unsweetened coconut

2/3 c. brown sugar

1 c. rolled oats

4 oz. (1 stick) butter (salted)

1 T. golden syrup (My local gourmet market sells golden syrup, and of course you can order it online. However, if you can't find it and/or don't want to order it, honey or light Karo syrup can be used as a substitute.)

1/2 t. baking soda

2 T. boiling water

Preheat oven to 315 degrees Fahrenheit. Now, my oven doesn't have a 315 mark, so I put it roughly between 300 and 325 and it works out well. Place flour, coconut, sugar and oats in a bowl. Mix well.


Place butter and golden syrup in a saucepan over medium heat and melt. Place baking soda in a small bowl and add the boiling water. Whisk to combine.

Add baking soda mixture to saucepan and stir. Pour over oat mixture and stir all ingredients together. You may want to use your hands to make sure the mixture is incorporated well.

Roll about a tablespoon each of biscuit mixture into balls and place on a Silpat- or parchment-lined baking tray, leaving room for spreading. Flatten each ball gently with the palm of your hand.


Bake the biscuits for 15 minutes, or until biscuits are golden brown at the edges. Don't over bake them and you'll be rewarded with a chewy cookie. Allow to cool slightly on trays before transferring to a wire rack.


You can then consume them in honour of Australia and her military sacrifices, or you can pack them up and send them off to Gallipoli. Personally, I will doing the former.

Makes 20 biscuits.

Sunday, April 20, 2008

"Because of the cake!"

There are many fun reasons to marry someone with a different religious background than that of your own. There is the marked increase in the number of religious holidays, each with its attendant traditions, that you can now celebrate in your home. There is the multiculti satisfaction that comes with decorating the front window with a Christmas tree and a menorah. There is the unexpected joy of "having" to purchase additional dishware, servingware, etc. to celebrate each holiday appropriately. (What fun is it to use a regular old platter as a seder plate when there are so many gorgeous ones available for purchase?) Of course, there is the deep and abiding love between you and your spouse; yes, there is that.


Most important, there is the food. (Well, most important is the deep and abiding love; I am contractually bound by the State of Ohio to say this. Kidding.) Marrying outside your religion means that you get to incorporate many new and exciting recipes into your culinary repertoire. December used to be about Christmas' pierogies, cut-out cookies, city chicken and Hello Dolly bars. Now it is about Christmas' pierogies, cut-out cookies, city chicken, Hello Dolly bars, as well as Hanukkah's latkes and homemade jelly doughnuts. Spring was about Easter's chocolate bunnies and hard-boiled eggs. Now it is about Easter's chocolate bunnies and hard-boiled eggs, as well as Passover's Hillel sandwich. And Purim's signature sweet, Hamantaschen! Those little gem-like beauties appear out of nowhere, brightening March (give or take a week or two) in a way that no Christian holiday does. Well, except for this year, when Easter was March 23. But I understand that Easter won't fall that early again until 2160, which totally clears a path for the Hamantaschen.

My gentile self is, therefore, always trying to learn new dishes to celebrate the Jewish holidays with Husband. It can be a rather steep learning curve: the first time I made latkes was a disaster, though I have since learned the proper egg-to-shredded-potato-to-matzo-meal proportions. Most of the time, though, my goy self is relatively successful with the Jewish cooking endeavors. I particularly enjoy the seder: each Passover I look for a fresh recipe that will honor tradition as well as taste magnificent. Last year I found this cake.


Walnut and almond cake with orange-pomegranate compote. This Kosher-for-Passover dessert is so nutty, so moist, so pomegranate-y, you might be tempted to answer the age-old question of why this night is different from all other nights with a resounding, "Because of the cake!" It is sweet but not too sweet, nutty but still cakey, egg-white-y enough to give angel food cake a run for its money. The supremed oranges and pomegranate syrup lend an elegant flair to an otherwise rustic treat. This cake really is delicious enough to enjoy any night of the year, but saving it for Passover lends it that extra-special air that comes from a year's worth of anticipation.

I know that Passover brings with it certain sacrifices; going without leavening for even one day is hard enough, let alone eight. But this cake just might make you forget Passover's restrictions. Excuse me while I serve myself another slice.

Happy Passover, everyone.


++++++

WALNUT AND ALMOND CAKE WITH ORANGE-POMEGRANATE COMPOTE
Adapted from "Bon Appetit"


For the cake:

Vegetable oil

1 3/4 c. walnuts

1 c. whole almonds

1/4 c. matzo cake meal (or finely-ground matzo meal)

8 large eggs, separated

1 T. lemon zest

1 T. orange zest

1 t. ground cinnamon

1/4 t. salt

1 c. sugar, divided

2 T. freshly-squeezed orange juice

For the syrup and compote:

4 large oranges, the peel of 1 orange removed in strips and reserved

1 c. pure unsweetened pomegranate juice

1 c. sugar

1 T. freshly-squeezed lemon juice


Make the cake. Preheat oven to 350 degrees Fahrenheit. Brush 13"x9"x2" metal baking pan with vegetable oil.

Combine the walnuts, almonds and matzo cake meal in a food processor; grind the mixture finely. (Note: if you cannot find matzo cake meal, which I could not even given Husband's valiant search of at least six area grocery stores and gourmet markets, just take the same measure of regular old matzo meal and grind it in the food processor before adding the nuts. Then add the nuts and grind them together with the homemade matzo cake meal. The recipe works just fine with this substitution.)

In the bowl of an electric stand mixer fitted with the paddle attachment, beat the egg yolks, lemon zest, orange zest, cinnamon and salt until it begins to thicken, about 3 minutes. Gradually add 1/2 c. sugar, beating until very thick and light in color, about 2 minutes longer. Beat in the orange juice; fold in the nut mixture.

Using clean dry beaters, beat the egg whites in another large bowl until soft peaks form. (I like to use my KitchenAid mixer for the egg yolk mixture, above, then switch to a hand-held mixer for the egg whites. But if you are not insane and only have one mixing device, just wash and dry the beaters and bowl thoroughly before proceeding to this step.) Gradually add the remaining 1/2 c. sugar to the egg whites, beating until stiff but not dry. Fold the egg whites into the yolk mixture in 3 additions. Transfer the batter to the prepared pan.


Bake the cake until it is puffed and deep golden and a tester inserted into center comes out clean, about 32 minutes. Cool cake in the pan on a rack (the center of the cake will fall; do not be alarmed).


While the cake is baking, make the syrup and compote. Place a wire-mesh sieve over a bowl. Cut off all peel and pith from the oranges. Working over sieve, cut oranges between the membranes to release the segments into sieve. (Or, put another way: supreme the oranges.) Squeeze any juice from the orange membranes over the sieve. Let the oranges drain while preparing the syrup.


Bring the pomegranate juice, sugar, lemon juice and reserved orange peel to a boil in a medium saucepan over medium-high heat, stirring until the sugar dissolves and a thin syrup forms. Remove the syrup from the heat. Holding the orange peel back with spoon, pour 3/4 c. syrup into a liquid measuring cup. Pour the syrup over the baked cake; let stand at least 1 hour.


Add the drained orange juice to the remaining syrup in the pan. Boil the syrup with the peel until it is reduced enough to coat the back of a spoon, about 8 minutes. Discard peel. Add this syrup to the orange segments; let the compote stand for 15 minutes or until ready to serve.


Cut the cake lengthwise into 2 1/2"-wide strips. Cut strips on the diagonal into diamonds; place on plates. Spoon the compote over and serve.


Serves 10-12. Please note: if you are organized, the cake can be made 1 day ahead. Cover and let stand at room temperature. You can also supreme the oranges the day ahead, leaving them covered with plastic wrap in a sieve set over a bowl in the refrigerator. Or you can just do everything the day of and totally exhaust yourself in the process. That's the way I roll.

Friday, April 11, 2008

Lima beans gave me an inch, and I took a mile of bad nutrition

I was a unique child.

Especially when it came to food.

For a long time I hardly ate anything, save french fries. If it wasn't a french fry, I wasn't interested. Then came cinnamon toast and pepperoni sandwiches. When I got home from my first day of first grade, I ate nearly an entire loaf of bread in cinnamon toast form. I finished one slice then asked for another and another and another until the loaf was almost gone and the cinnamon-sugar supply ran dangerously low. Since it wasn't a french fry, Mom obliged. She was happy that I was eating something other than a fried potato. Then there were the pepperoni sandwiches. Thinly sliced pepperoni, sauteed until crisp in a frying pan, then tiled on mayonnaise-slathered white bread. It sounds totally disgusting but trust me: cured meat heaven. I'd still eat those sandwiches today, if I ate red meat. You can understand why Mom was concerned about my nutrition: french fries, cinnamon toast and fried pepperoni sandwiches do not a balanced diet make.

With the way I ate, you never would have guessed that I would someday transform into the food lover that I am. Though once, in fifth grade, I had to do a cooking demonstration for what reason I cannot recall. I chose to make no-bake chocolate cookies but I chose to perform the entire demonstration in Julia Child's accent. Now, I ask you, what fifth grader even knows who Julia Child is, let alone has the desire to stand in front of a room of her peers and imitate the French Chef? It is such an odd thing for a kid to want to do, yet there I was, effecting Julia's legendary voice. Clearly there was a little Epicurean obscured under those layers of fries and toast and pepperoni, even if I didn't know it yet.

Strangely enough, my potato/toast/pepperoni psychosis yielded to lima beans. Man, I loved lima beans. Sometimes I felt very lonely in this regard: not even my parents liked them. I, however, could eat them by the plate-full. I often did: sometimes plain, sometimes mixed with a scoop of mashed potatoes. Starchy goodness! Fordhook, baby, no matter the variety, I was on board. I felt superior; even though I had a freakish diet, I rationalized, I am eating lima beans, which are so good for you that everyone hates them, even the adults! Lima beans gave me license to consume fried things and things coated in sugar. Lima beans gave me an inch, and I took a mile of bad nutrition.

Several decades later, my diet has changed to be sure. I enjoy a wide variety of foods, and love trying new things. Yet the freezer remains stocked with lima beans, because I still love them and they continue to help me feel self-righteous about some of the less-healthful things I eat on a semi-regular basis. Beyond all the moralizing, however, lies the plain fact that lima beans are delicious. They don't have to be blanched and plainly piled on your dinner plate. There are lots of amazing things you can do with lima beans -- I swear.


Take this salad that I found nestled in the pages of "Martha Stewart Living." It sees my beloved lima beans and raises them with chickpeas. And basil. And Pecorino. And zucchini. And hot pepper flakes. This salad is a wonderful way to enjoy lima beans no matter their position in your culinary repertoire. If they are old favorites, as they are to me, this dish is an exciting new way to experience them. If you aren't sure whether you can get excited about lima beans, perhaps this recipe will change your perspective on what they can be and how they can taste. The lima beans marry quite nicely with their legume brethren, the chickpeas. The tiny Pecorino cubes add a pleasing salty, chewy component, while the lemon juice and kosher salt perform admirably in their role of softening the raw red onion and the romaine. The black pepper and the red pepper flakes add just a hint of heat, lingering nicely in the background without overtaking the salad. The basil adds a brightness that reminds you that you're eating a fresh, modern iteration of the lima bean -- not the overcooked, mushy, gray bean you might remember from your youth.


As with most salads, this recipe couldn't be easier to make: assemble ingredients, toss. It works well as a side dish or as a summer salad, and with spring trying to rear its pretty flowery head who couldn't use a sunny culinary kick-start to the season? Of course, I often eat this dish as an entree because I find the lima beans and chickpeas meaty and filling enough to sate even my most ravenous appetite. The very best part? You can feel good about this meal.

Make this salad, then call your mother and inform her that you're eating your lima beans. Even if she's on the fence regarding the humble legume, the part of her that will always view you as an eight-year-old will be delighted that, finally, you've caved and cleared your plate. She no longer has to send your uneaten food to those starving kids in China.


++++++

LEMONY LIMA BEAN, CHICKPEA AND ZUCCHINI SALAD

Adapted from "Martha Stewart Living"


1 c. fresh or frozen lima beans, blanched

1 c. canned chickpeas, drained and rinsed

1 zucchini, quartered lengthwise and cut crosswise into 1/4" pieces

1/2 small red onion, halved and sliced very thinly

3 romaine leaves, cut in half lengthwise and cut crosswise into thin strips

2 oz. Pecorino cheese, diced

4 T. chiffonade of fresh basil

4 1/2 t. freshly-squeezed lemon juice

3 T. extra-virgin olive oil

1/4 t. red pepper flakes

3/4 t. kosher salt

1/4 t. freshly-ground black pepper


Blanch and drain the lima beans; set aside to cool.


(Photo credit: Dad. See, Dad? I am crediting you for your excellent work!)

While the lima beans are cooling, prep the rest of the ingredients. When you're ready to eat, combine the lima beans, chickpeas, zucchini, romaine, Pecorino and basil in a large bowl. Add the lemon juice, olive oil, red pepper flakes, salt and pepper. Toss to combine.


Serve! Then go back for seconds. And thirds. Trust me.

Serves about 4. Though tonight there were three of us and we emptied the bowl. I suppose the yield depends entirely on how your friends and family feel about lima beans and how willing they are to shatter their preconceptions. Yes, lima-bean eating is serious, groundbreaking business.

Sunday, April 6, 2008

Hot damn! A cakey chocolate chip cookie recipe!

Every person who is love with the kitchen travels her own route to chocolate chip cookie perfection. Sometimes the road is easy; sometimes it twists, turns and is fraught with potholes and other such perils. The only certainty is that real food maniacs -- people who, for example, name their stoves, ahem -- are rarely satisfied with the recipe on the back of the Nestle Toll House chocolate chip package.


I am aware of the bitterly divided camps of chocolate chip cookie aficionados: those that like their cookies thin and crisp, oozing with butter that has rendered the cookie a deep golden, almost nutty, brown; and those that prefer a thicker, weightier, cake-like cookie that holds its chocolate chips in a glorious suspension of moist crumb. If your reading comprehension skills are up to snuff, the sentence you just read might give away which type of chocolate chip cookie I favor. (Hint: In one clause I use the word "glorious," calling to mind a heavenly host of angels, all singing the praises of the chocolate chip cookie. In the other, I use the word "ooze," not a pleasant culinary descriptor in my book.) I suppose if you're desperate, either type of cookie will do. Say, for example, it is 3:00 on a Tuesday afternoon and you require a snack yet have nothing stashed in your desk drawer, but then someone from accounting comes around with chocolate chip cookies and even though the cookies' origin is somewhat unknown and they are brown and flat and crisp, and even though you prefer thicker cakey cookies, you take one anyway. And you eat it rapidly and then go searching for another, because you are desperate and people in offices will eat anything that's handed to them or presented on the table in the break room.

Following the recipe on the back of the chocolate chip bag is a good start; however, complying with it to the letter yields the aforementioned brown, crisp, buttery result that I consider to be Lesser Chocolate Chip Cookie. In high school, I started playing around with that recipe, cutting the amount of butter nearly in half and adding up to one extra cup of flour. I was able to devise something that better-suited my personal cookie expectations and as a bonus I earned the satisfaction that comes from creating your own recipe. I was thrilled and quite impressed with myself.

The adapted Toll House recipe fed my cravings for many years, until 2001 when my mother- and father-in-law gave me a book called In the Sweet Kitchen, by Regan Daley. On page 501 (501!) I spied a recipe for "The Ultimate Soft and Chewy Chocolate Chunk Cookies." Hot damn! A cakey chocolate chip cookie recipe! Then I read the narrative: "Crisp and crunchy have their place in the world of biscuits, but not, I believe, in the best and simplest chocolate chip cookie. If you like chewy, cakey and full to the brim with chocolate, these are for you."

Regan Daley, I think I am in love with you.


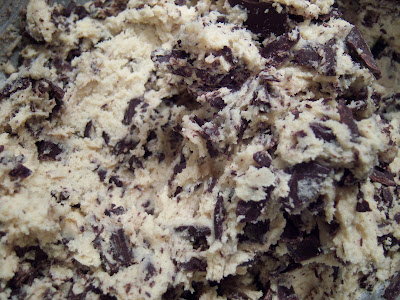
The recipe doesn't disappoint. It is everything I hoped it would be. The large, chewy cookies are greatly enhanced by the coarsely chopped semisweet chocolate, whose angular shard-like edges somehow make them taste more like chocolate than the traditional kiss-shaped chocolate chip. The chocolate is "meatier" in these cookies. When you bite into them, you know you are eating chocolate, not some subtle, shy morsel. These cookies are not cloyingly sweet, even though they are chock full of chocolate. And I do mean chock full: with a full 16 ounces of the stuff, I do believe there is more chocolate than there is dough in this recipe. That, I can assure you, equals a winning chocolate chip cookie that more than earns the "chocolate" part of its moniker. And if you use kosher salt you will be rewarded with a subtle salt flavor in every fourth or so bite, which works and plays perfectly with the cookie's sweeter elements.


So, break free from the back of the bag. Though there's nothing inherently wrong with the Toll House recipe, you just might find that a different cookie better meets your stringent chocolate chip cookie requirements. That is what I have learned along my road to chocolate chip perfection -- a trip that's as much about the journey as it is about the destination.


++++++

ULTIMATE SOFT AND CHEWY CHOCOLATE CHUNK COOKIES
Adapted from In the Sweet Kitchen, by Regan Daley


1 c. unsalted butter, at room temperature

1 c. tightly-packed light brown sugar

1/2 c. granulated sugar

2 large eggs

1 1/2 t. pure vanilla extract

3 c. plus 2 T. all-purpose flour

1 t. baking soda

1/2 t. kosher salt

16 oz. semisweet chocolate, coarsely chopped


Preheat the oven to 350 degrees Fahrenheit. Line two baking sheets with Silpats or parchment paper, or lightly butter them, and set them aside. Sift the flour, baking soda and salt together in a small bowl.

Place the room-temperature butter and both sugars in the bowl of a stand mixer, or in a large bowl if you're using a hand-held mixer. Cream the butter and sugars until the mixture is light and fluffy. Add the eggs, one at a time, beating well and scraping down the sides of the bowl after each addition. Beat in the vanilla.

Add the flour mixture to the butter-sugar mixture in three batches, incorporating each addition before adding the next. Mix until combined, then fold in the chocolate chunks.


Using a spring-loaded ice cream scoop (or a tablespoon), shape knobs of dough about the size of a large walnut into balls and place them about 1 inch apart on the baking sheets.


Bake 12 minutes, but not any longer! You want the cookies to be only slightly golden brown; if they are neither firm nor dark when they are removed from the oven they will cool chewy and soft. Which is, after all, the best feature of these cookies.


Cool the cookies on the baking sheets for 5 minutes, then transfer them to wire racks to cool completely. Store the cookies (well, the ones that are left after your friends and relatives descend upon the hot, melty batch) in an airtight container at room temperature for up to 1 week.


Makes about 40 delectable cookies.

Thursday, April 3, 2008

Just the context we needed for discussing and planning and plotting and laughing

I am proud to say that I had some semblance of a misspent youth.

Even now, as a mid-thirtysomething woman with a "career" and a marriage and a mortgage, I look back on this brief period of misplaced priorities and irresponsible financial decisions and consequences-be-damned activities with great pride and no small measure of nostalgic yearning. It all started with a friendship that I never thought would be as close and enduring as it has become.

I met LJS when we were both working at a certain rock and roll museum that is located in Cleveland but holds its induction ceremonies in New York. The first time I was introduced to her I was totally intimidated by her stunning height and rapier wit. (Though she takes great pride in the wit, she never believes me that her height is something to be envied.) I thought, OK, cool co-worker. I did not realize that I had just met one of the best friends I will have in this life.

LJS has taught me that the best friendships are forged in youthful jackasserie. ("Jackasserie," a noun coined by Sister, roughly translates to idiotic but outrageously fun behavior.) LJS and I were both single when we first met and as such were not bogged down with actual adult obligations. Not that marriage bogs you down, but you know what I mean. We were free to do whatever sort of nonsense we wished, such as frequently shopping at Nordstrom's as though we could easily afford it; drinking far too much wine at La Cave du Vin; dropping life's responsibilities for weeks at a time to follow a Canadian power pop band around the United States and also Ontario; racking up significant credit card bills staying at nice hotels with triple-sheeting and rewards programs while following around said Canadian power pop band; getting far too invested in fictional portrayals of the 1980 Olympic hockey team; forcing people to watch "On the Line" with Lance Bass with us; kidding ourselves that Nashville is, in fact, really close to Atlanta, so why not drive there for yet another show?; dying over the reunited Duran Duran; and eating many meals together at Mama Santa's in Cleveland's Little Italy.

(When you see this amp, you know it is time to rock. [Sloan @ Grog Shop, Cleveland, OH, January 2007])

Mmmm, Mama Santa's. After LJS left the rock and roll museum and we stopped seeing each other on a daily basis, we would often meet at Mama Santa's (or Maxi's, also in Little Italy, or at the now-shuttered Ruthie & Moe's diner) to ground ourselves with a good meal and plan for our next attack. Usually our next attack involved determining where Sloan was playing and then making hotel reservations in that city. But often our plans were more local, much simpler, but just as awesome. Mama Santa's cheap and amazingly delicious Italian-American food was just the context we needed for discussing and planning and plotting and laughing. Their pizza is out of this world, but, as she did with fashion luminaries such as Lagerfeld muse Ines de la Fressange, LJS introduced me to Mama Santa's ceci. I never looked back.

Ceci are chickpeas. By virtue of its other applications (pureed in hummus, curried in Indian dishes like aloo chana, toasted and sprinkled with delicious spices), the chickpea has already earned its status as one of the finest foods on earth. But before I started eating regularly at Mama Santa's, I had no idea the Italians had laid claim to the glorious legume as well. But I should have known, and shame on me and my taste buds for our ignorance. Native to Turkey, the chickpea wisely meandered over to the Roman diet long ago; indeed, Apicius includes several chickpea recipes. The Italians still use them in many ways, including in a soup-like pasta dish that found its way onto Mama Santa's menu, then quickly into my stomach.


Pasta e ceci alla Romana (or, simply, ceci on Mama Santa's menu) is glorious in its simplicity, the kind of meal that has a sublime flavor inversely proportionate to the humble, rustic nature of the ingredients. Tagliatelle or fettuccine, tomato paste, olive oil, garlic, rosemary, salt, freshly ground black pepper and the blessed chickpea. That's it. That's all you need. At Mama Santa's, it arrives at the table sloshing messily over the rim of a large, shallow soup bowl. Its lucky recipient must not stand on ceremony: the soupy tomato sauce will splash, invariably staining the diner's new Club Monaco sweater, as chickpeas hurl themselves off the spoon in a desperate attempt to reunite with their fettuccine friends still in the bowl. The chickpeas add an amazing unctuous dimension to the fettuccine and tomato sauce that is unexpected and totally delicious, elevating run-of-the-mill pasta to a sort of texture and flavor heaven. (Usually I don't use the word "unctuous" to describe delicious food but trust me, the slippery-ness of the olive oil in this dish marries so divinely to the starchy-ness of the chickpeas, creating a beautifully thickened peppery sauce that, in my book, beats anything those fussy old French mother sauces have to offer.) Ceci is best eaten with the most buttery, garlicky toast imaginable. That's how Mama Santa's rolls and I see no reason to mess with perfection.


Like most restaurant dishes that I order so often that I no longer need to consult the menu, I just had to translate ceci to the home kitchen. I know that I most certainly could have adapted it without a recipe, given how simple the dish is. But I thought it would be more fun to consult the brilliant Giuliano Bugialli's pasta masterpiece, Bugialli on Pasta. The book is full of authentic Italian recipes presented alongside a no-nonsense and informative narrative. If you want to learn how the chickpea is used differently in Rome versus Naples versus Lecce, this is the book for you. And you should want to know those things, after all, because what life is worth living that doesn't examine and celebrate chickpeas?

Of all the chickpea's health benefits -- it is high in folate, protein, dietary fiber and is a great source of calcium -- I personally hope that it has some vitamin or mineral known for boosting memory-retention. For I need it. LJS knows that I frequently get confused and assume that she was present at major events in my lifetime that took place before we met. Many times I start to reminisce with her about something that happened in college, but then she gently reminds me that we went to different schools. Perhaps if I eat enough chickpeas I can keep our friendship's chronology straight.

Then again, why does it matter? It's just as fun to assume that I've known her forever -- or at least as long as the Romans have been dining on ceci.


++++++

PASTA E CECI ALLA ROMANA
Adapted from Bugialli on Pasta


According to Bugialli, "Ceci (Cicer arietinum), or chick-peas, probably originated in southeastern Turkey, but there are no known survivors of the original, wild form of the plant. The varieties presently known likely are domesticated mutations. The Mediterranean chick-pea is larger and is white to dark yellow in color, while the type used in India and Persia is smaller and brown.

"Following are three recipes for pasta e ceci: from Rome, Naples and Lecce (Apulia), all seats of ancient Greek and Roman culture. The Tuscans, famous in Italy as 'bean eaters,' have in addition to their many Phaseolus vulgaris bean dishes quite a few using chick-peas. [Phaseolus vulgaris is the species that includes Cannellini, great northern beans, red kidney beans et. al.]

"This...Roman version of pasta with chick-peas shares certain traditional ingredients of the Tuscan dish, but here the rosemary taste is much stronger, tomato paste is used instead of tomatoes and the pasta is dried tagliatelle instead of the very short tubular avemarie or ditalini."

It's also worth repeating what Bugialli mentions in the introduction to his "Pasta and Beans" chapter: "Every part of Italy has its pasta and beans minestre or minestroni. Today we are reaffirming the wisdom of this combination, for it provides an almost balanced diet in itself, containing protein and carbohydrates, without cholesterol or fat. This was understood through folk wisdom many centuries ago, and it may be that these dishes were along the first uses of pasta."

Blessed chickpea, indeed.


For the chickpeas:

2 c. canned chickpeas (about 1 1/2 19-oz. cans), drained, liquid reserved

4 c. cold water

1 c. reserved liquid from the cans of chickpeas

2 sprigs fresh rosemary

1 t. kosher salt


For the sauce:

1/2 c. olive oil

3 large garlic cloves, peeled but left whole

1 T. fresh rosemary leaves, coarsely chopped

3 T. tomato paste

1/2 t. kosher salt

1 t. freshly-ground black pepper

1/2 lb. dried fettuccine or tagliatelle

Pecorino or Parmigiano-Reggiano cheese, to taste


Drain chickpeas, reserving 1 c. of the liquid. Place 4 c. cold water, the reserved chickpea liquid, chickpeas and 2 sprigs of fresh rosemary into a medium-sized stockpot over medium heat. When the water reaches a boil, reduce the heat to medium-low, cover and cook the chickpeas until they are heated through but still firm, about 10 minutes. Add 1 t. kosher salt to the chickpeas, cover again, reduce the heat to low and simmer for an additional 5 minutes.

While the chickpeas are simmering, prepare the sauce. Heat the olive oil with the garlic cloves and chopped rosemary in a medium saucepan over medium heat for 5 minutes. It will seem like an excessive amount of olive oil, and maybe it is -- but trust me, it is tasty. After 5 minutes, remove 1 c. of the chickpea broth and whisk it together in a small bowl with the tomato paste, dissolving and thinning the paste. Add the tomato paste mixture to the saucepan with the olive oil. Season the sauce with salt and abundant black pepper (about 1 t.) and cook, whisking occasionally, for 10 minutes.

Pass the sauce through a wire mesh strainer directly into the stockpot containing the chickpeas and chickpea broth. Push the sauce through the strainer with a wooden spoon, then discard the garlic and rosemary. Also remove the 2 rosemary sprigs from the chickpea broth. Stir to combine the tomato sauce with the chickpeas and chickpea broth. At this time the mixture will have a somewhat soupy consistency.


Add the pasta and cook according to the package directions until it is al dente. Leave a lid on the pot for just about all of the pasta's cooking time. (The goal is not to let all the liquid boil away.) Taste for salt and pepper and let the dish rest off the heat before serving. Sprinkle with grated Pecorino or Parmigiano-Reggiano and mangia.


Serves 4, but with only one helping each. It might be a good idea to double this recipe if you're hungry, which as you undoubtedly know I always am.