Aside from having to explain to a hapless young employee of my local grocery store what exactly matzo is -- and aside from having to respond to the butcher's questions re: shank bone (Butcher hands me little bone, wrapped in plastic; asks, "When is this? Should I get more bones ready?") -- I am no Jewish cooking expert. Within Hudson Heinen's I'm a Goy Joan Nathan. Outside Hudson Heinen's I'm a lady who happens to have married a Jew, who knows just enough about Jewish holiday fare to make a Joan Nathan reference.
But please don't let my lack of Ashkenzi pedigree stop you from admiring this brisket. It is delicious, and you should make it. It might be too late to make it for a seder tonight (Passover begins this evening at sundown), but if you're hosting a second night seder, by all means, have at it.
The recipe comes from Paula, the mother of one of my best friends in this life. Paula and her charming husband Walter, along with their sons Zachary and Aaron and their fabulous extended family (hi, Cissy!), invite me and Husband to their home for many Jewish holidays. Even when my best friend won't be in attendance, they often still invite us. I think they feel bad for Husband, languishing down here in this gentile town with no matzo at its Heinen's, but they make us feel like family and I love them even more, I think, than my best friend does.
Several years ago I was all, "Paula, I am going to marry your brisket." And Paula was all, "Here's the recipe," as she whipped out an ancient tattered stained cookbook to display a recipe for brisket of beef with limas that's part of a menu for a "Campaign Rally Dinner." I snapped a few photos with my phone, and I've been making her brisket ever since. In my house, we call it "Paula's brisket," and nary a Jewish holiday passes without it.
++++++
PAULA'S BRISKET
Adapted from Paula Schwartz
This is a fantabulous recipe to make in advance. I do, in fact, recommend that you make it a day or more in advance. I like to make it a day ahead, keep it in the refrigerator, then slice and warm it before dinner. Paula tells me she often makes it far in advance, freezing it, then bringing it to room temperature the day of her seder, slicing then warming it as her guests arrive. Either way, it's a dream, because your main course is done.
A note: Husband tells me that, according to some corners of the Diaspora, mustard is not kosher for Passover. We include it in the recipe because Paula does, but feel free to omit if you are of a stricter variety.
5 lbs. brisket of beef, trimmed of most of the fat
2 T. Dijon mustard, divided
1 1/2 c. chili sauce, divided
1/2 c. red wine, divided
2/3 c. light brown sugar, divided
Juice of 1 lemon, divided
2 t. kosher salt, divided
Preheat the oven to 350 degrees Fahrenheit. Place the brisket in a roasting pan.
In a medium bowl, combine 1 T. Dijon mustard, 3/4 c. chili sauce, 1/4 c. red wine, 1/3 c. light brown sugar, juice of half a lemon, and 1 t. kosher salt. Whisk to combine.
Pour the chili sauce mixture over the brisket. Roast the meat, covered, for approximately 2 hours. Remove from the oven, uncover, transfer to a baking sheet and let cool to room temperature. Reserve the juices.
(Once the meat has cooled to room temperature, you can refrigerate or freeze the brisket. Remember, if you choose to freeze it, move it to the refrigerator the night before you wish to serve it to allow it to defrost safely. Cissy's, Paula's mother, tells me that she slices the brisket before she freezes it, rather than freezing the brisket whole to slice later, so you can certainly do that instead. In fact, I would do what Cissy says. She knows. Whenever you choose to slice it, be sure to do so against the grain.)
On the night you will serve the brisket, preheat the oven to 350 degrees Fahrenheit. In a medium bowl, make another batch of the chili sauce by combining the remaining 1 T. Dijon mustard, 3/4 c. chili sauce, 1/4 c. red wine, 1/3 c. light brown sugar, juice of half a lemon, and 1 t. kosher salt. Add the reserved juices from the original roasting of the brisket, and whisk to combine.
Slice the brisket against the grain and place the slices in a 13" x 9" casserole.
Cover the brisket with the second batch of the chili sauce mixture, then cook, uncovered, for about 30 minutes.
Baste the meat with the sauce a few times while it cooks. The goal is to reheat the meat, reduce the sauce, and develop those wonderful almost-burned crispy edges.
Serve, ask four questions, devour.
Serves 8-10.
++++++
Previously, on A Stove With A House Around It:
One year ago: tomato-water spaghetti
Two years ago: chickpea salad with cumin vinaigrette
Three years ago: chicken souvlaki
Four years ago: chard and ricotta won tons with sage and brown butter
Five years ago: tsoureki
Monday, March 25, 2013
Friday, October 12, 2012
I embraced the hop
I have to admit something.
I used to drink Corona. It was my beer of choice. The fridge was always stocked, and even my parents kept some on hand for my visits. Back in those days, when I wasn't drinking a cosmopolitan, I was drinking a Corona.
I hope you still love me, Cleveland Craft Beer Community.
The thing is, I had no idea that there was anything better out there. I certainly wasn't into beer enough at that point to explore new brew horizons. But then I became pregnant with my first son. Liquorless for 40 weeks, I developed a serious, unexpected, and powerful craving for beer. All I wanted was beer. None of that stereotypical ice-cream-and-pickles garbage for me. No. Beer.
When my first dude was born and I was once again free to imbibe, I started looking past the Corona to see what else was in the beer case. It started innocently enough, with Great Lakes Christmas Ale. At the time, I was pretty certain that this was the finest beer ever made. I bought cases of the stuff. I think there might even be a bottle left in the back of the beer fridge from this introductory binge. We drank it all through the holidays and then, when the calendar page flipped from 2010 to 2011, Husband and I signed up for the Winking Lizard's World Tour of Beers. (Husband wasn't a hardcore beer person, either, as I distinctly recall his late-'90s fondness for Icehouse. But he was more than happy to come along with his wife on this journey.) We plowed through 100 beers each, finishing the Tour in mid-July with nearly six months to spare.
I stopped being afraid of dark beers. I embraced the hop.
Somewhere on the path from Corona to CBS -- and this is the point of this post -- we met an amazing group of people bound together by love of beer. And though love of beer brought us together, I suspect love of hanging out together -- and love of Steve Lawn -- keeps us together. It's a diverse group: some extremely excellent bloggers, teachers, marathon runners, dentists, elementary school principals, Browns fans, Jets fans, R.A. Dickey fans. Though we've only known them a year, it feels like it's been a lot longer. When our beloved dog Jet passed away in March, beer friends brought us our favorite sandwiches, leaving them on our doorstep with a note of condolence. When our second son was born in August, beer friends raised glasses to us across Northeast Ohio (and across social media). If they've got a bottle of rare beer, beer friends open it and pour you a taste. These are quality people, people.
So in honor of the Cleveland Craft Beer Community, as Cleveland Beer Week approaches, as I reflect on how lucky we are to have met such a group of fun, welcoming, and kind people, I'd like to share this recipe for maple-stout bread. I suppose you could make it with Guinness, as the original recipe suggests. But do yourself a favor: find an exceptional stout and use it instead. Then drink the rest of the bottle. Then seek another beer, perhaps something you've never tried before.
The world of fantastic brews awaits, my friends. And speaking of friends, don't be surprised if you make a few new ones along the way.
++++++
n.b. If you also have a fridge full of Corona but desire something greater, please consult the following authorities. They will never steer you wrong on the road to beer nirvana:
Bobby Likes Beer
Brewer's Daughter
Cleveland Food and Brews
Hop Bunnies
Also: If you'd like your love of cooking to collide with your love of craft beer, check out The Beeroness for some phenomenal recipes.
++++++
MAPLE-STOUT BREAD
Adapted from Cooking Light
1 3/4 c. all-purpose flour
1 t. baking soda
1/2 t. baking powder
1/2 t. salt
6 T. butter, softened
3/4 c. dark brown sugar
2 eggs
1/2 t. vanilla extract
1/2 c. good-quality stout beer (such as Founders Breakfast Stout)
1/2 c. sour cream
1/4 c. plus 2 T. real maple syrup, divided
5 T. powdered sugar
Preheat oven to 350 degrees Fahrenheit. Coat a 9" x 5" metal loaf pan with baking spray.
In a medium bowl, whisk together flour, baking soda, baking powder, and salt. Place butter and brown sugar in the bowl of an electric mixer fitted with the paddle attachment; beat at high speed until well blended. Add eggs, 1 at a time, beating well after each addition. Beat in vanilla.
In a liquid measuring cup or small bowl, combine beer, sour cream, and 1/4 cup maple syrup, stirring well with a whisk. Beating at low speed, add the flour mixture and the beer mixture alternately to the butter mixture, beginning and ending with flour mixture. Beat just until combined.
Scrape batter into the prepared pan. Bake at 350° for 40-45 minutes, until a wooden pick inserted in the center comes out with moist crumbs clinging. Cool for 10 minutes in the pan on a wire rack. Remove from pan; cool completely on wire rack.
Place powdered sugar in a small bowl. Add the remaining 2 tablespoons syrup; whisk until smooth. Drizzle glaze over cooled bread; let stand until set, if desired.
Eat, for breakfast, while drinking remaining Breakfast Stout.
Makes 1 cake.
++++++
Previously, on A Stove With A House Around It:
One year ago: spaghetti with herbed turkey meatballs and pesto
Two years ago: homemade meat pies
Three years ago: plum and McIntosh tart
Four years ago: breakfast cookies
I used to drink Corona. It was my beer of choice. The fridge was always stocked, and even my parents kept some on hand for my visits. Back in those days, when I wasn't drinking a cosmopolitan, I was drinking a Corona.
I hope you still love me, Cleveland Craft Beer Community.
The thing is, I had no idea that there was anything better out there. I certainly wasn't into beer enough at that point to explore new brew horizons. But then I became pregnant with my first son. Liquorless for 40 weeks, I developed a serious, unexpected, and powerful craving for beer. All I wanted was beer. None of that stereotypical ice-cream-and-pickles garbage for me. No. Beer.
When my first dude was born and I was once again free to imbibe, I started looking past the Corona to see what else was in the beer case. It started innocently enough, with Great Lakes Christmas Ale. At the time, I was pretty certain that this was the finest beer ever made. I bought cases of the stuff. I think there might even be a bottle left in the back of the beer fridge from this introductory binge. We drank it all through the holidays and then, when the calendar page flipped from 2010 to 2011, Husband and I signed up for the Winking Lizard's World Tour of Beers. (Husband wasn't a hardcore beer person, either, as I distinctly recall his late-'90s fondness for Icehouse. But he was more than happy to come along with his wife on this journey.) We plowed through 100 beers each, finishing the Tour in mid-July with nearly six months to spare.
I stopped being afraid of dark beers. I embraced the hop.
Somewhere on the path from Corona to CBS -- and this is the point of this post -- we met an amazing group of people bound together by love of beer. And though love of beer brought us together, I suspect love of hanging out together -- and love of Steve Lawn -- keeps us together. It's a diverse group: some extremely excellent bloggers, teachers, marathon runners, dentists, elementary school principals, Browns fans, Jets fans, R.A. Dickey fans. Though we've only known them a year, it feels like it's been a lot longer. When our beloved dog Jet passed away in March, beer friends brought us our favorite sandwiches, leaving them on our doorstep with a note of condolence. When our second son was born in August, beer friends raised glasses to us across Northeast Ohio (and across social media). If they've got a bottle of rare beer, beer friends open it and pour you a taste. These are quality people, people.
So in honor of the Cleveland Craft Beer Community, as Cleveland Beer Week approaches, as I reflect on how lucky we are to have met such a group of fun, welcoming, and kind people, I'd like to share this recipe for maple-stout bread. I suppose you could make it with Guinness, as the original recipe suggests. But do yourself a favor: find an exceptional stout and use it instead. Then drink the rest of the bottle. Then seek another beer, perhaps something you've never tried before.
The world of fantastic brews awaits, my friends. And speaking of friends, don't be surprised if you make a few new ones along the way.
++++++
n.b. If you also have a fridge full of Corona but desire something greater, please consult the following authorities. They will never steer you wrong on the road to beer nirvana:
Bobby Likes Beer
Brewer's Daughter
Cleveland Food and Brews
Hop Bunnies
Also: If you'd like your love of cooking to collide with your love of craft beer, check out The Beeroness for some phenomenal recipes.
++++++
MAPLE-STOUT BREAD
Adapted from Cooking Light
1 3/4 c. all-purpose flour
1 t. baking soda
1/2 t. baking powder
1/2 t. salt
6 T. butter, softened
3/4 c. dark brown sugar
2 eggs
1/2 t. vanilla extract
1/2 c. good-quality stout beer (such as Founders Breakfast Stout)
1/2 c. sour cream
1/4 c. plus 2 T. real maple syrup, divided
5 T. powdered sugar
Preheat oven to 350 degrees Fahrenheit. Coat a 9" x 5" metal loaf pan with baking spray.
In a medium bowl, whisk together flour, baking soda, baking powder, and salt. Place butter and brown sugar in the bowl of an electric mixer fitted with the paddle attachment; beat at high speed until well blended. Add eggs, 1 at a time, beating well after each addition. Beat in vanilla.
In a liquid measuring cup or small bowl, combine beer, sour cream, and 1/4 cup maple syrup, stirring well with a whisk. Beating at low speed, add the flour mixture and the beer mixture alternately to the butter mixture, beginning and ending with flour mixture. Beat just until combined.
Scrape batter into the prepared pan. Bake at 350° for 40-45 minutes, until a wooden pick inserted in the center comes out with moist crumbs clinging. Cool for 10 minutes in the pan on a wire rack. Remove from pan; cool completely on wire rack.
Place powdered sugar in a small bowl. Add the remaining 2 tablespoons syrup; whisk until smooth. Drizzle glaze over cooled bread; let stand until set, if desired.
Eat, for breakfast, while drinking remaining Breakfast Stout.
Makes 1 cake.
++++++
Previously, on A Stove With A House Around It:
One year ago: spaghetti with herbed turkey meatballs and pesto
Two years ago: homemade meat pies
Three years ago: plum and McIntosh tart
Four years ago: breakfast cookies
Tuesday, March 6, 2012
Burying the lede
People, seriously. Seriously, people.
I hate how long I've been absent from this space. I hate that I couldn't manage to pop in at any time over the past three months, not even to tell you about the world's most simple and frugal cooking ingredient, tomato water. I hate making excuses. So I won't.
Save this one: I am a lazy ass.
I have spent the majority of the past three months napping, at least those hours when I wasn't at work. Frankly, I might have napped at work, but my office door has six windows set into it, and, dude, you can see through it. I can't even nap under my desk a la Constanza, as my desk is simply a table.
Anyway, I'm burying the lede. I'm so freaking nappy because I'm once again expecting a little one, scheduled to join us in August, two years after his/her big brother was born. So basically, if you're not TiVoed episodes of "America's Test Kitchen," or the absolutely dreadful Sex and the City 2 movie being replayed ad nauseam on HBO in the middle of the night, or a "Diners, Drive-Ins, and Dives" marathon, or the sofa, or my son, or my high-maintenance dog, then I have not been paying attention to you. (Note: Husband did not make that list. Neither did the dishes, or the laundry.) (Don't I have really great taste in television?)
All this doesn't mean I haven't been thinking of cooking, though. Because I have been. I've been thinking a lot about tomato water, ever since the maestro Ruhlman mentioned it on his site back in October 2010. As a lover of everything pasta and everything tomato -- and a staunch advocate of frugality in the kitchen -- tomato water speaks to me. Each time I'm using fresh tomatoes as the basis for a roasted tomato sauce, I now set them in a colander over a large bowl, salt them, and capture their water. The resulting more concentrated tomatoes make for an even richer, deeper roasted sauce, and the tomato water gets frozen, awaiting the next time I make the following dish.
You might think tomato-water spaghetti would be thin, watery, and flavorless. You would be wrong. It is delicate, fresh, tomato-y, and subtly salty. The tomato water, once it simmers a bit and mixes with the butter and the residual starch washing off the cooked pasta, turns velvety soft and smooth. It clings to the pasta beautifully, cloaking it with a pinkish, savory veil. It's a little beguiling, really, and its ability to charm and bewitch completely belies its frugal, otherwise-waste roots.
So apparently you can make a silk purse out of a sow's ear. And you can get a pregnant lady off the couch long enough to share a recipe.
++++++
TOMATO-WATER SPAGHETTI
Adapted from Michael Ruhlman
Note: If you don't have tomato water waiting for you in your freezer, start stocking up the next time you use fresh tomatoes in a sauce or stew. Simply peel the tomatoes, cut them into chunks and place them in a colander set over a large bowl. Toss the tomatoes with a few pinches of kosher salt and let them drain. Freeze the water for use later, then proceed with however you were going to use the tomatoes themselves. I find that 6-8 large tomatoes will yield the 1 1/2 c. of tomato water called for in this recipe.
Another note: You'll want to serve this dish with plenty of crusty bread, for sopping. Sopping is key.
1 lb. spaghetti
2 T. olive oil
10 cloves garlic, chopped
1 1/2 c. tomato water
1 c. fresh basil, roughly chopped, divided
3 oz. unsalted butter, cut into 3 chunks
Kosher salt, to taste
Pecorino, grated, to taste
1 c. fresh tomatoes, diced (optional)
Bring a large pot of salted water to a boil, and cook the spaghetti according to package directions until it is al dente.
While the spaghetti cooks, heat the olive oil in a large skillet over medium heat and add the garlic. Cook for a few minutes, stirring frequently, until the garlic just turns brown at the edges. Do not burn the garlic! Horribleness will ensure.
Add the tomato water to the garlic, swirling to combine. Cook the tomato water until it reduces and thickens slightly. Add 3/4 c. of the basil. Add the butter, one piece at a time, whisking it into the sauce until it melts.
Drain the pasta, and add it to the tomato-water sauce in the skillet. Using a pair of tongs, stir the spaghetti until it is evenly coated with the sauce. Taste, and season with a little salt, if you like. Add the remaining 1/4 c. basil.
Serve in big bowls topped with Pecorino and, if so desired, a few spoonfuls of fresh chopped tomatoes.
Serves 2-4, depending on hunger level. Frankly, I think it serves 2.
++++++
Previously, on A Stove With A House Around It:
One year ago: coffee liqueur barbecue sauce + homemade coffee liqueur
Two years ago: layered chocolate fudge cake
Three years ago: cinnamon ice cream + chocolate Valentino
Four years ago: chicken divan
I hate how long I've been absent from this space. I hate that I couldn't manage to pop in at any time over the past three months, not even to tell you about the world's most simple and frugal cooking ingredient, tomato water. I hate making excuses. So I won't.
Save this one: I am a lazy ass.
I have spent the majority of the past three months napping, at least those hours when I wasn't at work. Frankly, I might have napped at work, but my office door has six windows set into it, and, dude, you can see through it. I can't even nap under my desk a la Constanza, as my desk is simply a table.
Anyway, I'm burying the lede. I'm so freaking nappy because I'm once again expecting a little one, scheduled to join us in August, two years after his/her big brother was born. So basically, if you're not TiVoed episodes of "America's Test Kitchen," or the absolutely dreadful Sex and the City 2 movie being replayed ad nauseam on HBO in the middle of the night, or a "Diners, Drive-Ins, and Dives" marathon, or the sofa, or my son, or my high-maintenance dog, then I have not been paying attention to you. (Note: Husband did not make that list. Neither did the dishes, or the laundry.) (Don't I have really great taste in television?)
All this doesn't mean I haven't been thinking of cooking, though. Because I have been. I've been thinking a lot about tomato water, ever since the maestro Ruhlman mentioned it on his site back in October 2010. As a lover of everything pasta and everything tomato -- and a staunch advocate of frugality in the kitchen -- tomato water speaks to me. Each time I'm using fresh tomatoes as the basis for a roasted tomato sauce, I now set them in a colander over a large bowl, salt them, and capture their water. The resulting more concentrated tomatoes make for an even richer, deeper roasted sauce, and the tomato water gets frozen, awaiting the next time I make the following dish.
You might think tomato-water spaghetti would be thin, watery, and flavorless. You would be wrong. It is delicate, fresh, tomato-y, and subtly salty. The tomato water, once it simmers a bit and mixes with the butter and the residual starch washing off the cooked pasta, turns velvety soft and smooth. It clings to the pasta beautifully, cloaking it with a pinkish, savory veil. It's a little beguiling, really, and its ability to charm and bewitch completely belies its frugal, otherwise-waste roots.
So apparently you can make a silk purse out of a sow's ear. And you can get a pregnant lady off the couch long enough to share a recipe.
++++++
TOMATO-WATER SPAGHETTI
Adapted from Michael Ruhlman
Note: If you don't have tomato water waiting for you in your freezer, start stocking up the next time you use fresh tomatoes in a sauce or stew. Simply peel the tomatoes, cut them into chunks and place them in a colander set over a large bowl. Toss the tomatoes with a few pinches of kosher salt and let them drain. Freeze the water for use later, then proceed with however you were going to use the tomatoes themselves. I find that 6-8 large tomatoes will yield the 1 1/2 c. of tomato water called for in this recipe.
Another note: You'll want to serve this dish with plenty of crusty bread, for sopping. Sopping is key.
1 lb. spaghetti
2 T. olive oil
10 cloves garlic, chopped
1 1/2 c. tomato water
1 c. fresh basil, roughly chopped, divided
3 oz. unsalted butter, cut into 3 chunks
Kosher salt, to taste
Pecorino, grated, to taste
1 c. fresh tomatoes, diced (optional)
Bring a large pot of salted water to a boil, and cook the spaghetti according to package directions until it is al dente.
While the spaghetti cooks, heat the olive oil in a large skillet over medium heat and add the garlic. Cook for a few minutes, stirring frequently, until the garlic just turns brown at the edges. Do not burn the garlic! Horribleness will ensure.
Add the tomato water to the garlic, swirling to combine. Cook the tomato water until it reduces and thickens slightly. Add 3/4 c. of the basil. Add the butter, one piece at a time, whisking it into the sauce until it melts.
Drain the pasta, and add it to the tomato-water sauce in the skillet. Using a pair of tongs, stir the spaghetti until it is evenly coated with the sauce. Taste, and season with a little salt, if you like. Add the remaining 1/4 c. basil.
Serve in big bowls topped with Pecorino and, if so desired, a few spoonfuls of fresh chopped tomatoes.
Serves 2-4, depending on hunger level. Frankly, I think it serves 2.
++++++
Previously, on A Stove With A House Around It:
One year ago: coffee liqueur barbecue sauce + homemade coffee liqueur
Two years ago: layered chocolate fudge cake
Three years ago: cinnamon ice cream + chocolate Valentino
Four years ago: chicken divan
Friday, December 2, 2011
Now there are four
I am Anti-Leftovers.
Husband loves them. Loves them so much that he affectionately calls them "lefties." While he will happily eat week-old chana masala for breakfast, the leftover has to be something special indeed for me to dig into it. Even one of my favorite foods in the world -- Mom's stuffing -- is languishing in its leftover form. I can't even think of a single thing that I truly enjoy the second time around. Oh. Turkey tacos. But that's it. I think maybe it's a mental problem.
| Who wants this? I don't. |
My vigorous Anti-Leftover stance reaches epic proportions around Thanksgiving time, when one is not only flooded with the leftovers themselves, but with 8,342,361 recipes for how to use them. Food magazines, food TV, food Internets, food iPad apps, all falling over themselves to inspire you to make a stuffing frittata or a turkey chili named after Guy Fieri's son. In my mind, there are exactly three things to do with Thanksgiving leftovers: (1) reheat and enjoy them as they are, if you must; (2) make a turkey sandwich; and (3) make turkey stock. (Actually, the stock is required. But that is another post.)
But now there are four. Welcome to the only recipe that utilizes Thanksgiving leftovers that I shall countenance: TURKEY COOKIES. FOR THE DOG.
This recipe is just perfect: making it ensures that no turkey will be wasted, as you can wait until the Pro-Leftovers people in your house have their fill, then use the remaining scraps for these "cookies." (I can't bear to waste meat -- an animal gave its life for what's on that plate, it's not right to throw any of it away.) Even if it's a day or so past its prime, I assure you, your pup won't care. As long as your best friend isn't on a restricted diet that would prohibit any of the component ingredients, this is a healthy doggie treat, made with love, that will make your companion love you even more than she already does.
And it will make me love you, because you are being rational about Thanksgiving leftovers. And I know how you crave my approval.
P.S. I am not alone in my T-giving leftover disdain: my rigid worldview was bolstered this year by a writer for Slate.com, Jill Pellettieri, who makes a persuasive and dare I say definitive case against Thanksgiving leftovers in a piece titled, "Let Leftovers Be Leftovers." Jill reasons: you wouldn't make a turkey quesadilla suiza any other day of the year, so why must you on the last Friday of November? Additionally, and most compelling, she advocates eschewing leftovers because one should keep the special and ceremonial Thanksgiving meal just that -- special. If you are going to spend most of November preparing for a single meal, why would you not enjoy what's left of that meal as it is? Why cobble it into something else, be it a pot pie or a hash or a soup? If you love Thanksgiving food so much as to spend the better part of a month making it, why discard it so callously after just one plateful?
"We spend weeks planning for Thanksgiving dinner. We travel great distances to enjoy it with loved ones. We postpone diets to gorge ourselves. We may even fast all day to make room for one more slice of pumpkin pie. Why not enjoy the leftovers for what they are, a delicious continuation of that feast? Why replace these rituals with recipes that are not only ridiculous, but create more work? Let Thanksgiving live out its natural life—you'll know when it's time to move on."
It's a good argument, I tell you, and Jill, I want you to be my new bestie.
++++++
TURKEY COOKIES
Adapted from a recipe that appeared in my local vet's newsletter
2 c. cooked turkey, cut into a small dice
3 T. grated cheese (my pup Jet likes sharp cheddar)
1 T. fresh parsley, chopped
4 eggs
2 c. whole wheat flour
2 T. nutritional yeast (or brewer's yeast)
2 T. vegetable oil
Preheat the oven to 350 degrees Fahrenheit. Line a baking sheet with parchment paper. In a medium bowl, combine the turkey, cheese and parsley. Mix well. In a separate bowl, beat the eggs and pour over the turkey mixture.
Add the flour, nutritional yeast and oil. Using your hands, mix until the ingredients are thoroughly combined and the mixture resembles a dough ball.
Using a spring-loaded scoop (or two spoons), portion the cookies, rolling each into a ball. Place on the prepared baking sheet. Using the bottom of a small juice glass, gently press each ball into a flat round about 1 inch thick.
Bake for 18-20 minutes, until the cookies are brown and firm. Remove to a wire rack to cool completely; feed to best friend.
Turkey cookies must be stored in the refrigerator.
Makes about 2 1/2 dozen.
2 c. cooked turkey, cut into a small dice
3 T. grated cheese (my pup Jet likes sharp cheddar)
1 T. fresh parsley, chopped
4 eggs
2 c. whole wheat flour
2 T. nutritional yeast (or brewer's yeast)
2 T. vegetable oil
Preheat the oven to 350 degrees Fahrenheit. Line a baking sheet with parchment paper. In a medium bowl, combine the turkey, cheese and parsley. Mix well. In a separate bowl, beat the eggs and pour over the turkey mixture.
| "I hear these can also be served to cats. But I don't know nothin' 'bout no cats." |
Add the flour, nutritional yeast and oil. Using your hands, mix until the ingredients are thoroughly combined and the mixture resembles a dough ball.
Using a spring-loaded scoop (or two spoons), portion the cookies, rolling each into a ball. Place on the prepared baking sheet. Using the bottom of a small juice glass, gently press each ball into a flat round about 1 inch thick.
Bake for 18-20 minutes, until the cookies are brown and firm. Remove to a wire rack to cool completely; feed to best friend.
Turkey cookies must be stored in the refrigerator.
Makes about 2 1/2 dozen.
++++++
Previously, on A Stove With A House Around It:
One year ago: apple and cheddar scones
Two years ago: kaiser rolls
Three years ago: turkey meatballs
Saturday, November 12, 2011
Dear fig-walnut pie of '10
This is a pie that I made a year ago.
I was all gung-ho about this pie, creating the recipe and baking it the night before Thanksgiving and then nibbling on it contentedly the next day. I had every intention of sharing it with you last year, but then I was all, "Thanksgiving's over now, does anyone really want to know about a fig-walnut pie? Surely they've moved on to gingerbread and thoughts of reindeer hooves on the roof."
Thus, the recipe and these photos have languished, imprisoned in the tiny jail cell that is an 8-GB SD card. I'd look at them every so often. Hm, I could write about this pie. But it's May! Nobody bakes pies in the spring. And then, Here's this pie again. But it's August! It's a million degrees! Plus, Thanksgiving will be here in no time.
As it is, time flies. And here we are: less than two weeks from Thanksgiving. Time to talk about the pie! Huzzah!
This whole thing came about last year when I was sitting around thinking about how people love pecan pies (myself included), but I never hear anyone talk about a walnut pie. Why not? I demanded an answer. A preliminary Google search told me that walnut pies do indeed exist. There are plenty of recipes out there. But they don't seem to enjoy the same headline-grabbing pie-ttention that their pecan cousins command. I was going to change that, if only for myself and whoever else managed to get a fork in the pie before I devoured it, all un-ladylike.
I threw figs into the mix because I determined that an all-walnut pie might be too overpowering with slightly bitter walnut aftertaste -- which I normally love when I'm snacking on walnuts but that might become too much within the context of a walnut-only pie. I started thinking about where I find walnuts, culinarily. On cheese trays. Next to the yummy veined cheeses. Alongside a fig or two, cut in half to show off their rustic, seeded centers. I almost went down the path of making a savory tart, with the blue cheese incorporated -- maybe I'll do that this year! -- but in the end, baked up a rich, and sweet beauty chock full of walnuts and chewy flecks of dried fig.
And with that, dear fig-walnut pie of '10, I release you from the SD card.
+++++++
FIG-WALNUT PIE
I used America's Test Kitchen's vodka pie crust recipe for this pie, and let me tell you: like everything else America's Test Kitchen does, it was perfect. Easy to work with, flaky, tasty, fantastic. But of course, you may use any pie crust that you love with all your heart.
Please note: if you do go with the vodka pie dough, the recipe makes enough for a double-crust pie, which this isn't. So go ahead and wrap the second disk in several layers of plastic wrap and freeze; it freezes quite well and then you'll be ready for impromptu pie-making. 'Cause that always happens.
Remove the pie shell from the refrigerator and fill about 3/4 full with walnuts. Add the rum-soaked figs -- and any remaining rum in the bowl -- to the filling; stir to combine. Pour the filling over the walnuts and bake for 30-35 minutes. Cool on a wire rack for about 15 minutes before cutting and serving.
I was all gung-ho about this pie, creating the recipe and baking it the night before Thanksgiving and then nibbling on it contentedly the next day. I had every intention of sharing it with you last year, but then I was all, "Thanksgiving's over now, does anyone really want to know about a fig-walnut pie? Surely they've moved on to gingerbread and thoughts of reindeer hooves on the roof."
Thus, the recipe and these photos have languished, imprisoned in the tiny jail cell that is an 8-GB SD card. I'd look at them every so often. Hm, I could write about this pie. But it's May! Nobody bakes pies in the spring. And then, Here's this pie again. But it's August! It's a million degrees! Plus, Thanksgiving will be here in no time.
As it is, time flies. And here we are: less than two weeks from Thanksgiving. Time to talk about the pie! Huzzah!
This whole thing came about last year when I was sitting around thinking about how people love pecan pies (myself included), but I never hear anyone talk about a walnut pie. Why not? I demanded an answer. A preliminary Google search told me that walnut pies do indeed exist. There are plenty of recipes out there. But they don't seem to enjoy the same headline-grabbing pie-ttention that their pecan cousins command. I was going to change that, if only for myself and whoever else managed to get a fork in the pie before I devoured it, all un-ladylike.
I threw figs into the mix because I determined that an all-walnut pie might be too overpowering with slightly bitter walnut aftertaste -- which I normally love when I'm snacking on walnuts but that might become too much within the context of a walnut-only pie. I started thinking about where I find walnuts, culinarily. On cheese trays. Next to the yummy veined cheeses. Alongside a fig or two, cut in half to show off their rustic, seeded centers. I almost went down the path of making a savory tart, with the blue cheese incorporated -- maybe I'll do that this year! -- but in the end, baked up a rich, and sweet beauty chock full of walnuts and chewy flecks of dried fig.
And with that, dear fig-walnut pie of '10, I release you from the SD card.
| (In context, second from right) |
+++++++
FIG-WALNUT PIE
I used America's Test Kitchen's vodka pie crust recipe for this pie, and let me tell you: like everything else America's Test Kitchen does, it was perfect. Easy to work with, flaky, tasty, fantastic. But of course, you may use any pie crust that you love with all your heart.
Please note: if you do go with the vodka pie dough, the recipe makes enough for a double-crust pie, which this isn't. So go ahead and wrap the second disk in several layers of plastic wrap and freeze; it freezes quite well and then you'll be ready for impromptu pie-making. 'Cause that always happens.
For the crust:
2 1/2 c. all-purpose flour, divided
1 t. kosher salt
2 T. sugar
12 T. cold unsalted butter, cut into 1/4-inch pieces
1/2 c. cold vegetable shortening, cut into 4 pieces
1/4 c. vodka, cold
1/4 c. cold water
For the pie:
1/4 c. dried figs
2 T. dark rum
1/4 c. unsalted butter
1/2 c. light brown sugar
1/2 c. light corn syrup
Pinch kosher salt
2 large eggs
12 oz. raw unsalted walnuts, roughly chopped
First, make the crust. Place 1 1/2 c. of the flour, salt and sugar in a food processor and pulse until combined. Add the butter and the shortening and process until a homogeneous dough begins to collect in uneven clumps, about 15 seconds (the dough will resemble cottage cheese curds). With a rubber spatula, scrape the bowl to redistribute the dough around the blade. Add the remaining cup of flour and pulse until the mixture is evenly distributed around the bowl, 4 to 6 quick pulses. Empty the mixture into a medium bowl.
Sprinkle vodka and water over the mixture. With a rubber spatula and using a folding motion, mix the dough, pressing down on it until it is slightly tacky and sticks together. Divide the dough into 2 even balls and flatten each into a 4-inch disk. Wrap each in plastic wrap and refrigerate at least 45 minutes, or up to 2 days.
Remove the pie dough from the refrigerator about 15 minutes before you wish to work with it. At this time, preheat the oven to 350 degrees Fahrenheit. On a
floured work surface, roll out the dough into a 10-inch round (you might need a little more flour than usual if you're using the vodka dough, as it's a bit stickier). Place the
dough in a pie plate, trim and flute the edges and return to the
refrigerator to chill while you assemble the filling.
In a small bowl, soak the figs in the rum. Let the figs sit while you assemble the rest of the filling.
Melt
the butter in a medium saucepan over low heat. When the butter is
melted, remove from the heat and add brown sugar, corn syrup, salt and eggs. Whisk the mixture until well-combined.
Remove the pie shell from the refrigerator and fill about 3/4 full with walnuts. Add the rum-soaked figs -- and any remaining rum in the bowl -- to the filling; stir to combine. Pour the filling over the walnuts and bake for 30-35 minutes. Cool on a wire rack for about 15 minutes before cutting and serving.
Makes one pie.
++++++
Previously, on A Stove With A House Around It:
One year ago: apple and cheddar scones
Two years ago: twice-baked cauliflower
Three years ago: dark gingerbread pear cake
Sunday, October 30, 2011
Thought wistfully of laminated dough
Gather 'round, kids. I would like to tell you a story.
It's the late '90s. Let's say 1998. I live in Chicago, a stone's throw from Wrigley Field, a cosmopolitan's sip from the heart of Boystown (otherwise known as Sidetrack). My third-floor apartment, though a one-bedroom, is so small that the kitchen doesn't have a single drawer. I'm still in the futon stage. The living room wall is festooned with a ceremonial street sign from when they christened my street, Cornelia Ave., "The Jon Simmons Parade." (This sign was much funnier and much more festive before I learned that Jon Simmons was a slain gay activist.) (I loved that sign, though, and still have it.) (No, I didn't steal it. It was $5 at a thrift shop on Halsted and Addison.) Even though my apartment is tiny, I have a wine rack with a built-in bar, copper bowls for mixing egg whites to stiff peaks, and enough room, somehow, to braid a tsoureki.
When I'm not at work on W. Wacker overlooking the Chicago River, or watching "Mr. Show with Bob and David" with Sort-Of Boyfriend (who would become Husband seven years later), or belting out showtunes at the aforementioned Sidetrack, I am sitting in that teeny apartment, on the futon, watching the fledgling Food Network, specifically "Taste." "Taste" is the brainchild of the inimitable David Rosengarten, who, it would turn out, was rather imitable in that Alton Brown came along to do the same show, to great effect, with "Good Eats." I digress. The "Taste" episode I'm watching is devoted to croissants, and it is particularly compelling: croissant dough is a laminated dough! Laminating dough is a lengthy process that involves constructing many alternating sheets of dough and butter, which puff during baking to create the flaky layers associated with a good croissant. Who on earth has the time and patience to make such a thing?!?? I wonder. It should be said that I also wonder how it will ever be possible that it will be the year 2000 and I will be twenty-six. I watch the rest of the episode, turn off the TV and head out for the evening, probably with a bottle of sparkling wine or vodka in hand.
Wasn't that a great story?
I've often thought wistfully of laminated dough since that day. Could I do it? Would it work? Am I crazy? Then, one bright day in 2011 -- bolstered by the intervening decade-plus of cooking and the experience of writing this blog for several years -- I see a croissant recipe in my Baking Illustrated cookbook and realize that laminating dough is actually very simple.
I made croissants. They were so easy. They were so amazing.
Then I found a recipe for deep-dish pizza with a cornmeal-flecked laminated crust. I made that, too. It was so easy. It was so amazing.
Now all I want to do is laminate dough. I suggest you do the same.
++++++
CROISSANTS
Adapted from Baking Illustrated
A note: this recipe allows you do to something called "FORMING THE BUTTER SQUARE." It is fun, and intense.
Another, more practical note: this dough needs to be cold when you work with it. Make sure it's thoroughly chilled before you begin rolling it out. If it gets warm or sticky, wrap it in plastic wrap and chill again. Your vigilance will be rewarded.
One last note: it helps to have a ruler for this recipe. Embrace your inner massive geek and buy a nice metal one and dedicate it to kitchen use.
And finally: this recipe includes the phrase "isosceles triangle." Do not be intimidated.
For the dough:
3 c. (15 oz.) all-purpose flour, plus extra for rolling
1 T. instant yeast
1/4 c. (1 3/4 oz.) sugar
1 1/4 t. kosher salt
1 1/4 c. whole milk, cold
2 T. unsalted butter
For the BUTTER SQUARE:
24 T. (3 sticks) unsalted butter, cut into 1-T pieces and kept cold
2 T. all-purpose flour
For the egg wash:
1 large egg, beaten
First, make the dough. In a medium bowl, whisk 2 3/4 c. of the flour with the yeast, sugar and salt. Place the milk in the bowl of an electric mixer fitted with the dough hook. Add the flour mixture to the milk and mix at low speed until a ball of dough forms, about 5 minutes.
Cut the 2 T. of butter into small pieces and add them to the dough. Continue to knead until the butter is fully incorporated and the dough becomes smooth and clears the sides of the bowl, about 5-6 minutes more. The dough should be sticky, but if more dough is sticking to the sides of the bowl than to itself, add the remaining 1/4 c. flour, 1 T. at a time. Wrap the dough in plastic wrap and refrigerate for 1 hour.
While the dough is chilling, have the time of your life while making the BUTTER SQUARE. Using a bench scraper, toss the butter pieces and flour together on a clean work surface. Smear the butter back and forth against the work surface until they combine into a smooth, homogeneous mixture. Wrap the butter mixture in plastic wrap and use the edges of the plastic to form it into an even 7-inch square. Refrigerate the butter square until ready to use, at least 30 minutes.
When everything is thoroughly chilled, it's time to make the turns. Lightly dust a work surface with flour. Roll the dough into an 11-inch square. Place the BUTTER SQUARE diagonally on top of the dough.
Fold the corners of the dough over the butter so they meet in the middle of the BUTTER SQUARE. Pinch the ends of the dough together to seal.
Using a rolling pin, tap the dough from the center outward until the butter begins to soften and become malleable. Gently roll the dough into a 14-inch square, dusting the work surface with flour as necessary to prevent sticking.
Fold one outside edge of the dough in toward the center and bring the opposite outside edge in over the top, as if folding a business letter.
Repeat the process, but folding over each end to make a square.
Congratulations! You have made 2 turns. Wrap the dough in plastic wrap and refrigerate for 2 hours.
After 2 hours, make 2 more turns. Remove the dough and place again on a work surface lightly dusted with flour. As before, roll the dough into a 14-inch square. Fold as before: first like a business letter, then folding over each end to make a square. Chill again for at least 2 hours.
Now it's time to shape the croissants. Line 2 baking sheets with parchment paper. Place the chilled dough onto a floured surface and gently roll it into a 20-inch square. Using a pizza cutter and your handy ruler, cut the dough into two equal rectangles. Cut each rectangle into thirds width-wise and then into triangles, for a total of 12 triangles.
Working one at a time, lift each triangle off the work surface, holding the base in one hand and the tip in the other. Gently stretch it into an isosceles triangle with two sides equal in length.
Place the triangle back on the work surface. With the base closest to you, cut a 1-inch slit into the center of the base of the triangle. Fold the two sides of the slit outward.
With both hands, roll the triangle from the base, gently stretching the dough as you roll and leaving the last 1/4-inch of the tip unrolled.
Transfer the croissant to the prepared baking sheet. Bring the ends of the croissant toward each other to form a crescent shape. Repeat with the remaining triangles.
Cover the croissants loosely with plastic wrap and let them rise at room temperature until puffy, 45-60 minutes. They will not double in size.
Finally, brush with egg wash and bake. Heat the oven to 400 degrees Fahrenheit. Brush the croissants with the beaten egg. Bake until the croissants are golden brown, about 18 minutes, rotating the baking sheet halfway through the baking time.
Cool on a wire rack for about 15 minutes before devouring them all in an embarrassing fashion.
Makes 12 croissants, best served fresh out the kitchen. However, they can be kept at room temperature for 2 days. You can also wrap them well in plastic and keep them in the freezer for up to 2 weeks, reheating them from frozen in a 300-degree oven for 5-10 minutes, but I wouldn't know anything about that because I consume all croissants without delay.
++++++
Previously, on A Stove With A House Around It:
One year ago: walnut shortbread
Two years ago: macaron fail (boy, isn't that fun to re-live)
Three years ago: pizza Margherita and pizza with sage-walnut pesto and gorgonzola
It's the late '90s. Let's say 1998. I live in Chicago, a stone's throw from Wrigley Field, a cosmopolitan's sip from the heart of Boystown (otherwise known as Sidetrack). My third-floor apartment, though a one-bedroom, is so small that the kitchen doesn't have a single drawer. I'm still in the futon stage. The living room wall is festooned with a ceremonial street sign from when they christened my street, Cornelia Ave., "The Jon Simmons Parade." (This sign was much funnier and much more festive before I learned that Jon Simmons was a slain gay activist.) (I loved that sign, though, and still have it.) (No, I didn't steal it. It was $5 at a thrift shop on Halsted and Addison.) Even though my apartment is tiny, I have a wine rack with a built-in bar, copper bowls for mixing egg whites to stiff peaks, and enough room, somehow, to braid a tsoureki.
When I'm not at work on W. Wacker overlooking the Chicago River, or watching "Mr. Show with Bob and David" with Sort-Of Boyfriend (who would become Husband seven years later), or belting out showtunes at the aforementioned Sidetrack, I am sitting in that teeny apartment, on the futon, watching the fledgling Food Network, specifically "Taste." "Taste" is the brainchild of the inimitable David Rosengarten, who, it would turn out, was rather imitable in that Alton Brown came along to do the same show, to great effect, with "Good Eats." I digress. The "Taste" episode I'm watching is devoted to croissants, and it is particularly compelling: croissant dough is a laminated dough! Laminating dough is a lengthy process that involves constructing many alternating sheets of dough and butter, which puff during baking to create the flaky layers associated with a good croissant. Who on earth has the time and patience to make such a thing?!?? I wonder. It should be said that I also wonder how it will ever be possible that it will be the year 2000 and I will be twenty-six. I watch the rest of the episode, turn off the TV and head out for the evening, probably with a bottle of sparkling wine or vodka in hand.
Wasn't that a great story?
I've often thought wistfully of laminated dough since that day. Could I do it? Would it work? Am I crazy? Then, one bright day in 2011 -- bolstered by the intervening decade-plus of cooking and the experience of writing this blog for several years -- I see a croissant recipe in my Baking Illustrated cookbook and realize that laminating dough is actually very simple.
I made croissants. They were so easy. They were so amazing.
Then I found a recipe for deep-dish pizza with a cornmeal-flecked laminated crust. I made that, too. It was so easy. It was so amazing.
Now all I want to do is laminate dough. I suggest you do the same.
++++++
CROISSANTS
Adapted from Baking Illustrated
A note: this recipe allows you do to something called "FORMING THE BUTTER SQUARE." It is fun, and intense.
Another, more practical note: this dough needs to be cold when you work with it. Make sure it's thoroughly chilled before you begin rolling it out. If it gets warm or sticky, wrap it in plastic wrap and chill again. Your vigilance will be rewarded.
One last note: it helps to have a ruler for this recipe. Embrace your inner massive geek and buy a nice metal one and dedicate it to kitchen use.
And finally: this recipe includes the phrase "isosceles triangle." Do not be intimidated.
For the dough:
3 c. (15 oz.) all-purpose flour, plus extra for rolling
1 T. instant yeast
1/4 c. (1 3/4 oz.) sugar
1 1/4 t. kosher salt
1 1/4 c. whole milk, cold
2 T. unsalted butter
For the BUTTER SQUARE:
24 T. (3 sticks) unsalted butter, cut into 1-T pieces and kept cold
2 T. all-purpose flour
For the egg wash:
1 large egg, beaten
First, make the dough. In a medium bowl, whisk 2 3/4 c. of the flour with the yeast, sugar and salt. Place the milk in the bowl of an electric mixer fitted with the dough hook. Add the flour mixture to the milk and mix at low speed until a ball of dough forms, about 5 minutes.
Cut the 2 T. of butter into small pieces and add them to the dough. Continue to knead until the butter is fully incorporated and the dough becomes smooth and clears the sides of the bowl, about 5-6 minutes more. The dough should be sticky, but if more dough is sticking to the sides of the bowl than to itself, add the remaining 1/4 c. flour, 1 T. at a time. Wrap the dough in plastic wrap and refrigerate for 1 hour.
While the dough is chilling, have the time of your life while making the BUTTER SQUARE. Using a bench scraper, toss the butter pieces and flour together on a clean work surface. Smear the butter back and forth against the work surface until they combine into a smooth, homogeneous mixture. Wrap the butter mixture in plastic wrap and use the edges of the plastic to form it into an even 7-inch square. Refrigerate the butter square until ready to use, at least 30 minutes.
When everything is thoroughly chilled, it's time to make the turns. Lightly dust a work surface with flour. Roll the dough into an 11-inch square. Place the BUTTER SQUARE diagonally on top of the dough.
Fold the corners of the dough over the butter so they meet in the middle of the BUTTER SQUARE. Pinch the ends of the dough together to seal.
Using a rolling pin, tap the dough from the center outward until the butter begins to soften and become malleable. Gently roll the dough into a 14-inch square, dusting the work surface with flour as necessary to prevent sticking.
Fold one outside edge of the dough in toward the center and bring the opposite outside edge in over the top, as if folding a business letter.
Repeat the process, but folding over each end to make a square.
Congratulations! You have made 2 turns. Wrap the dough in plastic wrap and refrigerate for 2 hours.
After 2 hours, make 2 more turns. Remove the dough and place again on a work surface lightly dusted with flour. As before, roll the dough into a 14-inch square. Fold as before: first like a business letter, then folding over each end to make a square. Chill again for at least 2 hours.
Now it's time to shape the croissants. Line 2 baking sheets with parchment paper. Place the chilled dough onto a floured surface and gently roll it into a 20-inch square. Using a pizza cutter and your handy ruler, cut the dough into two equal rectangles. Cut each rectangle into thirds width-wise and then into triangles, for a total of 12 triangles.
Working one at a time, lift each triangle off the work surface, holding the base in one hand and the tip in the other. Gently stretch it into an isosceles triangle with two sides equal in length.
Place the triangle back on the work surface. With the base closest to you, cut a 1-inch slit into the center of the base of the triangle. Fold the two sides of the slit outward.
With both hands, roll the triangle from the base, gently stretching the dough as you roll and leaving the last 1/4-inch of the tip unrolled.
Transfer the croissant to the prepared baking sheet. Bring the ends of the croissant toward each other to form a crescent shape. Repeat with the remaining triangles.
Cover the croissants loosely with plastic wrap and let them rise at room temperature until puffy, 45-60 minutes. They will not double in size.
Finally, brush with egg wash and bake. Heat the oven to 400 degrees Fahrenheit. Brush the croissants with the beaten egg. Bake until the croissants are golden brown, about 18 minutes, rotating the baking sheet halfway through the baking time.
Cool on a wire rack for about 15 minutes before devouring them all in an embarrassing fashion.
Makes 12 croissants, best served fresh out the kitchen. However, they can be kept at room temperature for 2 days. You can also wrap them well in plastic and keep them in the freezer for up to 2 weeks, reheating them from frozen in a 300-degree oven for 5-10 minutes, but I wouldn't know anything about that because I consume all croissants without delay.
++++++
Previously, on A Stove With A House Around It:
One year ago: walnut shortbread
Two years ago: macaron fail (boy, isn't that fun to re-live)
Three years ago: pizza Margherita and pizza with sage-walnut pesto and gorgonzola
Tuesday, October 25, 2011
Squarely in order
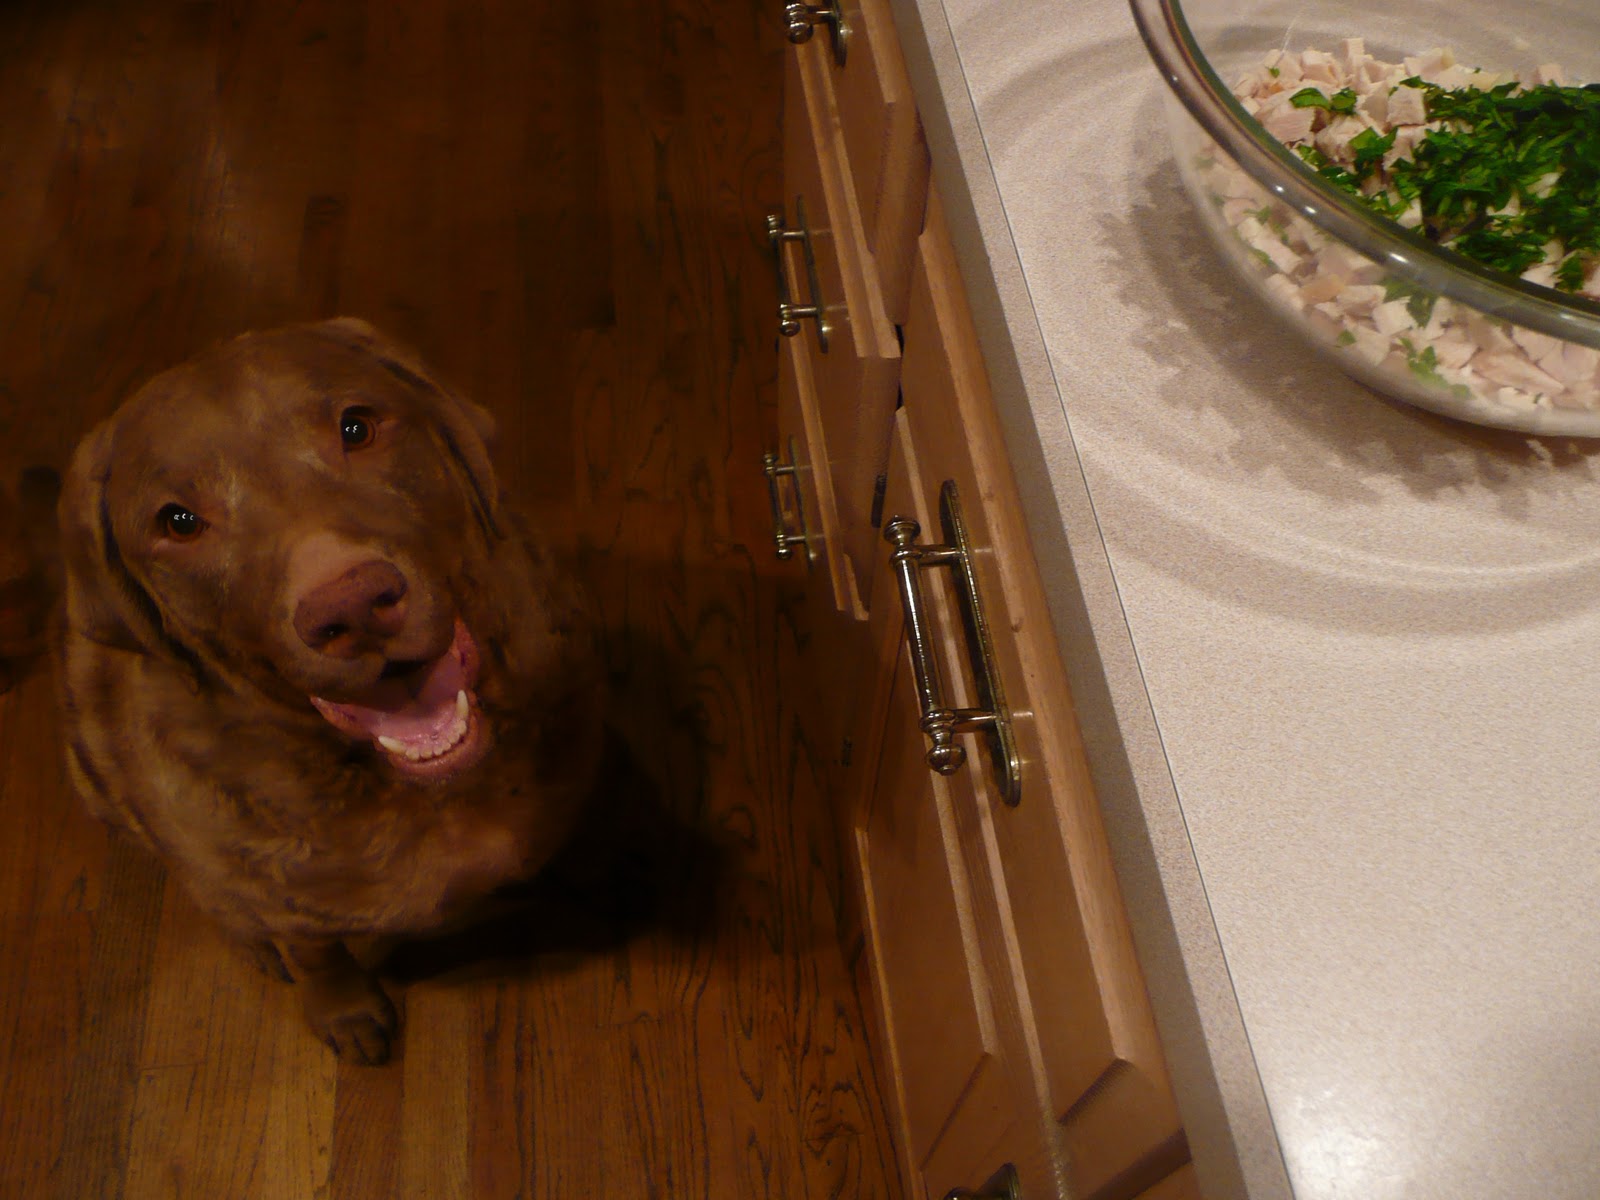
The first thing my son learned how to do -- the first thing that wasn't instinctive, like eating or crying or turning over -- was feed the dog a treat. Honestly. His first party trick was not to play peekaboo or patty cake or shake a rattle. It was to take the Barkwheat handed to him, hold it out patiently and wait for the large Chesapeake Bay Retriever to extract it, gingerly, from his tiny human-paw. I could not be more proud of him, as it is clear that even as a wee tot, he has his priorities squarely in order.
So when he began to grow very weary of smoothly-pureed baby food, whether store-bought or prepared at home by me, I felt the least I could do to reward his dog-loving instincts was give him some good quality adult food (or "human food," as Husband calls it, as if babies are somehow not human, which they kind of aren't, but anyway). Somewhere around his first birthday he had started taking a keen interest in our food, reaching plaintively and somewhat pathetically for our plates, whimpering shyly as if quietly pleading, "What is that and why am I not having any and I am so tired of these carrots but I can't talk so please please try to figure it out you losers."
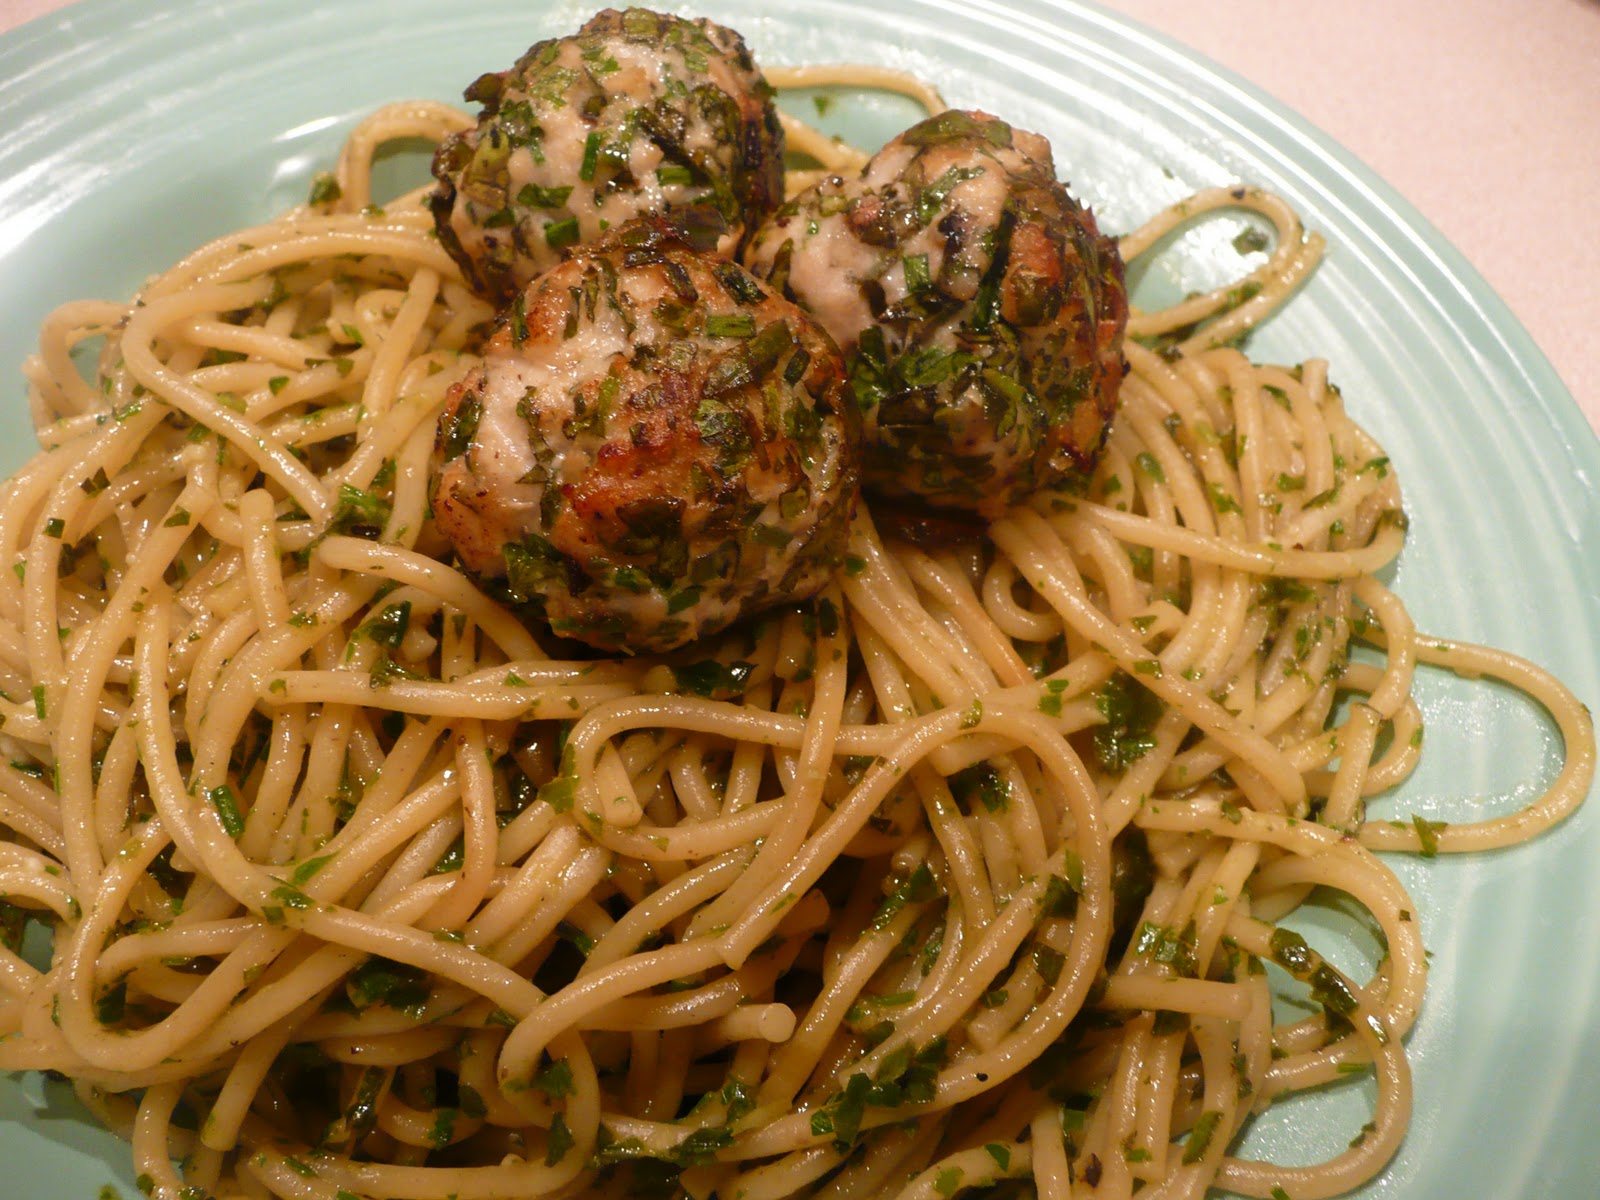
Soon his subtle non-verbal requests became outright mutiny, and I realized that if the lad was to eat well, he was going to have to start eating our food. So I wandered out onto the back porch, where a variety of stubborn herbs still thrive, defying this summer's wet and generally crappy garden-growing weather, and cut a massive bouquet of basil, parsley and chives. I mixed together some turkey meatballs, using scads of the finely-chopped fresh herbs as the meatballs' primary flavor. I took more of the herbs and whirred together a pesto, earthy and salty and bright. I cooked some spaghetti. And as I served a bowl of herby spaghetti with herby meatballs to Husband, I took a serving for a spin in the food processor for the baby.
I fed him a spoonful; he responded, "Mmmmmmmm" then waved his hands frantically while giggling and smiling.
He then gave the dog a meatball.
++++++
SPAGHETTI WITH HERBED TURKEY MEATBALLS AND PESTO
Adapted loosely from Serious Eats
2 c. fresh basil, finely chopped (about 2 large bunches)
1/2 c. fresh parsley, finely chopped
1/2 c. chives, finely chopped
1 slice ciabatta or other crusty white bread
1/4 c. whole milk
1/2 lb. ground turkey
Kosher salt and freshly-cracked black pepper
1 lb. spaghetti
6 T. olive oil
2 garlic cloves
Freshly-grated Pecorino, to garnish
Combine the herbs into a bowl and mix well. Soak the bread in the milk for about 5 minutes, then remove it and lightly squeeze out the milk.
Place the bread in a medium bowl, and add the ground turkey, 1 c. of the herb mix and a pinch of salt and pepper. Using your hands, work the mixture until well-combined, adding the remaining milk, if necessary, to form a slightly sticky mixture. Shape into 1-inch meatballs.
Heat 2 T. of the olive oil in a large skillet over medium heat until shimmering. Add the meatballs (in batches if necessary) and cook until brown on all sides, about 5-10 minutes. Remove the meatballs to a baking sheet (keep warm in an oven heated to 250 degrees Fahrenheit). Reserve the pan drippings in the skillet.
In the meantime, bring a large pot of salted water to a boil and cook the spaghetti according to the package directions until it's al dente. Drain, reserving 1 c. of the pasta cooking water.
In a food processor, combine the remaining herbs, 4 T. of the olive oil, garlic, a pinch of salt and pepper and 1/4 c. of the reserved pasta water. Process until pureed, seasoning to taste if necessary.
Place the drained pasta into the skillet that you used to cook the meatballs, along with a splash of the reserved pasta cooking water. Add the herb sauce and toss over low heat, adding more pasta water if necessary to make a smooth sauce. Top with meatballs and serve with a generous dusting of Pecorino.
Makes 4 servings, but really more like 2 servings. To put it another way, it's enough for two hungry adults, a tot and a Jet.
++++++
Previously, on A Stove With A House Around It:
One year ago: walnut shortbread
Two years ago: Bread Baker's Apprentice French bread
Three years ago: sibling rivalry chicken noodle soup
So when he began to grow very weary of smoothly-pureed baby food, whether store-bought or prepared at home by me, I felt the least I could do to reward his dog-loving instincts was give him some good quality adult food (or "human food," as Husband calls it, as if babies are somehow not human, which they kind of aren't, but anyway). Somewhere around his first birthday he had started taking a keen interest in our food, reaching plaintively and somewhat pathetically for our plates, whimpering shyly as if quietly pleading, "What is that and why am I not having any and I am so tired of these carrots but I can't talk so please please try to figure it out you losers."
Soon his subtle non-verbal requests became outright mutiny, and I realized that if the lad was to eat well, he was going to have to start eating our food. So I wandered out onto the back porch, where a variety of stubborn herbs still thrive, defying this summer's wet and generally crappy garden-growing weather, and cut a massive bouquet of basil, parsley and chives. I mixed together some turkey meatballs, using scads of the finely-chopped fresh herbs as the meatballs' primary flavor. I took more of the herbs and whirred together a pesto, earthy and salty and bright. I cooked some spaghetti. And as I served a bowl of herby spaghetti with herby meatballs to Husband, I took a serving for a spin in the food processor for the baby.
I fed him a spoonful; he responded, "Mmmmmmmm" then waved his hands frantically while giggling and smiling.
He then gave the dog a meatball.
++++++
SPAGHETTI WITH HERBED TURKEY MEATBALLS AND PESTO
Adapted loosely from Serious Eats
2 c. fresh basil, finely chopped (about 2 large bunches)
1/2 c. fresh parsley, finely chopped
1/2 c. chives, finely chopped
1 slice ciabatta or other crusty white bread
1/4 c. whole milk
1/2 lb. ground turkey
Kosher salt and freshly-cracked black pepper
1 lb. spaghetti
6 T. olive oil
2 garlic cloves
Freshly-grated Pecorino, to garnish
Combine the herbs into a bowl and mix well. Soak the bread in the milk for about 5 minutes, then remove it and lightly squeeze out the milk.
Place the bread in a medium bowl, and add the ground turkey, 1 c. of the herb mix and a pinch of salt and pepper. Using your hands, work the mixture until well-combined, adding the remaining milk, if necessary, to form a slightly sticky mixture. Shape into 1-inch meatballs.
Heat 2 T. of the olive oil in a large skillet over medium heat until shimmering. Add the meatballs (in batches if necessary) and cook until brown on all sides, about 5-10 minutes. Remove the meatballs to a baking sheet (keep warm in an oven heated to 250 degrees Fahrenheit). Reserve the pan drippings in the skillet.
In the meantime, bring a large pot of salted water to a boil and cook the spaghetti according to the package directions until it's al dente. Drain, reserving 1 c. of the pasta cooking water.
In a food processor, combine the remaining herbs, 4 T. of the olive oil, garlic, a pinch of salt and pepper and 1/4 c. of the reserved pasta water. Process until pureed, seasoning to taste if necessary.
Place the drained pasta into the skillet that you used to cook the meatballs, along with a splash of the reserved pasta cooking water. Add the herb sauce and toss over low heat, adding more pasta water if necessary to make a smooth sauce. Top with meatballs and serve with a generous dusting of Pecorino.
Makes 4 servings, but really more like 2 servings. To put it another way, it's enough for two hungry adults, a tot and a Jet.
++++++
Previously, on A Stove With A House Around It:
One year ago: walnut shortbread
Two years ago: Bread Baker's Apprentice French bread
Three years ago: sibling rivalry chicken noodle soup
Subscribe to:
Posts (Atom)