skip to main |
skip to sidebar
I do not wish to be one of those pregnant ladies who can only talk about how pregnant she is. I do not wish for a screen capture of this site to end up posted to STFU, Parents -- no matter how much I love that blog (oh, and I do). And though pregnancy is exhausting and just a slight bit all-consuming, I wish also to focus on other elements of my life.
As such, today I will not be telling you about how I have been wickedly craving chicken souvlaki since mid-December. I shall not blame it on this tiny person I'm carrying around. Instead, I will tell you all about chicken souvlakis I have loved and -- for various reasons -- cannot get any longer. I shall explain why, after many nights pining away at my souvalki-lessness, I finally broke down and (gasp!) made my own. And it was good. Damn good. So damn good we've eaten it three of the last four nights (it goes really well with both RuPaul's Drag Race *and* Lost).

But first: chicken souvlakis I have known. For many decades there was a family-owned restaurant in my hometown called Mary & Ted's. It had been there forever, changing its decor every so often but always serving up the same comfort food/Greek diner favorites. I can easily picture the restaurant in at least three different interior design iterations and can especially remember the large U-shaped counter flanked by big square plastic drink dispensers full of blue slushy liquid. When I was in elementary school, sometimes Dad would take me there before school and I'd eat silver-dollar pancakes with childish gusto. You could buy Andes mints at the cash register. The same people always seemed to be there.
Mary & Ted's closed a few years back. And while it's always sad when a local institution goes out of business, my sorrow was reserved mostly for the fact that Mary & Ted's chicken souvlaki would no longer be in my life: juicy grilled chicken, served with tangy tzatziki and crisp lettuce and red onions in a warmed, soft, ever-so-slightly olive oily flatbread. Alongside this messy concoction: a mountain of crisp, salty fries. Perfection. But as with many perfect things, it couldn't last forever.

Then there was Uncle George's, a Greek diner in Astoria, NYC, that was around the corner from Husband's old apartment. Sitting, fat and happy, on a busy Queens street corner, Uncle George's was always stuffed full of people, night or day. Loud people eating a lot of Greek food, drinking cold red wine from jewel-toned aluminum cups. Uncle George's had the most amazing lemony and oregano-y potatoes, cut in large hunks and set alongside whatever it was you happened to be eating. In my case, it was the souvlaki, with its soft bread lapping up the lemon runoff from the nearby potatoes. Husband and I were dating at the time, and a weekend trip to New York for me was never complete without a stop at Uncle George's. Husband still beats a path there whenever he's in town, especially if he's in town for a Mets game.
And thus, having been spoiled by restaurant souvlaki for the better part of the past decade, is it any wonder that it never once occurred to me that I could cook it at home? All this whining about how I can never get souvlaki anymore finally came to a head last week when the light bulb went off over Husband's head. "Do you want me to grill some chicken? We could make our own."
Eureka!

So we made our own, and then we made some more. And then, what the hell, we made some more. The weather's been really nice and the charcoal grill was calling and I bought extra bread at the Middle Eastern grocery and I can eat several cups of homemade tzatziki single-handedly. And you know what? Homemade tastes even better than restaurant-made. Even Mary & Ted's and Uncle George's.

Now excuse me while I make some more.
++++++
CHICKEN SOUVLAKI
For the tzatziki:
1 c. plain Greek yogurt (I especially like Fage 2%)
1/2 c. seeded, peeled and shredded cucumber, squeezed to remove excess moisture
2 T. fresh mint, chopped
1 T. fresh dill, chopped
1 T. olive oil
1 T. freshly-squeezed lemon juice
2 garlic cloves, minced
Pinch sea salt, to taste
For the chicken:
4 boneless, skinless chicken breasts
2 T. olive oil
2 T. dried oregano
3/4 t. kosher salt
1/2 t. freshly-cracked black pepper
To assemble the souvlaki:
4 pieces of soft flatbread (or pita)
2 tomatoes, cut into wedges
1 c. shredded iceberg lettuce
1/2 c. red onion, thinly sliced
Hot sauce, if desired
First, make the tzatziki. In a medium bowl, combine all tzatziki ingredients and stir to combine. Set aside. Prep the tomatoes, lettuce and red onion. Set aside.

To prepare the chicken, place the meat in a medium bowl and drizzle with olive oil. Add the oregano, salt and pepper and stir to coat the chicken breasts. Grill the chicken -- either outdoors on the grill or indoors in the grill pan if the weather is less than cooperative -- until golden brown and delicious and the internal temperature registers at 161 degrees Fahrenheit. Remove from the heat and let the chicken rest a few minutes before slicing into pieces.

Assemble the souvlaki by lightly grilling a piece of flatbread until warmed. Spread with a few tablespoons of the tzatziki then top with chicken, tomato, red onion and lettuce. If you're in the mood for hot sauce, feel free to add a little (Husband likes his this way).
Makes 4 sandwiches, with a little tzatziki left over. Store the tzatziki in an airtight container in the refrigerator for up to 4 days.
++++++
Previously, on A Stove With A House Around It:
One year ago: Mrs. DiLorenzo's manicotti and an alternate take on my roasted tomato marinara
Two years ago: tsoureki
I can already hear you all out there, sighing.
It's been almost two months since you've posted that rich chocolate cake, and now you return with...vegetables? Seriously??

I know, I know. Broccoli pesto might not seem like the most thrilling of dishes...not the sexiest, food porniest thing with which I could return after my lengthy cooking and blogging hiatus. But what can I say? I have broccoli in the fridge and a craving in my mind, and if there's anything I'm learning from being pregnant, it's listen to those cravings.
Yes, you read that right. I am expecting. Hence the whole hiatus -- I haven't had the energy or desire to eat, let alone cook, let alone be creative in the kitchen. But as the constant nagging illness and exhaustion make way for what I pray is an easier few months ahead, I find myself ready to get back to (modest) culinary work. My first task: transforming those green florets in the crisper drawer into a pleasing riff on pesto.

And though he's been an absolute dear over these past four months -- cooking for me when I wanted to eat, running out to the store to buy me grapes, doing the dishes, baking me chocolate chip cookies at the drop of a hat, not complaining when I wanted to go to bed at 8:15 instead of play The Beatles: Rock Band -- I'm hoping Husband will appreciate that I'm cooking dinner for him tonight. Thanks to some recent warmer weather and some rain today, the blanket of snow that's been covering our world since Christmas is finally gone. Clearly, hell has frozen over. And I'm ready to cook again.
At least for the moment. We'll see how tomorrow goes.
++++++
BROCCOLI PESTO
Adapted from Kitchenist
It is not at all necessary to serve this simple pesto over pasta. I can think of lots of things to do with it: serve it atop a grilled or pan-fried chicken breast; mix it with cold pasta, kalamata olives, fresh tomatoes and some bright fresh herbs for pasta salad; serve it, room temperature, as a spread for a homemade crusty loaf of bread, warm from the oven.
That said, I do like it quite a lot served over pasta. To do so, bring a large pot of well-salted water to a boil. Cook 1 pound of pasta according to the package directions to al dente. Drain pasta, reserving a few cups of the starchy pasta cooking water. Toss the pasta with about 1 cup of the broccoli pesto, adding a ladle or two of the pasta cooking water to transform the pesto into a creamy sauce.

1 head of broccoli (about 2 1/2 c. florets and tender stems)
1/2 c. walnuts, almonds or pine nuts (or a mix), toasted
1 garlic clove, chopped
1/4 t. red pepper flakes
1/3 c. grated Pecorino cheese
4 oz. feta cheese, cubed or crumbled
Juice of half a lemon1/2 c. olive oil
Pinch sea salt

Cook the broccoli florets either by blanching them in a pot of boiling water for 3-4 minutes or steaming them in a vegetable steamer for 4-5 minutes. Rinse immediately with cold water to stop the cooking process; drain, and set aside to cool.

Place the cooked, cooled florets in the bowl of a food processor with all the remaining ingredients, except the olive oil and sea salt. Process until the broccoli is chopped into fine pieces, then drizzle in the olive oil until the mixture is well combined and smooth. Taste for seasoning, then add sea salt if desired.
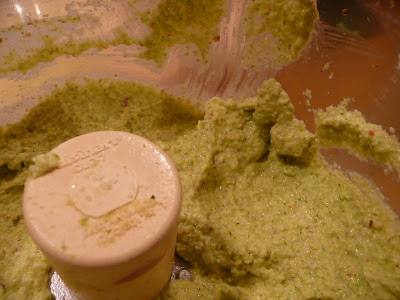
Makes about 2 cups of pesto, which will keep in an airtight container in the refrigerator for 3 days and in the freezer for at least a month.
++++++
Previously, on A Stove With A House Around It:
One year ago: spinach lasagna
Two years ago: Italian wedding soup
Yesterday I made myself a chocolate layer cake for no reason at all.

I hardly ever make a cake for myself; I wait until a special occasion, then make a cake for someone else. Which is ridiculous, if you think about it. Do I not deserve a delicious cake? Even when it's not my birthday? So yesterday, when I was drooling over a photo of a chocolate layer cake in one of my favorite cookbooks, waxing poetic about how badly I wanted a slice, Husband said, "You know, you do know how to bake. Why don't you make yourself one?"
Well, duh. It was a revelation. The cold winter sky opened; angels began to sing. And I started chopping chocolate.
Donna Hay's layered chocolate fudge cake is nothing if not rich, and nothing if not rustic. The luscious photograph that accompanies the recipe shows a four-layer cake spread with frosting between the layers and on top -- but not around the cake's chocolatey sides. They are left unfrosted, naked, for all the salivating eaters to see. Beguiling, really.

The cake itself is deeply flavored with chocolate, with a texture that veers into genoise/sponge-cake territory. It achieves its modest lift from vigorously beaten eggs and a modest amount of flour. The recipe does not call for salt, though as I think of it the recipe calls for "butter" -- not "unsalted butter" -- and I'm thinking it might be possible that Australians would use salted butter in the cake. (My edition of the cookbook was published in Australia.) My knee-jerk reaction is always to use unsalted butter in baked goods, so I might have missed the salt boat here (though I certainly made up for it with a sprinkling of fleur de sel atop the finished cake). But no matter, the cake was marvelous and maybe next time -- just for comparison's sake, you know -- I'll go the salted butter route.
As far as the fudge filling goes, I used it as an opportunity to cobble together 12 oz. of random bits and pieces of chocolate left over from previous baking adventures -- orphaned chunks of chocolate that were just hanging out in the pantry, waiting for their chance to play a starring dessert role. It was quite satisfying, chucking butter and cream together with semi-sweet Nestle chips and a hunk of semi-sweet Valrhona and several squares of bittersweet Ghirardelli and a few rectangles of Hershey's dark chocolate to make the filling. It was a scene, man.

And even though I had made the cake for myself, I did end up sharing it with family. Sister's 142nd birthday is this week, and we went out last night to celebrate. I will be baking a proper chocolate-hazelnut cake for her birthday tomorrow. But last night, after her birthday dinner, it seemed silly not to use this rustic layer cake as a sort of precursor to her formal birthday. Which is how Younger Nephew ended up sitting in my kitchen, covered in frosting, fork in hand, stating that the chocolate -- like everything else sweet in my kitchen -- was "HIS" and his alone.

Not exactly what I envisioned when I set out greedily and piggishly to make a cake for myself. But as with everything else in life, chocolate cake is always sweeter when you can share it with someone you love. Even if that person doesn't really want to share.

++++++
LAYERED CHOCOLATE FUDGE CAKE
Adapted from Flavours, by Donna Hay
For the cake:
2 1/2 oz. unsalted butter
1 t. vanilla extract
8 eggs
1 1/3 c. sugar
2/3 c. cocoa powder
1 c. all-purpose flour
For the fudge filling:
12 oz. semi-sweet or dark chocolate, chopped
3/4 c. heavy cream
5 oz. unsalted butter
Pinch kosher salt
Optional but totally delicious topping:
A hearty pinch of fleur de sel
First, make the fudge filling. Place the chocolate, heavy cream, butter and salt in a medium heat-proof bowl. Set the bowl over a pan of simmering water and allow everything to melt, stirring occasionally to combine the ingredients. Remove from the heat and refrigerate until cool.
While the filling is cooling, make the cakes. Preheat the oven to 350 degrees Fahrenheit. Line the bottom of 2 8-inch round cake pans with parchment paper.
Melt the 2 1/2 oz. butter and vanilla in a small saucepan over low heat, then set aside to cool slightly.

Place the eggs and sugar in the bowl of an electric mixer and beat for 8 minutes, or until the mixture is light and creamy and tripled in bulk.

Sift the cocoa powder and the flour twice, then sift it into the egg mixture.
 (Those cocoa chunks up there just go to show that sifting once is not enough.)
 (Double-sifted and lovely.)
Add the butter mixture to the batter and fold gently with a spatula until the batter just comes together. Divide the batter between the prepared pans and bake for 25 minutes, until the cakes pull away from the sides of the pans. Cool in the pans. Cut each cake horizontally into 2 layers.
When the filling is cool and somewhat stiff, remove it from the refrigerator and transfer into the bowl of an electric mixer. Using the whisk attachment, whip the filling until it is light and fluffy, scraping down the sides of the bowl a few times.
To assemble the cake, place one layer of the cake on a serving plate and spread with the filling. Repeat with the remaining cake layers and the remaining fudge filling. If using, sprinkle the top of the cake with fleur de sel.

Serves 10-12.
++++++
A little taste of what's come before:
One year ago: cheddar-Pecorino biscotti
Two years ago: Ma Chris salad
A few days ago, friends, A Stove With A House Around It turned two.
Two!
It is hard to believe that two whole years have elapsed since that dull evening in January 2008 when I decided that I was too creatively and culinarily pent-up to continue without some sort of outlet. And so I wrote on that day, "Always a fan of metaphor (and hyperbole), this blog represents the overwhelming importance of food in my life -- to the exclusion of shelter itself. Kidding. Maybe."

Well, considering we do have several roof issues that cause troubling leaks every winter -- and I am instead dreaming of how exactly I wish to use our limited resources to remodel our perfectly serviceable kitchen -- it looks like my manifesto was right on the money. And though I originally envisioned this space as dedicated mostly to the recipes and memories of my youth, it has happily evolved into a record of the food, people, places and experiences that make up the day-to-day fabric of my life. It has been my pleasure sharing it all with you, and I hope you've enjoyed yourself here. After all, without you, there is just a lot of echoing in this space as my lonely words bounce off the heading and the sidebar.
So. How to acknowledge this second birthday? I could bake a cake. But I have a feeling I'll be doing that this weekend, as Sister turns, like, 90 or something. No. I think I'll make some pretzels. As I did last year at this time to celebrate birthday #1. Yes. I believe I shall make birthday pretzels a yearly tradition: each year this blog grows a little older, I'll share another pretzel recipe I've found. Because I do believe a full life is one lived in the presence of many pretzel recipes.

For your second birthday, little blog, I've made you some of Alton Brown's hot pretzels. Just about everything Alton makes is a win and you, my HTML progeny, deserve the best. (And, yes, these beat last year's Martha Stewart recipe by leaps and bounds, in terms of crusty browned flavor and soft yeasty interior). So sidle up to the kitchen counter and help yourself to some yeasty, salty goodness.

And happy birthday.
++++++
HOMEMADE SOFT PRETZELS
Adapted from Alton Brown
1 1/2 c. warm water (110-115 degrees Fahrenheit)
1 T. sugar
2 t. kosher salt, plus more for sprinkling over the pretzels
2 1/2 t. instant yeast
22 oz. all-purpose flour (about 4 1/2 c.)
2 oz. unsalted butter, melted and cooled slightly
Olive oil, for bowl
Non-stick spray, for pan
10 c. water
2/3 c. baking soda
1 large egg yolk beaten with 1 T. water
Combine the water, sugar and 2 t. kosher salt in the bowl of an electric mixer and sprinkle the yeast on top. Whisk together to dissolve the sugar and then let stand until the mixture bubbles and foams, about 5 minutes.
Add the flour and butter to the yeast mixture. Fit the mixer with the dough hook and mix on low speed until the dough comes together. Then switch to medium speed and knead until the dough pulls away from the side of the bowl and forms a ball, approximately 4-5 minutes. Remove the dough from the bowl, then coat the bowl with a few teaspoons of olive oil. Return the dough to the bowl, rolling to coat it in oil. Cover the bowl with plastic wrap and let it sit in a warm spot in the kitchen until the dough doubles in size, 50-55 minutes.

Preheat the oven to 450 degrees Fahrenheit. Line two baking sheets with parchment paper, then spray with non-stick spray (or brush with olive or vegetable oil). Set aside.
Bring the 10 c. of water and the baking soda to a rolling boil in a large pot.
While the water comes to a boil, turn the dough out onto a work surface and divide into 8 equal pieces. Roll out each piece of dough into a 24-inch rope. Make a U-shape with the rope then, holding the ends of the rope, cross the ends over each other and press into the bottom of the U in order to form the shape of a pretzel. Place the formed pretzels onto the parchment-lined baking sheets.
 (Even Husband makes pretzels.)

Place the pretzels in the boiling water, one at a time, for 30 seconds each. Remove them from the water using a large flat spatula, letting as much of the water drain away as possible.

Return the boiled pretzels to the parchment-lined baking sheet, brush the top of each pretzel with the egg yolk and water mixture, then sprinkle with kosher salt.


Bake until the pretzels are a deep golden brown, about 12 minutes. Transfer to a cooling rack for 5 minutes before serving.

Makes 8 large, gorgeous hot pretzels.
++++++
Gee Dianne, what were you cooking in years past?
One year ago: pan-fried tofu with spicy lemongrass sauce
Two years ago: chocolate chip cake
Ah, the new year.
Rather.
Ah, the first few weeks of January. When everyone is eating light, kicking off weight-loss resolutions, trying to be healthy. Martha Stewart is trying to get us to eat kombu in a clay pot; Alton Brown is pushing sardines and avocado on toast. (To be fair, Alton looks amazing. And his "lists" of how much of which types of food to eat per week really are quite sensible. And his smoothies are tasty.) Hell, even Rachael Ray is slinging low-cal halibut in parchment ("FISH IN A SACK!"). Beware, however. All this good health has a definite shelf-life, and it starts to go bad right around the end of the NFL playoffs.
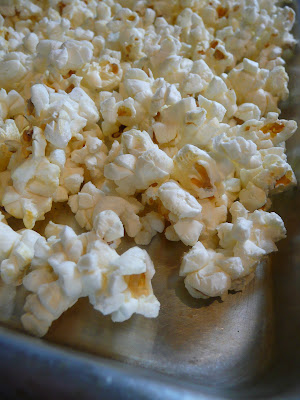
Now, I am no fan of resolutions. But even if I was, the way I see it, we all have until roughly Super Bowl Sunday to follow through with our new good habits. Because the minute The Food Network switches from its "healthy eating" promos to its "GET READY FOR THE BIG GAME HERE ARE SOME JALAPENO POPPERS!" ads, you can kiss those resolutions goodbye. The new year's good intentions are replaced by football party snack food: a gridiron of guacamole, spread on a platter and striped with sour cream yard lines...chicken wings...spinach dip...Tostitos. Super Bowl Sunday is the end of a short-lived resolution season, followed as it is by luscious baked goods for Valentine's Day, then green beer and corned beef in March, then dozens of chocolate Easter eggs in April. You get my point.
So I say, to hell with it all. It is January 10, and I am going to make some caramel corn.

This is the caramel corn of my youth, which I don't think I've had since my youth. But a romp through Mom's recipe box on New Year's Eve (I really know how to party) unearthed this gem and awakened in me a long-suffering hankering for caramel corn that I didn't even know I had. The recipe comes from my childhood neighbors, the Chases. They were awesome, and so was their corn. It's sweet and a little bit salty, laced with a deep brown-sugary flavor and spiked with big pecan shards. It's a perfect snack on a lazy, frigid Sunday afternoon in January, when the television ads say "Weight Watchers" but your growling stomach says "no thanks."
Never let it be said that my priorities aren't in line.

++++++
CARAMEL CORN WITH PECANS
8 c. popped popcorn (feel free to use microwave popcorn, just choose a "lite" variety without a lot of added flavorings)
1 1/2 c. raw pecans, very coarsely chopped
3/4 c. light brown sugar
6 T. unsalted butter
3 T. light corn syrup
1/4 t. kosher salt
1/4 t. baking soda
1/4 t. pure vanilla extract
Preheat the oven to 325 degrees Fahrenheit. Place the popped popcorn and pecans on an 11" x 17" rimmed baking sheet lined with a Silpat.
In a heavy-bottomed saucepan, combine the brown sugar, butter, corn syrup and salt. Bring to a boil over medium heat, stirring to combine the ingredients. Once the mixture is boiling, reduce the heat to medium-low and cook for 5 minutes without stirring.
Remove from heat and stir in the baking soda and vanilla. Pour the mixture over the popcorn and pecans and stir well with a spatula, covering as much of the popcorn with the brown sugar mixture as possible.


Bake for 10 minutes. Remove from the oven and stir. Bake for 10 more minutes. Remove from the oven and stir one last time with a spatula, coating the popcorn as evenly as possible. Cool, and happily consume.

Makes 8 cups of caramel corn.
Hello Dolly bars are the sweet, gooey pillar upon which the joyous Christmases of my youth rest. They were omnipresent: on every cookie tray, in each cousin's hand, presented in abundance on the card table my aunt would set up in front of her living room closet for the express purpose of holding Christmas cookies.
 (Studly cousin Jeff on Christmas morning 1984, in front of the festive tablecloth-covered cookie card table.)
I didn't know back then that they were a relatively common bar cookie. I didn't know that anyone else had ever heard of Hello Dolly bars. I thought my extended family was really onto something...a super-secret amalgamation of graham cracker, nuts, chocolate, butterscotch, coconut and Eagle Milk.

For you see, my aunt -- the one with the cookie card table -- is named Dolly. (Actually, she is named Georgeann, but everyone throughout the history of time has only called her Dolly.) And she is an amazing cookie-baker (she made all the cookies for my wedding favors). I thought the cookies were named for her. Like, Hello, Dolly! We are here to eat your cookies! It wasn't until, like, 2003 that I realized they were (a) common, and (b) named after Carol Channing. OK, I don't know if they were named after Carol Channing, but I know for certain that they weren't named after Georgeann Shearer.

But just because something is popular doesn't mean it's not perfect in every way. (See: Glee, Tater Tots, "Single Ladies.") I'm happy I can't imagine Christmas without a pan of Hello Dolly bars. I'm glad that I can still picture them on the card table, next to those peanut butter cookies with the Hershey's Kisses planted firmly atop them.

So though Hello Dolly bars are nothing special, they are most special to me. If someone told me that I could only have one cookie at Christmastime, I would choose the Hello Dolly bar. They're rich, and sweet, and crumbly, and more than able to support a childhood's worth of happy Christmas memories.
Even if they're not named after my aunt.

++++++
HELLO DOLLY BARS
These delicious cookies are an absolute snap to make. Which is good for when you need a quick dessert (or for when you have a craving).
1/2 c. (1 stick) unsalted butter
2 c. graham cracker crumbs (about 18 graham crackers, pulsed in the food processor)
1 c. sweetened coconut
6 oz. butterscotch chips
6 oz. semi-sweet chocolate chips
3/4 c. walnuts, roughly chopped
1 14-oz. can sweetened, condensed milk (I prefer Eagle Brand)
Preheat the oven to 350 degrees Fahrenheit.
Melt the butter over low heat directly in a 13" x 9" metal pan. Sprinkle the graham cracker crumbs over the butter and mix to combine. Using your fingers, pat the graham cracker crust into an even layer on the bottom of the pan.


Sprinkle the coconut over the crust, followed by the butterscotch chips, chocolate chips and walnuts. Drizzle the sweetened, condensed milk evenly over the cookies, then bake for 20 minutes.


Remove from the oven and let cool completely before cutting into bars.

Makes 3 dozen cookies.
So you know it's bad news when your dad tells you he doesn't bother going to your blog anymore.
"I keep reading about those kaiser rolls, but there's never anything new."
Well, Father, as usual you are correct. I have been noticeably low-key around these parts for the past few weeks. Maybe I should blame the turkey:
 (Father, expert carver of my brined bird.)
Or the spectacular view of Manhattan from our Hoboken hotel-room perch last weekend:
 (Post-dinner at Diner.)
 (Pre-"breakfast" at Shake Shack.)
Or Shake Shack, which we ate twice in two days, in the car mind you because the weather was so frightful:
 (Note gearshift.)
 (Steaming up the car windows with our Shake Shack.)
Or the cute dog, who requires and deserves a great deal of attention:
 (No caption necessary.)
Or the Christmas decorations, which, you know, should be in place before the 25th:

Or the couch, my warm and inviting nemesis:

Yes, I've been otherwise occupied. And my little bloggy space has suffered. So today I offer chocolate on a stick -- something decadent enough to take your mind off my inappropriate absence. Because if anything's a distraction, a rich hunk of chocolate is.

A rich hunk of chocolate (or 36) is also a good thing to have on hand in December, when you might need a festive treat while decorating the tree, or listening to Christmas carols, or welcoming friends and long-lost family members. These cocoa blocks are perfect for just such occasions: chunks of creamy chocolate you can swirl in a mug of hot milk to create a deeply flavorful cup of hot chocolate -- or that you can just eat straight off the stick, depending on your patience and sweet tooth. When I think of December, I think of blustery snow, cable-knit sweaters and steaming mugs of cheerful soul-sating goodness. These cocoa blocks fit right in with that image, and are particularly perfect on Christmas morning.

They're also really easy to make, so you can get right back to the couch if you want. I won't judge you.
++++++
COCOA BLOCKS
Adapted from the King Arthur Flour catalog
I used a bit of almond extract to add a non-chocolate complimentary dimension to these treats, but they would be equally delicious with an equal amount of vanilla extract or a drop or two of peppermint oil. Or even a drop of cinnamon oil (how very Mayan). Or you can skip the extra flavoring entirely and just go for the full-on chocolate.
Also, please note that the cocoa blocks need to stand overnight to set, so plan accordingly.
One final note: unless you are going to use all 36 cocoa blocks at once, I find it easiest to cut the blocks, then wrap the whole batch together in parchment paper and a layer of plastic wrap BEFORE adding the wooden sticks. Store at room temperature and insert the sticks before serving. (It's challenging to store 36 cocoa blocks on sticks.)
1/2 c. (4 oz.) heavy cream
14-oz. can sweetened, condensed milk
3 c. (18 oz.) semisweet chocolate, coarsely chopped
3/4 c. (4 oz.) unsweetened chocolate, coarsely chopped
1/4 t. almond extract (or flavoring of your choice; see above)
1 T. cocoa powder, for dusting
Wooden sticks
Line an 8"x 8" pan with parchment paper, allowing for an overhang of parchment on all 4 sides that you'll use to grip and remove the cocoa blocks once they're set.

In a heavy-bottomed saucepan, heat the cream and condensed milk over low heat until it simmers and steams. Remove from heat and add the chocolate; allow it to melt gently.

After 10 minutes, return the chocolate mixture to low heat to melt the chocolate completely. Whisk until the chocolate is thick and shiny, which only takes a few minutes. Add the almond extract and whisk to combine.
Pour the chocolate mixture into the prepared pan; level with an off-set spatula. Using a small sieve, sprinkle the cocoa powder over the chocolate to coat the surface. Set aside overnight, uncovered, at room temperature to set.

The next day, remove the chocolate from the pan using the excess parchment overhang. Heat a knife by running it under hot water. Dry the knife and cut the chocolate into 1 1/4"-inch squares, cleaning and reheating the knife occasionally to ensure even cuts.

Place a wooden stick into the center of each block, taking care not to stick it all the way through.

Eat straight off the block, or stir into a cup of hot milk. Repeat.


 (Husband = cocoa block beneficiary.)
Makes 36 blocks.


