skip to main |
skip to sidebar
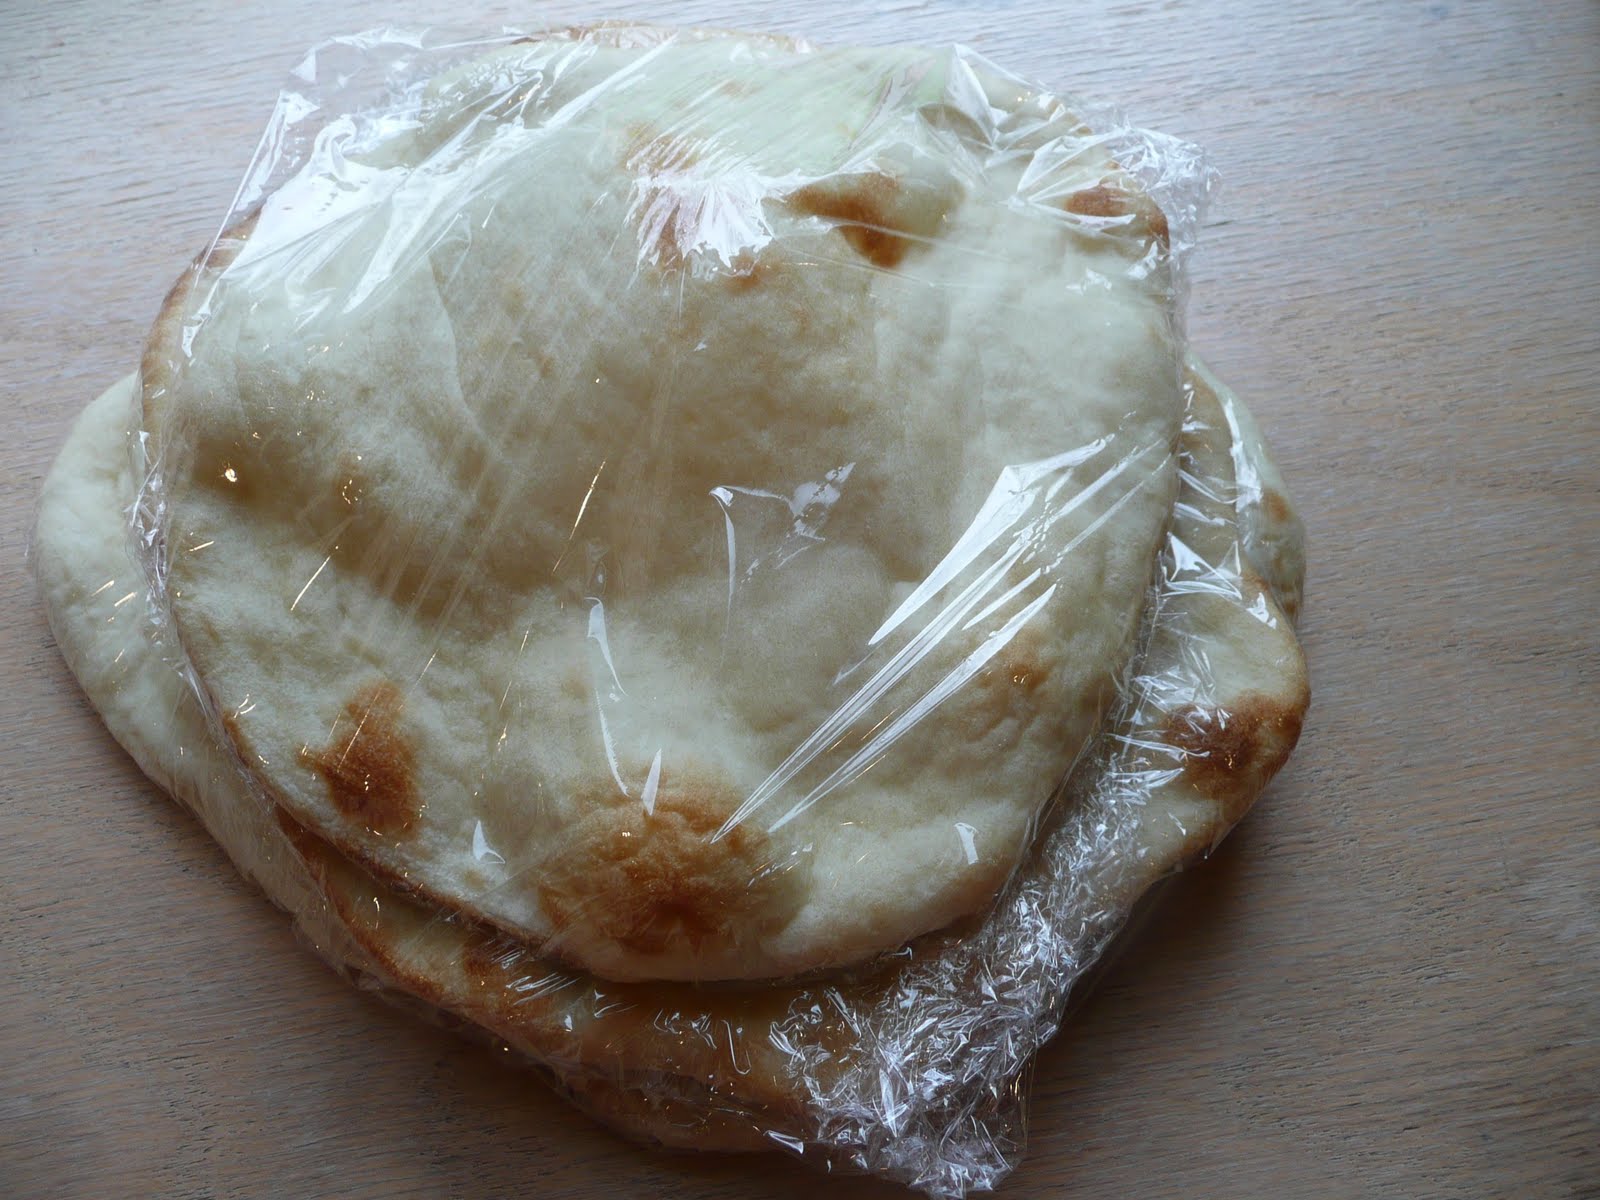
I don't know about you, but this seems to happen a lot in our house:

We begin with the best of intentions. We want more fresh fruit on hand, to encourage healthy snacking. Husband wants bananas available for necessary post-run fuel. They're good for smoothies. So we buy five or six of them, then they inevitably linger, uneaten on the counter top, turning from lovely green-tinged yellow to gently speckled brown to black in the time it took me to write this sentence.
Then I make matters worse by getting up on my Tasteful Decor Horse, placing the bananas in a pretty frosted yellow glass dish on the shelf above the stove. Out of Husband's line of sight. And we all know that when something is out of Husband's sight, it is out of Husband's mind. Unless that something is Howard Stern. Or Mr. Met. Or greasy Chinese food from Rockland County, New York.
This rotten parade of banana flesh has been therefore enriching our compost pile. I often think that I should bake something (muffins, dog treats) with the darkening fruit, but I always end up missing the window as the bananas go from perfect-for-baked-goods to liquefied before I can get out the mixer.
Sunday night, though, I was victorious.

While mentally preparing for the series finale of "Lost," I happened to glance at the bananas, which I had moved from their stylish perch atop the stove back to their utilitarian counter top real estate. I was really tired, and I think I was mid-sentence talking about how tired I was, but I got up, walked across the room, grasped the bananas and started peeling them. I was determined to have freshly-baked banana bread -- made from not-wasted bananas -- in my hand before I learned if Jack had the ability to kill the Man in Black.
I can't help but think that if the Smoke Monster had some of this banana bread, studded with toasted pecans and flakes of sweetened coconut, maybe he wouldn't have been so cranky.

++++++
BANANA BREAD WITH COCONUT AND PECANS
Adapted from More From Magnolia, by Allysa Torey
Baked in a tube pan, this banana bread can also pass for cake, especially if served with a little ice cream or homemade whip cream. Personally, though, I like it sliced in thin pieces, toasted and spread with salted butter. The breakfast of champions.
ALSO: This bread is even better with chocolate. So if you're feeling it, add in some (8 oz. or so) chips or chunks of your favorite chocolate when you stir in the coconut and pecans.
3 c. all-purpose flour
1 1/2 t. baking soda
3/4 t. cinnamon
3/4 t. kosher salt
3/4 c. canola or vegetable oil
1 1/2 c. sugar
3 large eggs at room temperature, well beaten
1 1/2 t. vanilla extract
1 1/2 c. mashed ripe bananas (about 4 bananas)
3/4 c. sour cream
1 1/2 c. pecans, toasted and coarsely chopped
3/4 c. sweetened shredded coconut
Preheat the oven to 350 degrees Fahrenheit. Place the chopped pecans on a baking sheet and bake until toasty brown, 7-8 minutes (be careful not to burn them). Remove from the oven and let cool. Keep the oven at 350.
Grease and lightly flour a 10-inch tube pan.
In a medium bowl, sift together the flour, baking soda, cinnamon and salt. Set aside.
In the bowl of an electric mixer, beat together the oil and sugar. Add the eggs and vanilla, and beat well. Add the bananas and sour cream, and mix well. Add the dry ingredients and mix until just combined. Stir in the pecans and coconut.

Pour the batter into the prepared pan and bake for 60-70 minutes, being sure to check after 60 minutes to ensure that it's not over-baked. (A skewer inserted into the center of the bread should come out with moist crumbs attached.) Let cool in the pan for at least 1 hour before removing from the pan and serving.

Makes one 10-inch cake/bread.
++++++
Previously, on A Stove With A House Around It:
One year ago: Christopsomos
Two years ago: Indian tacos, breakfast-style
As I noted last time, you can't just have guacamole for dinner.
I mean, you could. But what fun would that be? Guacamole is a gateway concoction, an excuse, if you will, to consume any manner of complementary Mexican treats. Mexican treats like tacos.

I've been on some type of taco/taquito bender of late. I blame a trip that Husband and I took to Chicago in March, during which time we ate a magnificent meal at Rick Bayless's perfect and delicious Frontera Grill. Rick's taquitos de pollo ahumado were simply bewitching and I still think about them a little each day. The ingredients are simple (smoked chicken, black beans, poblano chiles, homemade sour cream, salsa verde, anejo cheese, guacamole) but Rick is an alchemist, I swear: he somehow transforms the simplest foodstuffs into creations that, well, are still on your mind months later. Remember this alchemy, for in a paragraph or two I'm going to bring it up again.
Back home from Chicago, I began seeking a local taquito that could scratch my Frontera itch. I remembered Momocho, a Cleveland restaurant known for its "mod mex" cuisine that had been on my to-try list for some number of years. A random night a few weeks ago I decided I could wait no longer. Husband looked at the menu online and I was half-way out the front door as soon as he mumbled the word "taquito." Between chef Eric Williams's goat cheese guacamole (holy hell) and the Mexican fighting masks leering down at my empanada from the restaurant's dimly-lit walls, I knew I had found a new favorite place to eat. And the taquitos, lord, the taquitos. I had the tinga (16-spice grilled chicken) and Husband had the machaca (coffee- and ancho-braised brisket). It is embarrassing, but as I am typing this I am drooling a little bit, Pavlov-style. I know: classy.
So if I can't get to Frontera Grill, I can get to Momocho. And if I can't get to Momocho, I can get to my kitchen. Because thanks to the glory that is the Rick Bayless cookbook empire, his Authentic Mexican includes a simple recipe for crispy tacos that are easily whipped up, even on a weeknight, to sate the most voracious of taco and/or taquito appetites.

Remember what I said about alchemy? The filling for these tacos is nothing more than shredded chicken, salt and a puree of roasted tomato, red onion and garlic that has been cooked and thickened in a cast-iron skillet. And yet, it is amazingly delicious and complex, and completely belies its humble component ingredients. Which is to say: the chicken filling for these tacos has no right or reason to be as tasty as it is, but it is, nevertheless, completely beguiling. No wonder Mr. Bayless is doing so well for himself.
And no wonder I've been eating so well.
++++++
CRISPY CHICKEN TACOS
Adapted from Authentic Mexican, by Rick Bayless
I've made these tacos with flour and with corn tortillas, and I must say I prefer the corn. That said, if you only have flour tortillas on hand, go for it. The filling is so good it doesn't matter what you wrap it in, short of a piece of aluminum foil or a Sham-wow. I serve the tacos with no small measure of guacamole and a sprinkling of feta cheese (I can't find queso anejo or queso fresco around here), though Rick also suggests serving them on a bed of romaine leaves with sliced radishes and thinned sour cream.
Note also that the chicken filling can be made a day in advance and stored in an airtight container in the refrigerator.
Finally, Rick fries his assembled chicken tacos, but I choose to bake them. They get just as crispy and are a little less greasy.
1 ripe, large tomato4 boneless, skinless chicken breasts
1 t. kosher salt, divided
1/2 t. freshly-cracked black pepper
2 T. + 1 T. + 1/4 c. vegetable oil, divided
1/2 a medium red onion, coarsely chopped
1 clove garlic, roughly chopped
12 corn tortillas
About 1 1/2 c. guacamole
1/4 c. crumbled feta cheese (or queso anejo or queso fresco, if you can find it)
1/2 c. sour cream thinned with 2 T. milk (optional)
Preheat the oven to 325 degrees Fahrenheit.
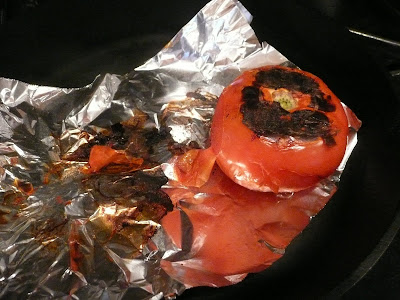
Place a piece of aluminum foil in a cast-iron skillet (or other large skillet). Over medium heat, place the whole tomato on the foil and roast it, turning often, until the skin is blackened. Remove the tomato from the foil and place on a plate to cool enough to handle it. Peel the tomato, then core and roughly chop it. Set aside.
Season the chicken breasts on both sides with 1/2 t. of the kosher salt and the black pepper. Heat the same cast-iron skillet (or other large skillet) over medium-high heat. Place 2 T. of the vegetable oil into the skillet and then add the chicken breasts. Cook about 6 minutes per side, until the chicken breasts register 161 degrees Fahrenheit on a probe thermometer. Remove the chicken to a plate and allow it to cool enough to handle it. Shred the chicken into bite-sized pieces.
Place the chopped roasted tomato, red onion and garlic in the bowl of a food processor. Process until the mixture is completely smooth. Heat 1 T. of the vegetable oil in the same cast-iron skillet (or other large skillet) that you used to roast the tomato and cook the chicken. Add the tomato puree to the pan and stir constantly until it is thick and reduced, about 4 minutes.

Stir the shredded chicken into the thickened tomato mixture. Remove from heat and season with the remaining 1/2 t. kosher salt.

Heat the remaining 1/4 c. of the vegetable oil in a small skillet over medium heat. When hot, quick-fry the tortillas one at a time to soften them, 2-3 seconds per side. Drain well on paper towels.

Immediately assemble the tacos by placing about 2 T. of the chicken mixture across each tortilla. Roll up the tortillas and place on a baking sheet, seam side down. Bake the tacos for about 10 minutes, or until crispy.

Serve with guacamole, crumbled feta and thinned sour cream (if desired). I also suggest serving with Luta's margaritas.
Makes 12 tacos.
++++++
Previously, on A Stove With A House Around It:
One year ago: granola
Two years ago: chocolate crinkles
"Hello Mother."
"Hello. How are you today? What do you need?"
[To be fair, I don't always necessarily need something from Mom when I call her. But mostly I do.]
"I need to know what you put into your avocado."
"What I put in my avocado? What the hell does that mean?"

"Sorry. I'm at work and distracted. I meant to ask, what do you put in your guacamole?"
[To be fair, her guacamole is awesome.]

"Oh, OK. Avocado, Lawry's seasoned salt, garlic, red onion, tomato, lime juice."
"Amounts?"
"I have no idea. Just make it. Why are you making guacamole, anyway?"
"For dinner."
"You're having guacamole for dinner?"
"Well, no. We're having tacos, with guacamole on the side."

"OK then. Don't forget the Lawry's seasoned salt. It is the secret."
A few hours later I realized that Mom's "recipe" -- otherwise known as "list of ingredients" -- did not include anything spicy. So I called her again.
"Do you put in a jalapeno?"
"Do I put a jalapeno in what?"
"Oh shut up, you know I'm talking about your guacamole."
"No. Just some hot sauce."
Husband had scrawled "one lonesome jalapeno" on the grocery list. I crossed it off the page.
I have often mentioned Mom's well-known disdain for ingredient measurements. Hence, she wanted me to publish her guacamole recipe as follows:
avocado
Lawry's
garlic
onion -- red
tomato
lime juice
hot sauce
Make guacamole.
However, even given Mom's charming disgust for method, I like to keep this space a full-service blog. So when I got home tonight I started measuring.
Just in time for Cinco de Mayo!

++++++
GUACAMOLE
This recipe is easily halved. In fact, if you're only looking for a little snacking guacamole, or perhaps some to use as a condiment for tacos, I would suggest halving it.
5 avocados, cut into pieces
2 t. Lawry's seasoned salt
2 cloves garlic, minced
1/2 c. red onion, finely chopped
1 medium tomato, diced
1/4 c. freshly-squeezed lime juice
Hot sauce (I like Tabasco), to taste
Place the avocados in a large bowl. Using a potato masher or a fork, mash the avocados until they're relatively smooth (leave a little chunkiness; it adds to the pleasing texture). Add the rest of the ingredients and mix well.
Start eating.
Makes about 3 cups of guacamole. If you're going to store leftover guacamole, do so in an airtight container, with a piece of plastic wrap pushed down on the surface of the guac. Also throw in one of the avocado pits; Mom swears this helps keep the leftover guacamole from turning brown.
++++++
Previously, on A Stove With A House Around It:
One year ago: honey biscuits
Two years ago: mole poblano
The last time I baked from The Bread Baker's Apprentice, Conan O'Brien was still on NBC. They were lighting the Christmas tree at Rockefeller Center. Winter was on its way, and I was, how do you say, with child even though I didn't know it yet. For someone who claimed that she was going to make all her own bread from now on, it has been a long, lonely hiatus indeed.

But I always knew I'd return. I'd watch the blogs of my fellow Bread Baker's Apprentice challengers as they baked loaf after loaf, speeding through the book with yeasty abandon while I was stuck in the never-never land between kaiser rolls and lavash crackers. I wondered if I'd been left behind, lapped many times over by more enterprising bakers who were already deep into the Ps. But I took solace in the fact that we were all permitted to go our own pace (even our dear leader was slowing up a tad). I knew it wasn't a race. I knew someday soon the bread-baking urge would strike again.

Part of my lag had to do with the fact that I was stuck on lavash crackers -- a recipe I had attempted before, for the Daring Bakers back in September 2008. I liked the crackers when I made them back then, but I wasn't totally enthusiastic to make them again. So I kept putting it off. And putting it off some more. Until one day a few weeks ago when -- staring at the lavash cracker recipe, willing my hands to begin working with flour -- I noticed a note in the margin. It said that the lavash cracker dough can also be used to make pita bread.

And thus was revealed the answer for which I had been waiting all these months: I could make the lavash crackers without really making the lavash crackers, while at the same time attempting homemade pita -- something I'd been hankering to do for a long, long time. I was a baker with a plan, a woman on a mission. No longer stalled on lavash, I was ready to take up the glorious mantle of the Bread Baker's Apprentice once again. I hoped my fellow bakers hadn't given up on me.

I made the pitas this past weekend and they were so amazing (and easy) that I had to make another batch, right away. I had forgotten how simple it is to make one's own bread, and how truly delicious the result. These pitas are especially easy: one quick 90-minute rise, a flattening trip under the rolling pin and just a few minutes on a 500-degree baking stone and -- hey! -- just like that, homemade pita. People will marvel at you when you present a big tray of hummus, veggies and pita and then explain that you made the bread yourself. Then they will marvel some more when they actually taste the soft pita, which is so much tastier than the store-bought stuff. (It is up to you whether you wish to divulge how easy it is to make your own.)
So here I go again. Just yesterday I vowed that I will always make my own pita from scratch, never again to reach for the grocery variety. I am again full of vigor and enthusiasm for bread baking. It's nice to be back.

++++++
The Bread Baker's Apprentice challenge asks that we do not share Reinhart's recipes. That said, if you are the least bit enterprising, you can find the lavash cracker recipe elsewhere on this blog (and linked to from elsewhere in this post). Even so, I know you all have the book anyway, so turn to page 178 and begin making pita, or crackers, or both.
The pita instructions can be found in the margins of page 178. A few pita-notes: First, the lavash cracker recipe as written makes only four 3-oz. pitas (or two larger 6-oz. pitas). That is woefully inadequate. I choose to double the lavash cracker dough and make eight 3-oz. pitas, which are a good size for sandwiches and for cutting into hummus-dipping wedges. Second, the process: preheat the oven to 500 degrees Fahrenheit, with a stone inside if you have one. Take the finished lavash cracker dough (after it's risen for 90 minutes and doubled in bulk) and then divide it into 8 equal portions. Roll out each portion until it's a circle a little less than a quarter-inch thick. Bake the rounds directly on the 500-degree stone. Third, I had great success baking the pitas on a stone, though the recipe states they can be baked on a parchment-lined baking sheet. Finally, the pitas only need a few minutes in the oven to begin to puff. Take them out right when they puff, and before they begin to take on color. If you let them brown in the oven, they will be much too crispy and crackery for traditional pita purposes (but the dog and probably your husband will still like them).
PS. I'm submitting these pitas to Yeastspotting because I am thrilled by them and choose to act like I am the first person in the world who has ever baked pitas at home.
And for one last piece o' business, check out these other Bread Baker's apprentices and their lavash successes:
++++++
Previously, on A Stove With A House Around It:
One year ago: Tim Tam cheesecake
Two years ago: truck-stop cinnamon rolls
I really haven't been feeling very human of late. I'm usually a pretty energetic person, and even though I do enjoy more than a few time-sucking television programs, I like to think that I am industrious. That I get stuff done. That, like the lady in the Cake song with the short skirt and the long jacket, I am touring the facility and picking up slack. House stuff. Cooking and baking stuff. Gardening stuff. I used to sit down only rarely on the weekends, instead moving from task to task, edging flower beds and baking bread and transplanting tomato seedlings, making my little corner of the world a little bit nicer for myself, Husband and pup Jet.

But these days I languish. I can rarely stay awake through an entire episode of CSI: NY, let alone bake a hearth bread. Husband keeps reminding me that although I might not actively realize it, I am doing quite a lot of work -- growing a small human and all. I wasn't prepared for what an exhausting task that truly is. So I try to feel righteous in my sloth, deserving of my time in the reclining chair. But it's not who I am. So I go a little stir crazy. And complain that I'm wasting too much time! There's too much work to be done! Patient Husband, who is so helpful and kind as to nearly achieve martyrdom status, talks me down every time. He is a good man.
Take for example Saturday night. It was about 7:30 p.m. and I was complaining about how I felt I hadn't gotten anything done that day. I should just go to bed, I whined. Husband said, "Why don't you bake something? I'll help you." He was so cute and earnest I couldn't turn him down.
"Would you make toasted coconut and chocolate chip cookies with me?" I replied, sheepishly.
He immediately got to work chopping chocolate.

These cookies are super easy to make, perfect if you're feeling lazy but would still like a home-baked treat to top off a lazy, rainy Saturday. They're chock full of toasty coconut and 70% cacao chocolate (I actually doubled the amount of chocolate from the original recipe, which seemed very very skimpy indeed). And they come from a Cooking Light article about how dark chocolate and coconut can now be considered to contain the "good" version of saturated fat. They are healthy! In moderation! (Whatever.)
So my goodness, people. Bake and eat up.

++++++
TOASTED COCONUT CHOCOLATE CHUNK COOKIES
Adapted from Cooking Light
It makes every bit of sense in the world to me to double this recipe. It only makes about 20 cookies as is, and I see no reason to have 20 cookies when you could easily have 40.
1 c. flaked sweetened coconut
4.5 oz. all-purpose flour (about 1 c.)
1/2 t. baking powder
1/4 t. baking soda
1/8 t. kosher salt
3/4 c. light brown sugar, packed
1/4 c. unsalted butter, at room temperature
1 t. vanilla extract
1 large egg
4 oz. dark chocolate (70% cacao), coarsely chopped
Preheat the oven to 350 degrees Fahrenheit. Spread the coconut on a baking sheet and toast in the oven, stirring every few minutes, for 7-10 minutes, or until the coconut is a toasty shade of light brown. Remove from the oven and set aside to cool. (Leave the oven at 350 degrees.)

In a medium bowl, combine the flour, baking powder, baking soda and salt and stir with a whisk until blended. Place the brown sugar and butter in the bowl of an electric mixer and beat with the paddle attachment at medium speed until well-combined. Beat in the vanilla and egg. Add the flour mixture and beat at low speed until combined. Using a spatula or wooden spoon, stir in the toasted coconut and chopped chocolate.

Using a spring-loaded ice cream scoop (or rounded tablespoons), drop the batter onto a Silpat- or parchment-lined baking sheet. Make sure the cookies are 2 inches apart. Bake at 350 degrees for 10 minutes, rotating the sheet halfway through the baking. Let the cookies sit on the baking sheet for about 2 minutes before moving them to a wire rack to cool.
Makes about 20 cookies.
++++++
Previously, on A Stove With A House Around It:
One year ago: potato-leek soup
Two years ago: lemony lima bean, chickpea and zucchini salad
Though I am not Jewish, I must admit that Passover, to a certain extent, is the bread of my affliction as well.

Husband keeps kosher for Passover, an act which I greatly admire. But the stark reality is: this carb-loving shiksa finds it challenging to make it through eight nights without being able to eat pasta with her husband. Take this afternoon for example. I was craving pizza like nobody's business. I was all excited that Husband was to be finished with work at 6:00 p.m. It's a beautiful warm spring night and I relished the drive to the best pizza place in Akron. And then I realized it's Passover. Husband can't have pizza. My dreams were dashed. Curses.
What I have found over the years, however, is that quinoa is kosher for Passover. And quinoa is satisfyingly grain-y and filling, so much so that one almost forgets that one is supposed to be eating only matzoh. Several years ago I found a Grant Achatz recipe for quinoa with caramelized onions -- which is so simple that I keep wondering how it is that the recipe is Grant Achatz's, he of the ethereal molecular gastronomic paradise that is Alinea (BUBBLE GUM long pepper hibiscus creme fraiche anyone?) -- and I knew it would become a Passover staple in our house. Because if there's anything that Husband loves, it's being a Jew. A Jew who would eat caramelized onions by the bowlful, with a spoon.

And so! If it is Passover, there is quinoa with caramelized onions. For the second-night Seder this year I paired it with chicken tikka masala -- non-traditional to be sure but delicious and kosher nonetheless.


Everything went perfectly with the Hillel sandwich, and even my nephew got in on the act, reading the four questions and searching for the afikoman for the old-school reward of just $1. Though Husband was the only Jew at the table, all were sated and happy and, well, reclining.

++++++
QUINOA WITH CARAMELIZED ONIONS
Adapted from Grant Achatz's recipe, from an old issue of Food & Wine
I used a mixture of "regular" and red quinoa for this dish, because it was what I had in the pantry. Feel free to use whatever quinoa you have and enjoy.
3 T. extra-virgin olive oil
1 1/2 pounds white or yellow onions, thinly sliced
Kosher salt and freshly-cracked black pepper
1 1/2 c. quinoa, rinsed and drained
2 1/2 c. water

Heat 2 T. of the olive oil in a large skillet. Add the onions and cook over low heat, stirring often, until meltingly soft and deep golden, about 30 minutes. As the onions begin to look dry and stick to the bottom of the pan, stir through a little bit of water. You might need to do this a few times. When the onions are deep brown, season with salt and pepper to taste and set aside (leaving them in the skillet, off the heat).

Heat the remaining 1 T. of olive oil in a large saucepan. Add the quinoa and cook over medium-high heat, stirring, until light golden and fragrant, about 3-4 minutes. Add the water and 3/4 t. of kosher salt and bring to a boil. Cover and reduce the heat to low and cook until all of the water has been absorbed and the quinoa is tender, about 12-15 minutes.
Fluff the quinoa with a fork and add it to the skillet with the caramelized onions, stirring to combine. Season with salt and pepper to taste and serve immediately.
Serves 8.
++++++
Previously, on A Stove With A House Around It:
One year ago: King Boo and Hot Wheels
Two years ago: more Nephew birthday cakes
I do not wish to be one of those pregnant ladies who can only talk about how pregnant she is. I do not wish for a screen capture of this site to end up posted to STFU, Parents -- no matter how much I love that blog (oh, and I do). And though pregnancy is exhausting and just a slight bit all-consuming, I wish also to focus on other elements of my life.
As such, today I will not be telling you about how I have been wickedly craving chicken souvlaki since mid-December. I shall not blame it on this tiny person I'm carrying around. Instead, I will tell you all about chicken souvlakis I have loved and -- for various reasons -- cannot get any longer. I shall explain why, after many nights pining away at my souvalki-lessness, I finally broke down and (gasp!) made my own. And it was good. Damn good. So damn good we've eaten it three of the last four nights (it goes really well with both RuPaul's Drag Race *and* Lost).

But first: chicken souvlakis I have known. For many decades there was a family-owned restaurant in my hometown called Mary & Ted's. It had been there forever, changing its decor every so often but always serving up the same comfort food/Greek diner favorites. I can easily picture the restaurant in at least three different interior design iterations and can especially remember the large U-shaped counter flanked by big square plastic drink dispensers full of blue slushy liquid. When I was in elementary school, sometimes Dad would take me there before school and I'd eat silver-dollar pancakes with childish gusto. You could buy Andes mints at the cash register. The same people always seemed to be there.
Mary & Ted's closed a few years back. And while it's always sad when a local institution goes out of business, my sorrow was reserved mostly for the fact that Mary & Ted's chicken souvlaki would no longer be in my life: juicy grilled chicken, served with tangy tzatziki and crisp lettuce and red onions in a warmed, soft, ever-so-slightly olive oily flatbread. Alongside this messy concoction: a mountain of crisp, salty fries. Perfection. But as with many perfect things, it couldn't last forever.

Then there was Uncle George's, a Greek diner in Astoria, NYC, that was around the corner from Husband's old apartment. Sitting, fat and happy, on a busy Queens street corner, Uncle George's was always stuffed full of people, night or day. Loud people eating a lot of Greek food, drinking cold red wine from jewel-toned aluminum cups. Uncle George's had the most amazing lemony and oregano-y potatoes, cut in large hunks and set alongside whatever it was you happened to be eating. In my case, it was the souvlaki, with its soft bread lapping up the lemon runoff from the nearby potatoes. Husband and I were dating at the time, and a weekend trip to New York for me was never complete without a stop at Uncle George's. Husband still beats a path there whenever he's in town, especially if he's in town for a Mets game.
And thus, having been spoiled by restaurant souvlaki for the better part of the past decade, is it any wonder that it never once occurred to me that I could cook it at home? All this whining about how I can never get souvlaki anymore finally came to a head last week when the light bulb went off over Husband's head. "Do you want me to grill some chicken? We could make our own."
Eureka!

So we made our own, and then we made some more. And then, what the hell, we made some more. The weather's been really nice and the charcoal grill was calling and I bought extra bread at the Middle Eastern grocery and I can eat several cups of homemade tzatziki single-handedly. And you know what? Homemade tastes even better than restaurant-made. Even Mary & Ted's and Uncle George's.

Now excuse me while I make some more.
++++++
CHICKEN SOUVLAKI
For the tzatziki:
1 c. plain Greek yogurt (I especially like Fage 2%)
1/2 c. seeded, peeled and shredded cucumber, squeezed to remove excess moisture
2 T. fresh mint, chopped
1 T. fresh dill, chopped
1 T. olive oil
1 T. freshly-squeezed lemon juice
2 garlic cloves, minced
Pinch sea salt, to taste
For the chicken:
4 boneless, skinless chicken breasts
2 T. olive oil
2 T. dried oregano
3/4 t. kosher salt
1/2 t. freshly-cracked black pepper
To assemble the souvlaki:
4 pieces of soft flatbread (or pita)
2 tomatoes, cut into wedges
1 c. shredded iceberg lettuce
1/2 c. red onion, thinly sliced
Hot sauce, if desired
First, make the tzatziki. In a medium bowl, combine all tzatziki ingredients and stir to combine. Set aside. Prep the tomatoes, lettuce and red onion. Set aside.

To prepare the chicken, place the meat in a medium bowl and drizzle with olive oil. Add the oregano, salt and pepper and stir to coat the chicken breasts. Grill the chicken -- either outdoors on the grill or indoors in the grill pan if the weather is less than cooperative -- until golden brown and delicious and the internal temperature registers at 161 degrees Fahrenheit. Remove from the heat and let the chicken rest a few minutes before slicing into pieces.

Assemble the souvlaki by lightly grilling a piece of flatbread until warmed. Spread with a few tablespoons of the tzatziki then top with chicken, tomato, red onion and lettuce. If you're in the mood for hot sauce, feel free to add a little (Husband likes his this way).
Makes 4 sandwiches, with a little tzatziki left over. Store the tzatziki in an airtight container in the refrigerator for up to 4 days.
++++++
Previously, on A Stove With A House Around It:
One year ago: Mrs. DiLorenzo's manicotti and an alternate take on my roasted tomato marinara
Two years ago: tsoureki